En mode pause d’enregistrement – Panasonic NV-RX1-2-5 User Manual
Page 28
Attention! The text in this document has been recognized automatically. To view the original document, you can use the "Original mode".
ENGLISH
Comment faire des reprises naturelles
entre une nouvelle séquence et la
séquence précédente
(Fonction de recherche caméra)
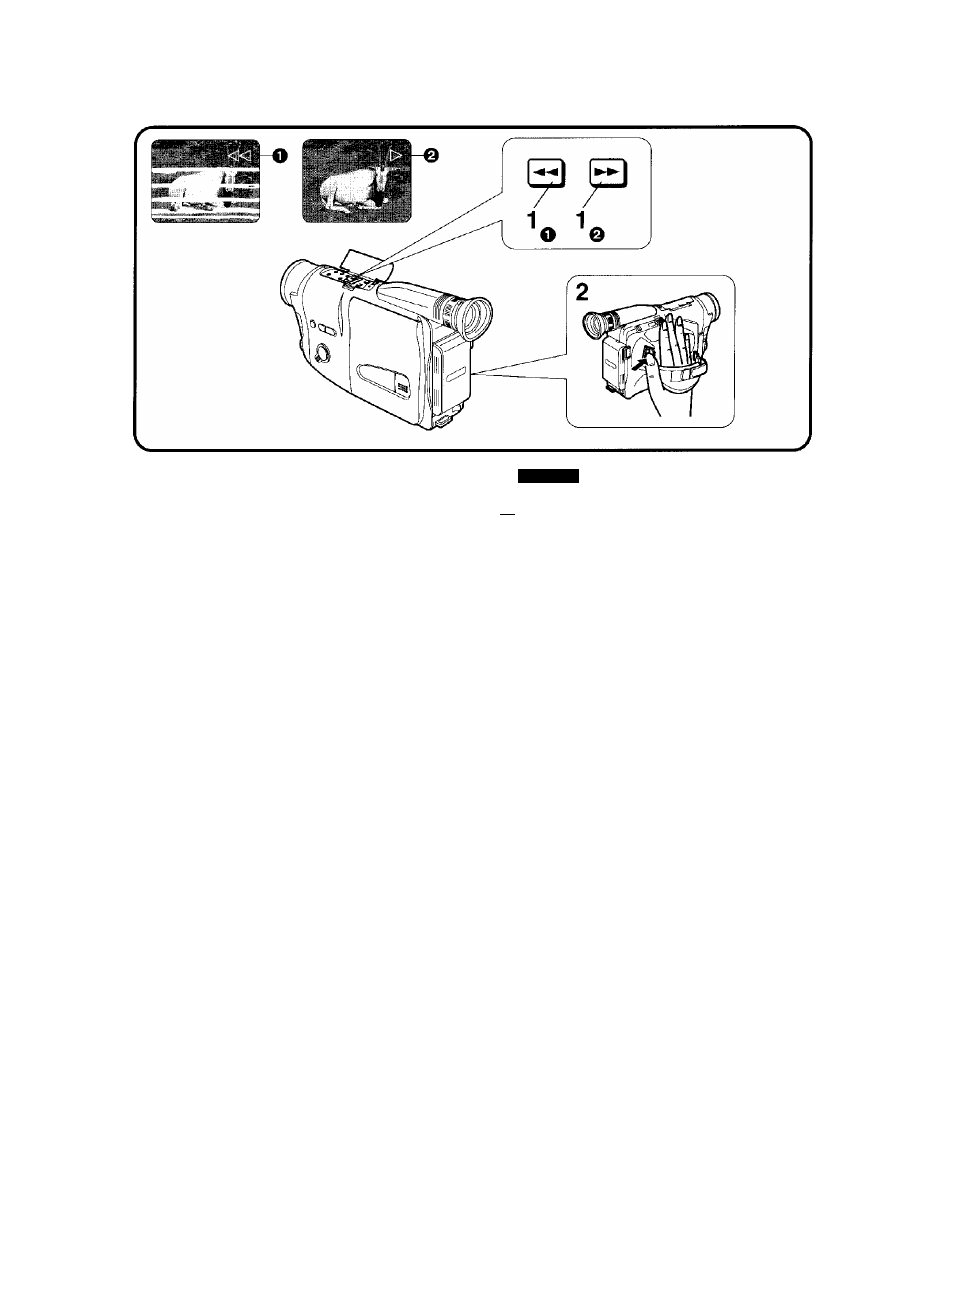
■ Comment ajouter une séquence au bout
d’une autre
La procédure suivante permet de faire des transitions
progressives entre deux séquences.
En mode pause d’enregistrement:
1
Maintenir la touche (ou la touche
[^^]) enfoncée pendant plus de
1 seconde pour rechercher le point à partir
duquel une nouvelle séquence doit être
ajoutée, puis relâcher la touche lorsque ce
point est atteint.
O Eri maintenant enfoncée la touche de
rebobinage [◄◄]:
• L’indication “
vitesse normale.
Q En maintenant enfoncée la touche d’avance
rapide [►►]:
• L’indication •'[>” apparaît dans le viseur.
• La séquence est lue en sens avant à la vitesse
normale.
2
Appuyer sur la touche marche/arrêt.
• L'enregistrement de la nouvelle séquence
s’enclenche alors et la transition progressive avec
la séquence précédente est réalisée.
■ Si vous avez retiré la cassette vidéo après la
prise de vues de la dernière scène:
Réinsérer la cassette vidéo. Appuyer sur la touche
[VCR/CAMERA] pour que le témoin “VCR” s’allume, puis
effectuer l'étape 1 de l'opération décrite ci-dessus. Après
avoir localisé la position de bande à laquelle on veut
joindre le nouvel enregistrement, appuyer sur la touche
[VCR/CAMERA] pour que le témoin "CAMERA” s’allume.
Ensuite, effectuer l'étape 2 de l'opération décrite
ci-dessus pour commencer la prise de vues de la
séquence suivante.
[3| How to Smoothly Join a New Scene to
a Previously Recorded Scene
(Camera Search Function)
■ How to Add a New Scene at the End of a
Previously Shot Scene
The following operation steps assure smooth scene-to-
scene transitions.
In the Shooting Pause Mode:
1
Keep pressing the [-^^] Button (or the
[►►] Button) for more than 1 second to
search for the point where the new
recording is to be joined, and release the
button as soon as this point is found.
O When keeping the Button pressed:
•The Indication “ •The scene is played back in reverse direction at 3 times normal speed. e When keeping the [►►] Button pressed: •The Indication appears in the Viewfinder. •The scene is played back in forward direction at normal speed. 2 Press the Start/Stop Button. •You have started shooting the new scene which is smoothly joined to the previously recorded scene. ■ If You Have Taken out the video cassette After Shooting the Last Scene: Reinsert the video cassette. Press the [VCR/CAMERA] Button so that the "VCR” Indication Lamp lights, and then perform the above operation step 1. After you have located the tape position at which the new recording is to be joined, press the [VCR/CAMERA] Button so that the “CAMERA" Indication Lamp lights. Next, perform the above operation step 2 to start shooting the new scene. 32