Bio-Rad Profinia™ Protein Purification Instrument User Manual
Page 33
26
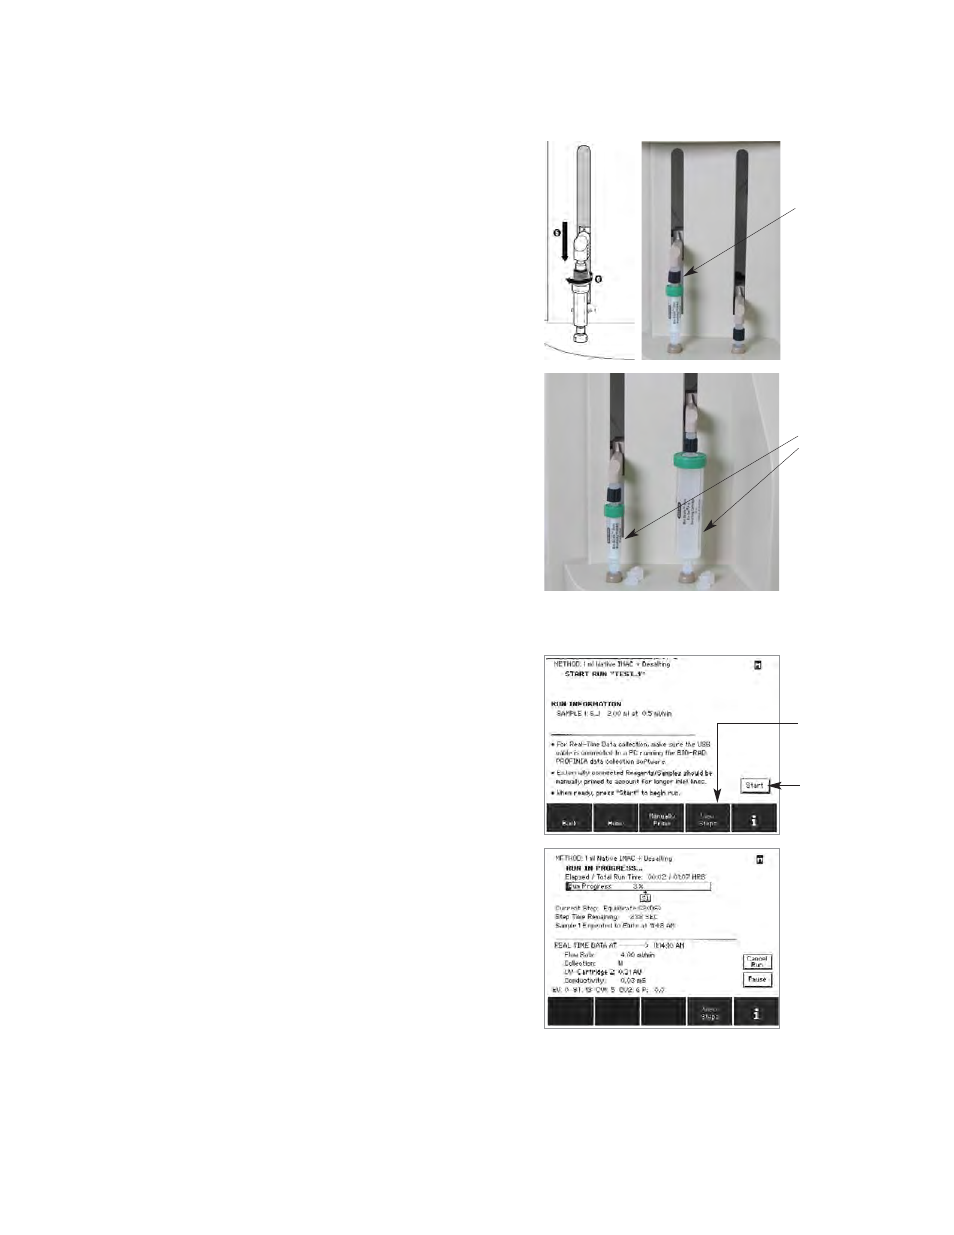
5. Remove the top cap from the cartridge. Move the upper
cartridge holder down to the cartridge.
6. Twist the black collar to tighten the upper fitting onto the
cartridge until snug.
Note:
Do not overtighten fittings. These fittings are designed to seal when turned
until snug. The cartridge flange may be damaged by overtightening and may
then leak. If leaking occurs, replace the cartridge.
7. Repeat this procedure to install a cartridge in the
cartridge 2 position, if required.
8. When cartridge installation is complete, touch the Next
button on the Install Cartridges screen. You will proceed
to the Start Run screen.
Step 4: Start the Run
4A. Start Run Screen
1. To view data in real time on a computer with Profinia
software, connect the instrument to a computer, and
start Profinia software before starting the run.
2. Any externally connected reagents or samples should be
manually primed before starting the run.
3. The View Steps button allows you to view detailed steps
of the method.
4B. Run In Progress Screen
The Run In Progress screen displays progress of the run.
■
S1 and S2 arrow marks indicate the approximate time for
sample elution
■
Expected elution time is displayed; the sample can be
collected at this time
■
The cleaning process is shown in the progress bar as the
time portion after sample elution (S1 and S2)
Cleaning and Run Data
1. When elution is complete, proceed with instrument
cleaning as indicated on the Profinia display.
2. Run data can be downloaded to a USB portable memory
device through the USB port in the front of the instrument
after the cleaning process.
Upper cartridge
holder fitting
tightened onto
cartridge.
Affinity and desalting cartridges installed in
positions 1 and 2, respectively.
View detailed
steps of the
method
Touch the
Start button
to start
the run
1
2