Configure your ultra3000 drive with devicenet – Rockwell Automation 2090 Ultra3000 Servo Drives Integration Manual User Manual
Page 93
Publication 2098-IN005C-EN-P — March 2008
Commissioning Your Ultra3000 Drive
93
Configure Your Ultra3000 Drive with DeviceNet
Follow these steps to configure your Ultra3000-DN drive.
1. Verify that there is no power applied to the drive and that the
DeviceNet cable is connected.
Refer to the figures on pages 89…92 for switch locations.
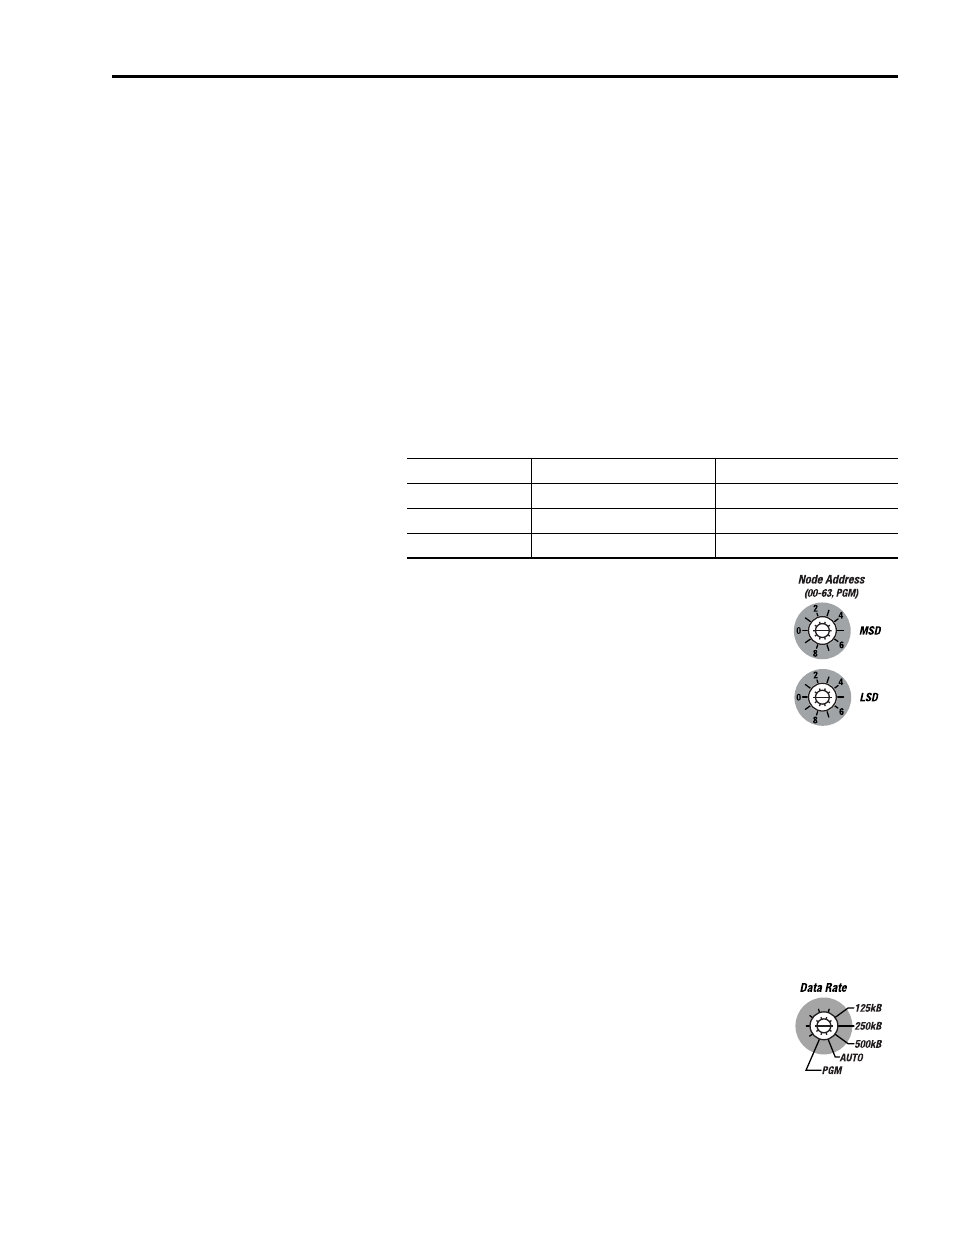
2. Set the node address for each drive in your system.
Valid node addresses are 00…63 and PGM. The MSD rotary switch
sets the most significant digit and the LSD rotary switch sets the
least significant digit.
Refer to the figures on pages 89…92 for the switch locations. Refer
to this table for examples.
Selecting an invalid node address (> 63) sets the node address
according to a non-volatile parameter stored in the drive.
3. Set the data rate.
Valid data rates are 125, 250, and 500 Kbps, AUTO, and PGM.
Refer to the figures on pages 89…92 for the switch location.
Selecting AUTO automatically matches the device data rate to the
rate of the network. Selecting PGM sets the data rate according to
a non-volatile parameter stored in the drive.
Node Address
MSD Switch
LSD Switch
10
1
0
11
1
1
12
1
2
Use the MSD and LSD rotary switches on the
DeviceNet drive panel to set node addresses.
Use the Data Rate rotary switch on the
DeviceNet drive panel to set the data rate.