Compactlogix example, Adding the controller to the i/o configuration – Rockwell Automation 25-COMM-E2P PowerFlex 25-COMM-E2P Dual-Port EtherNet/IP Adapter User Manual
Page 40
40
Rockwell Automation Publication 520COM-UM003A-EN-E - June 2013
Chapter 4
Configuring the I/O
6.
Verify that your computer recognizes the drive. Select Communications >
RSWho
and, in the menu tree, click the “+” symbol next to the Ethernet
driver.
7.
Note that two other RSLinx drivers (Ethernet devices or Remote Devices
through Linx Gateway) may be used. Use one of these drivers if the
“EtherNet/IP Driver” cannot see your drive.
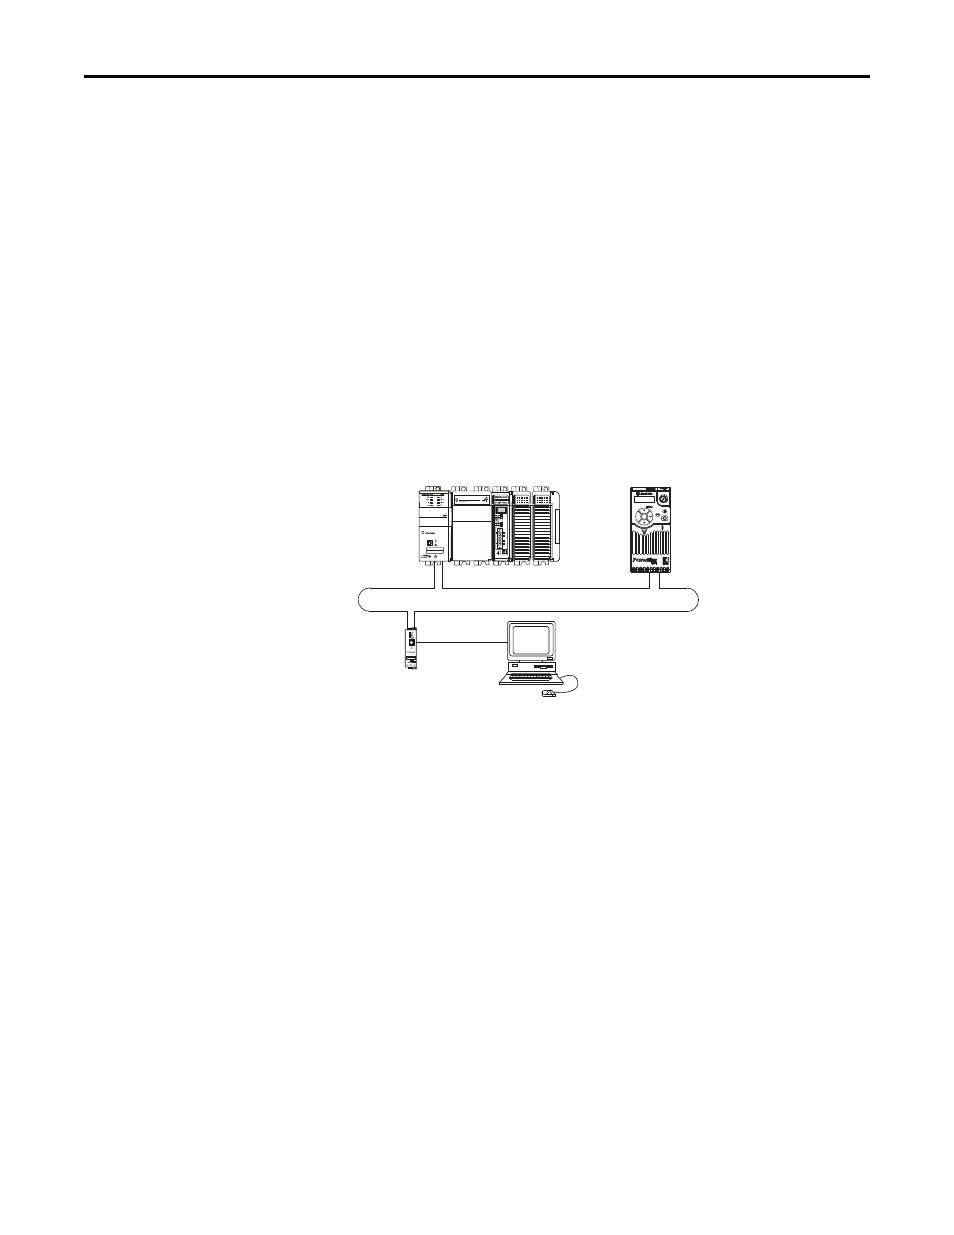
CompactLogix Example
After the adapter is configured, the drive and adapter will be a single node on the
network. This section provides the steps needed to configure a simple EtherNet/
IP network. In our example, we will configure a 1769-L36ERM CompactLogix
controller with embedded EtherNet/IP capability to communicate with a drive
using Logic Command/Status, Reference/Feedback, and eight Datalinks (four to
read and four to write) over the network.
Adding the Controller to the I/O Configuration
To establish communications between the controller and adapter over the
network, you must first add the CompactLogix controller and its embedded
EtherNet/IP bridge to the I/O configuration.
1 (Front)
1 (Front)
1 (Front)
2 (Rear)
00:00:BC:2E:69:F6
Esc
Sel
1783-ETAP
IP Address 192.168.1.3
1769-L36ERM CompactLogix controller
with embedded EtherNet/IP bridge
IP Address 192.168.1.4
PowerFlex 520-series drive with
25-COMM-E2P adapter (Frame A shown)
Computer with
Ethernet connection