Scanning for instruments, Nanodac, 64 6.2 scanning for instruments – Carbolite nanodac User Manual
Page 66
nanodac™
MC27 –EN– 1.04
64
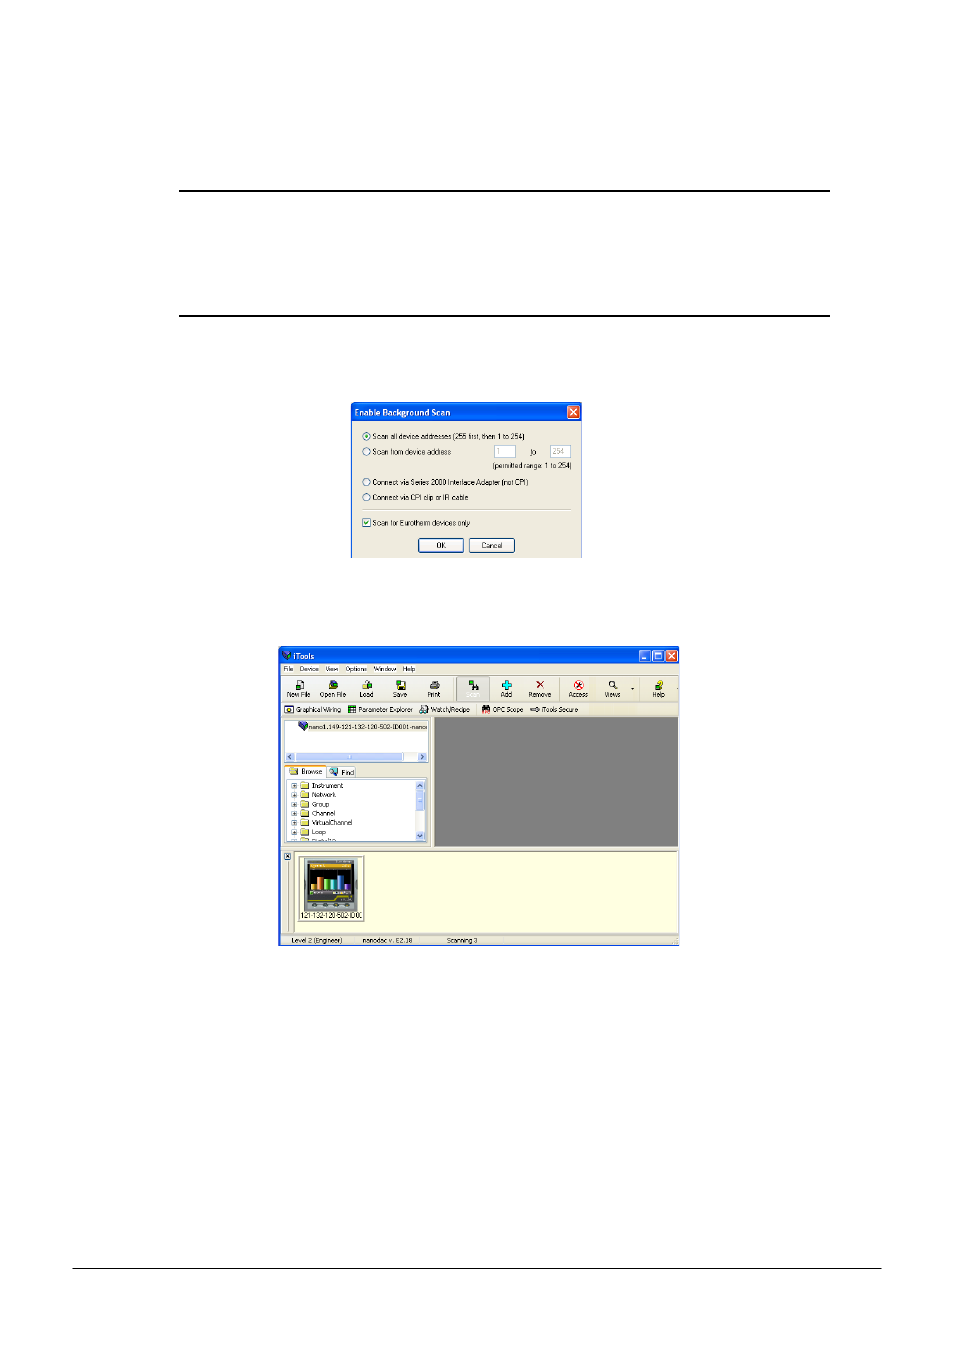
6.2 SCANNING FOR INSTRUMENTS
Clicking on the ‘Scan’ toolbar icon causes a dialogue box (shown below) to appear. This allows the user to
define a search range of addresses.
Notes:
1. The relevant instrument address is that entered in the Network.Modbus configuration item
, and it can take any value between 1 and 254 inclusive, as long as it is unique to
the comms link.
2. The default selection (Scan all device addresses...) will detect any instrument on the serial link,
which has a valid address.
As the search progresses, any instruments detected by the scan appear as thumbnails (faceplates) in the
‘Panel Views’ area, normally located at the bottom of the iTools screen. (options/Panel Views position
allows this area to be moved to the top of the window, or the Close icon can be used to close it. Once
closed it can be re-opened by clicking on ‘Panel Views’ in the ‘View’ menu.)
Figure 3.2a Scan range enable
Figure 3.2b iTools initial window with one instrument detected
Once the instrument has been detected stop the scan. When the instrument has synchronised, click on
the ‘Access’ button to enter configuration mode (a password might be required). Once the editing session
is complete, click on the Access button again to quit configuration mode.