HP Integrity rx4610 Server User Manual
Page 80
Chapter 7
Installing Accessory Boards
72
2. Pull the chassis out of the rack as far as it will go.
3. Loosen the two thumbscrews in the back of the chassis that secure the rear
part of the top cover.
4. Lift the rear cover to expose the hot plug PCI slots.
CAUTION
Do not touch the components or gold edge connectors on the
add-in board as this may damage the connectors causing
erratic performance.
5. Remove the card from its protective wrapper, and place it component-side
up on a nonconductive, antistatic surface.
6. Record in your log the serial number of the board and any jumpers or
switch settings according to the board manufacturer’s instructions. See
Appendix B for the equipment log form.
7. Skip to step 8 if you are installing a board in an empty slot. To replace a
board or install a different board in an occupied slot, after the LED shows
which slot is powered down, press the center of the PHP mechanism to
disengage it from the LED board.
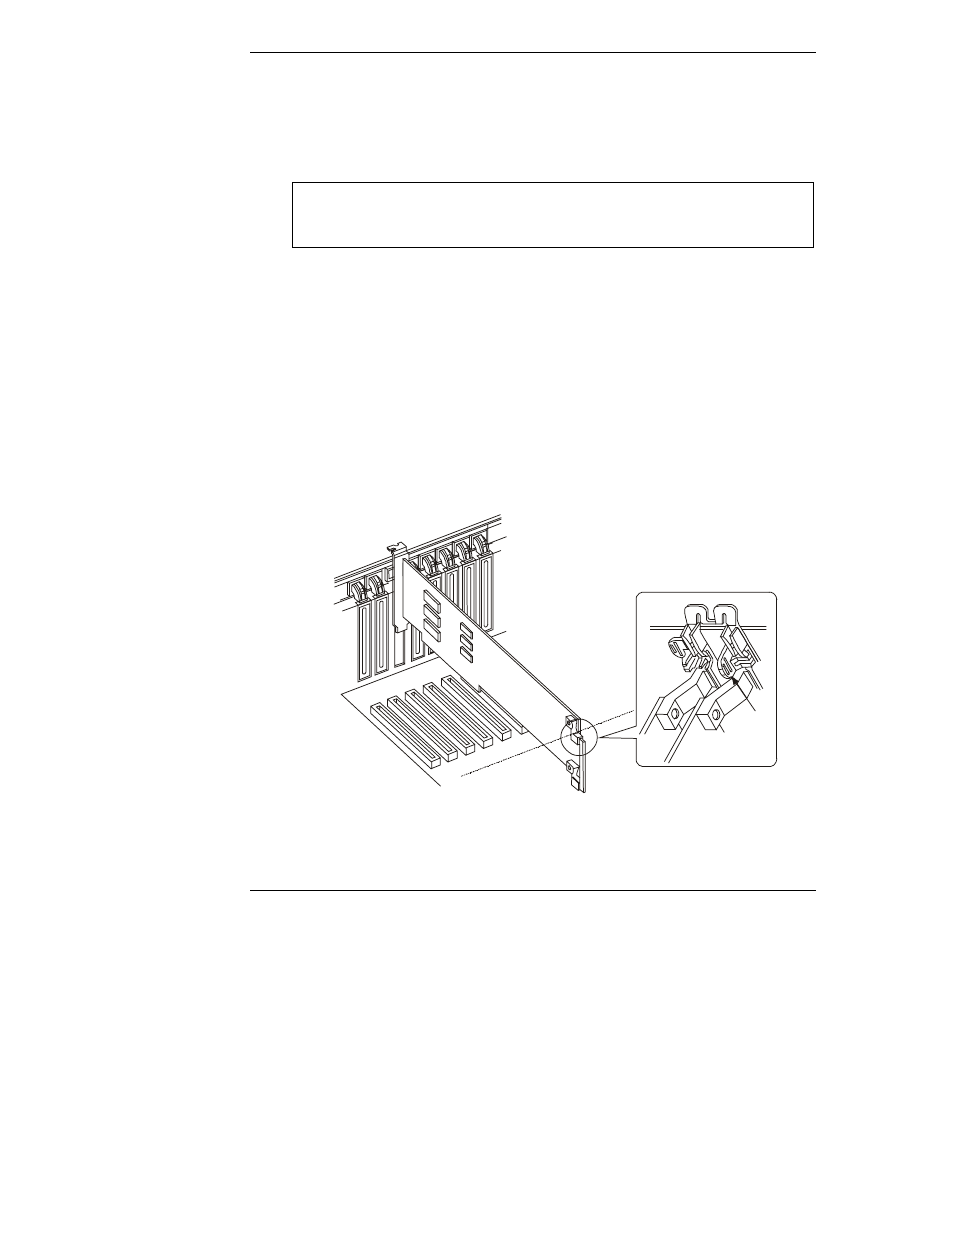
8. Be sure that the plastic retaining mechanism (I/O Card Guide) that secures
the end of the board nearest the front of the chassis is open so that it will
allow a board to be removed/inserted.
Figure 7-1. Open the Plastic Retaining Mechanism Towards the Front of the
Server