How to mark a field boundary – Seed Hawk Raven 2010 User Manual
Page 92
Chapter 4
82
Seed Hawk™ Viper Pro™ Installation & Operation Manual
How to Mark a Field Boundary
With an active job on-screen:
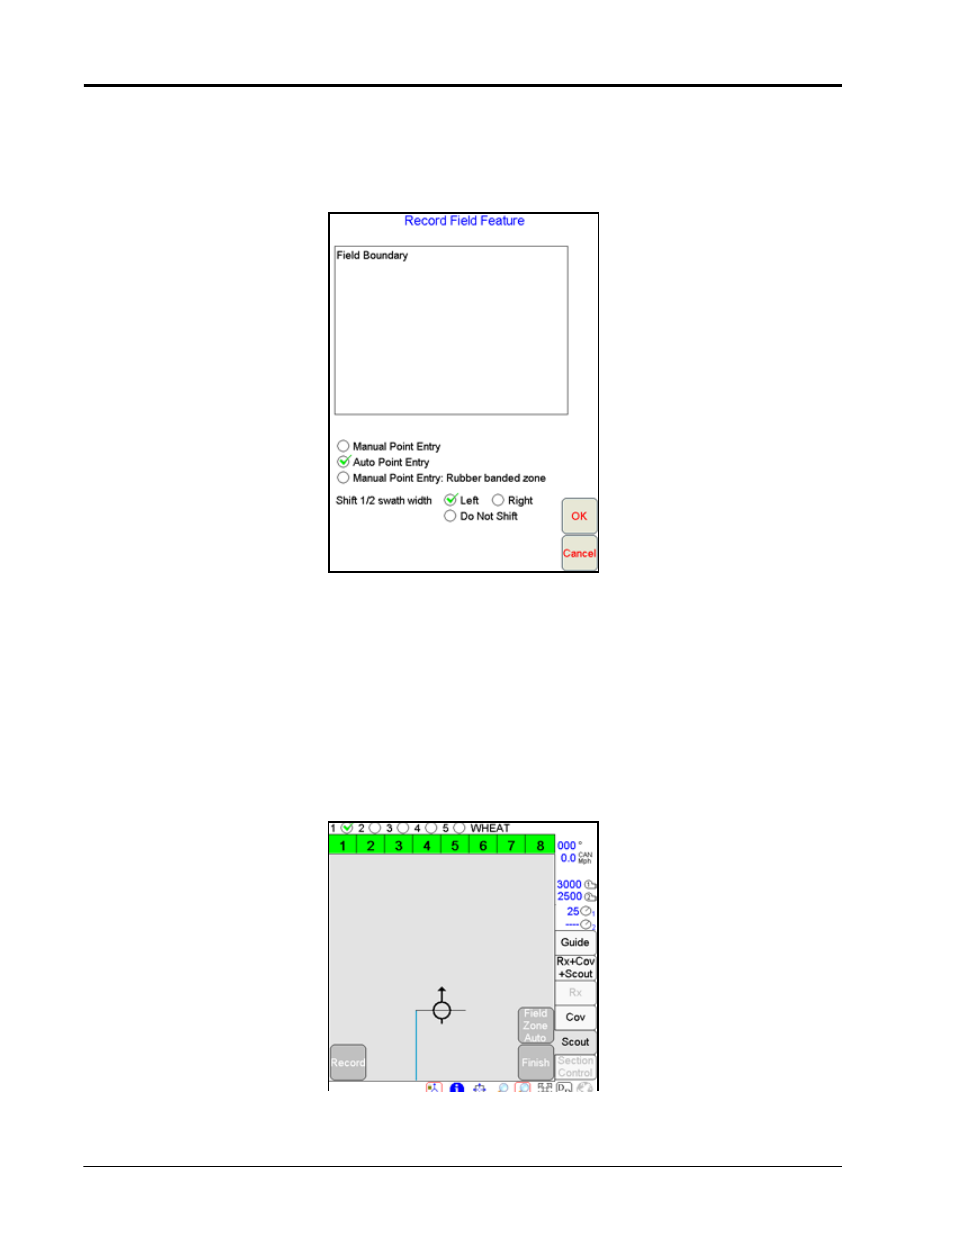
1.
Press the Scout tab.
2.
Select Record, then Zone. The Record Field Feature screen displays.
3.
Select Field Boundary.
4.
Select the method best suited to your application.
5.
Select an offset shift for the boundary.
a.
Selecting the Left offset places the reference point for recording the boundary at the left side of the
implement.
b.
Selecting the Right offset places the reference point at the right of the implement.
c.
Select the Do Not Shift option to record the boundary at the center of the implement.
6.
Press OK. Viper begins recording points based upon the selected Point Entry mode.
Note:
Refer to
Chapter 7, Sectional Control Technology™ (SCT), for detailed setup and operation and
for detailed information on creating apply/no-apply maps.
7.
Drive the perimeter of the field while keeping the selected reference point along the path of the field
boundary.