Analyzer maintenance – ITC IRMA TruPoint Blood Analysis System User Manual
Page 92
6.4
CONDITIONING THE BATTERY
For optimal battery performance, perform a conditioning charge:
• Prior to initial use;
• Monthly, or more frequently as the schedule allows;
• If the battery icon fails to display in the upper right corner of the
touchscreen, or if a fully charged battery yields fewer than the expected
number of tests. Condition batteries as follows:
1. Insert a battery into the battery charger. The battery should ‘click’ into
the charger when properly inserted. The yellow light indicates that the
battery is charging. Charge the battery for 24 hours.
2. After 24 hours, remove the battery from the charger, then reinsert the
battery into the charger. Leave the battery in the charger until the green
light flashes continuously, indicating that the battery is fully charged. The
battery should remain in the charger until it is needed for use in the
analyzer.
ANALYZER MAINTENANCE
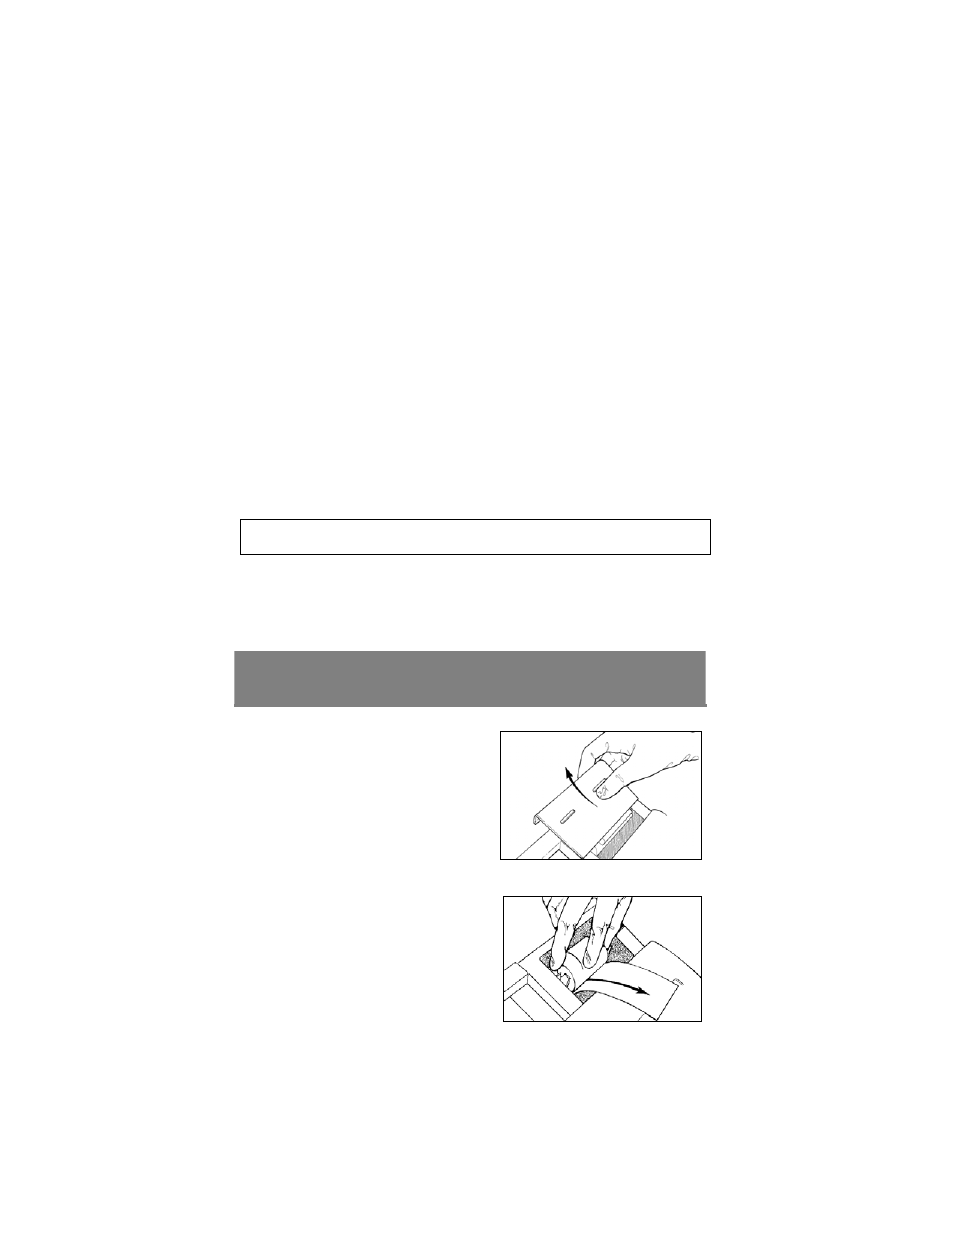
CHANGING THE PRINTER PAPER
The printer paper should be replaced when a red stripe displays on the side of
the roll. Instructions automatically appear on the screen when the printer door
is removed. Press
next
from the first screen to see additional instructions.
Note:
• Do not remove the printer door while a test is in progress.
Change the printer paper as follows:
1. Remove the printer door. With the
analyzer “on”, push down on the
printer door and slide the door away
from the analyzer. (Figure 6-2)
2. Remove old paper roll and spindle.
Save the spindle.
Figure 6-2
3. Insert new paper roll. Insert the
plastic spindle through the center of
the new paper roll. (Figure 6-3)
Figure 6-3