Generating bar code labels for checked-in item ids – IntelliTrack Check In/Out User Manual
Page 226
I
NTELLI
T
RACK
C
HECK
I
N
-O
UT
V
8.1
User Manual
196
3.
A dialog box appears asking if you want to retire this item. Select Yes
to close the dialog box and retire the selected item. If you do not want
to retire this item, select No to close the dialog box and return to the
Check In form.
Generating
Bar Code
Labels for
Checked-In
Item IDs
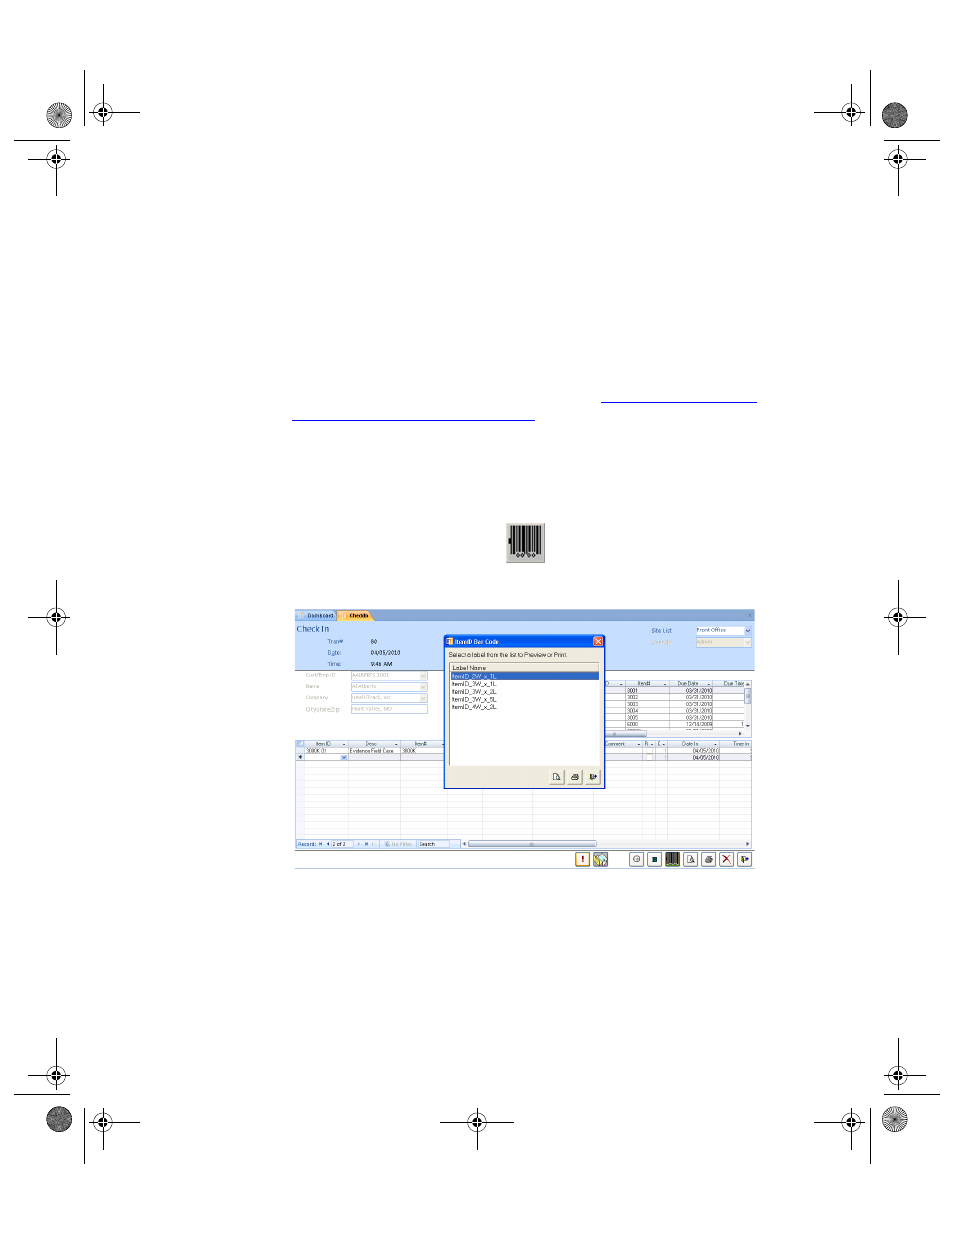
After selecting items for check in, you can generate bar codes based on the
selected check in item IDs. For example, generate bar code labels for all
new items received (to be placed on each check out item).
These instructions are the same as those found in
Location and Item Labels” on page 263
except that not all choices are
available. Check In-Out automatically selects the ItemIDs to print labels
directly from the Check In form.
1.
After you select the items for check in, select the Bar Code button
found along the bottom of the form.
2.
The ItemID Barcode form appears.
3.
At the Item ID Bar Code form, select the label format and click the
Preview button to preview the leading item bar code. To print item bar
codes for the Check In transaction, click the Print button; the bar codes
are sent to your default printer and printed there.
4.
When you are finished at the Item ID Bar Code form, click the Close
button to close this form and return to the Check In form.
5.
When you are finished at the Check In form, click the Close button to
close the form and process the Check In transaction.
2283.book Page 196 Thursday, July 7, 2011 2:29 PM