Configure dhcp option 81 – Epiphan Pearl Mini Live Video Production System with 512GB SSD (NA/JP) User Manual
Page 106
Pearl Mini User Guide
Configure DHCP Option 81
5. After the system has finished rebooting, log back in to the Admin panel as admin and verify that all
changes were applied.
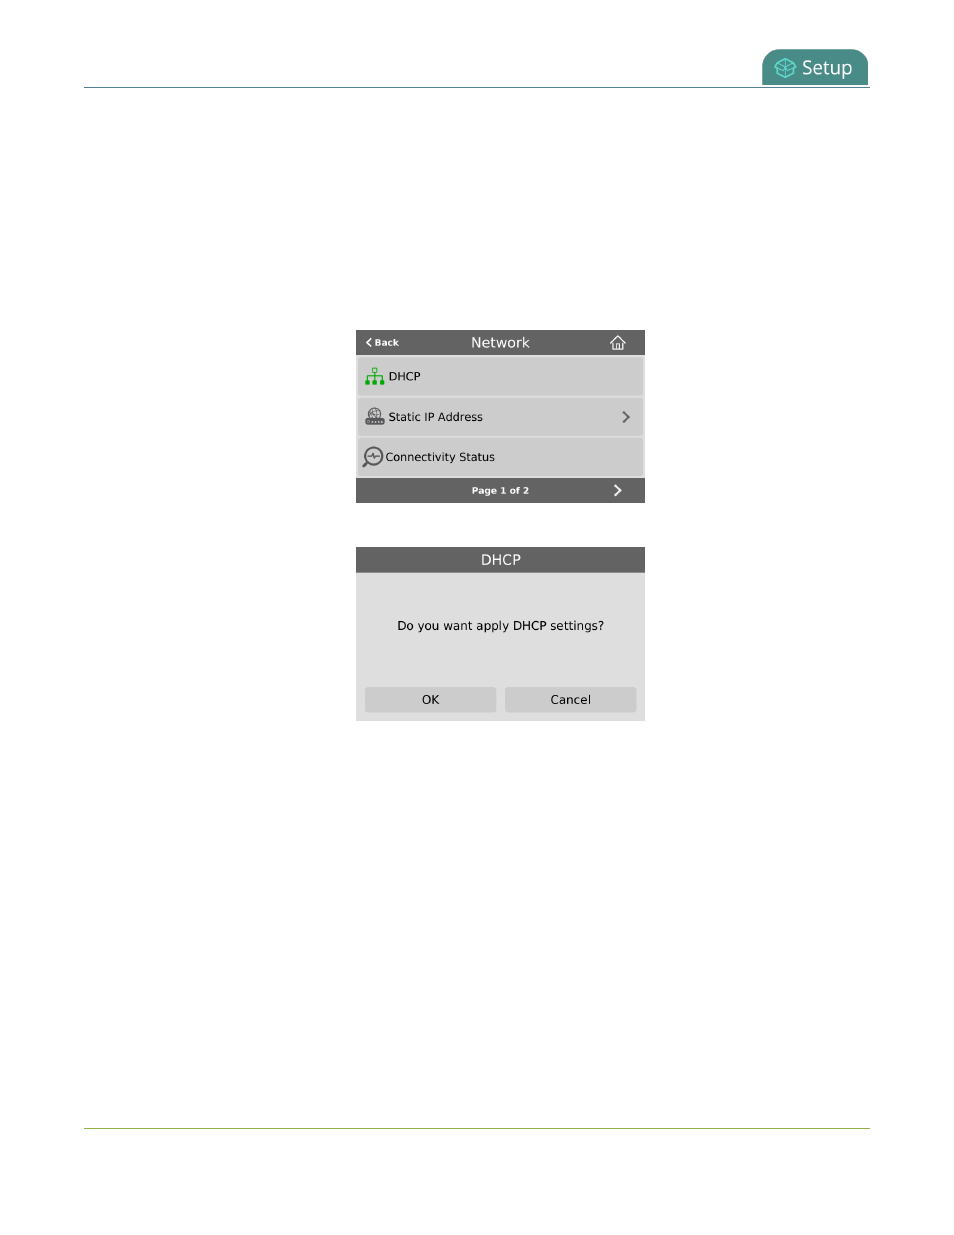
Manually select DHCP as the network type using the touch screen on Pearl Mini and
Pearl-2
1. Tap the gear icon to open the System settings screen. If the control icons aren't showing, tap anywhere on
the touch screen.
2. Tap Network. The Network settings page appears. The currently enabled network type (DHCP or static) is
highlighted green.
3. Tap DHCP, and then tap OK to confirm.
4. Reboot the Pearl device to apply the network changes.
Configure DHCP Option 81
Ensure your Domain Name Server (DNS) always has the Pearl device's most up-to-date IP address mapped to
the Pearl device's Fully Qualified Domain Name (FQDN). Option 81 support means you can keep using Pearl's
FQDN no matter how many times the DHCP server may change Pearl's IP address. The Pearl device
automatically asks the DHCP server to tell the Domain Name Server (DNS) to update the Pearl device's record
with any changes to the Pearl device's IP address or FQDN. DHCP Option 81 is disabled by default.
Important considerations
l
The DHCP server must support Option 81 for this feature to work.
l
DHCP should be enabled and setup before enabling DHCP Option 81, see
Configure DHCP
.
95