Configure dhcp – Epiphan Pearl Mini Live Video Production System with 512GB SSD (NA/JP) User Manual
Page 104
Pearl Mini User Guide
Configure DHCP
4. Reboot the Pearl device when prompted. From the Configuration menu, select Maintenance and click
Reboot Now on the Maintenance page.
5. After the system has finished rebooting, use the new IP address to log back in to the Admin panel as
admin and verify that all changes were applied.
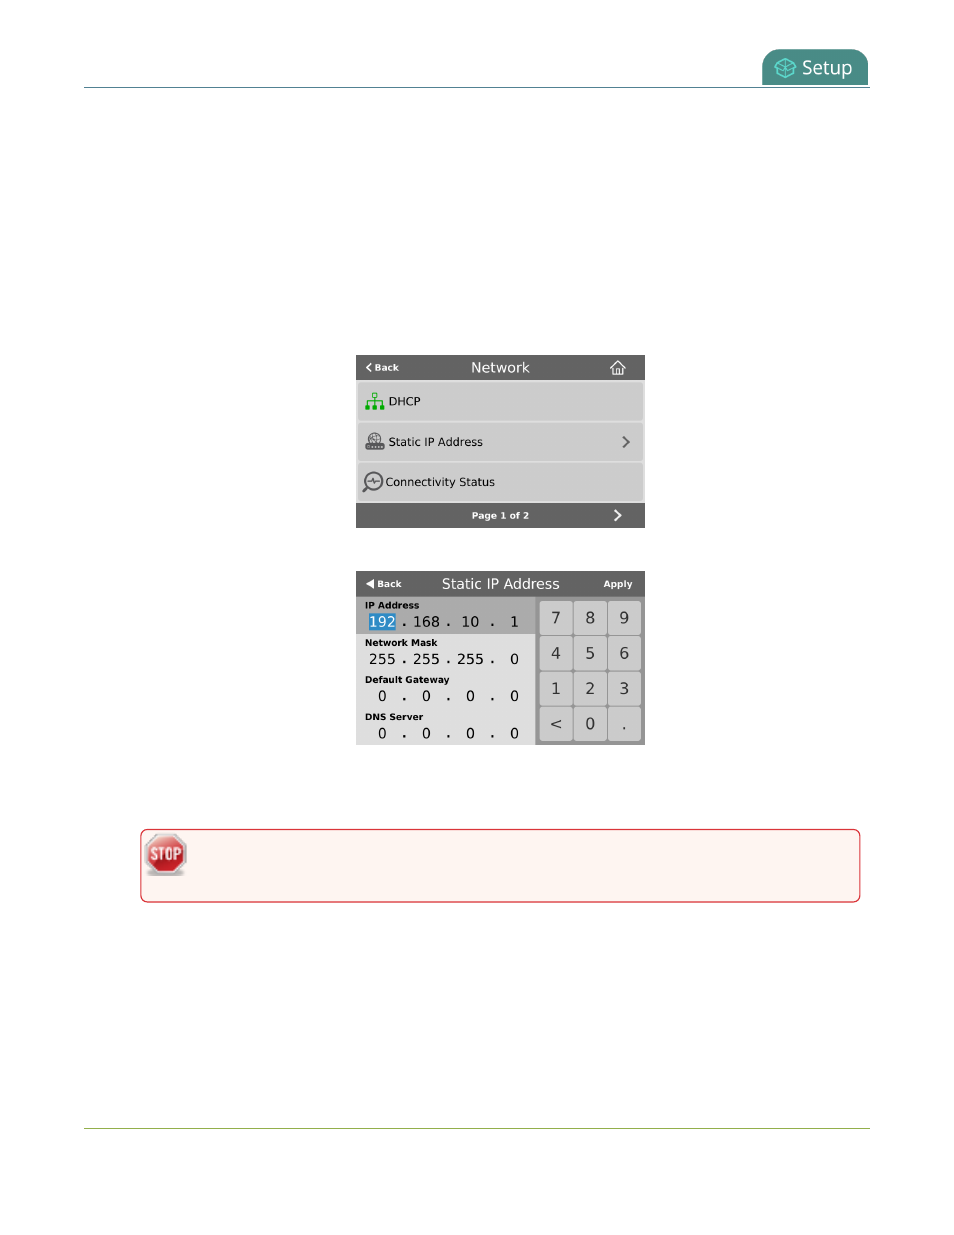
Configure a static IP address using the touch screen on Pearl Mini and Pearl-2
1. Tap the gear icon to open the System settings screen. If the control icons aren't showing, tap anywhere on
the touch screen.
2. Tap Network. The Network settings page opens. The currently enabled network type (DHCP or static) is
highlighted green.
3. Tap Static IP Address. The Static IP Address configuration page opens.
4. Tap a segment of the IP Address (e.g. 192) to select it and use the keypad to enter a new static IP
address. Continue to enter your Network Mask, Default Gateway, and DNS server information. Tap Apply
when you're done.
The default gateway and DNS Server fields cannot be left blank. If you do not have a default
gateway or a DNS server for your network, enter the static IP address in those fields.
5. Reboot the Pearl device to apply the network changes.
Configure DHCP
If you need to switch Pearl Mini from using static IP address allocation to using dynamic allocation with DHCP,
you can do this three different ways:
93