Importing enhanced omf files back into aurora edit – Grass Valley Aurora Edit v.7.0 User Manual
Page 164
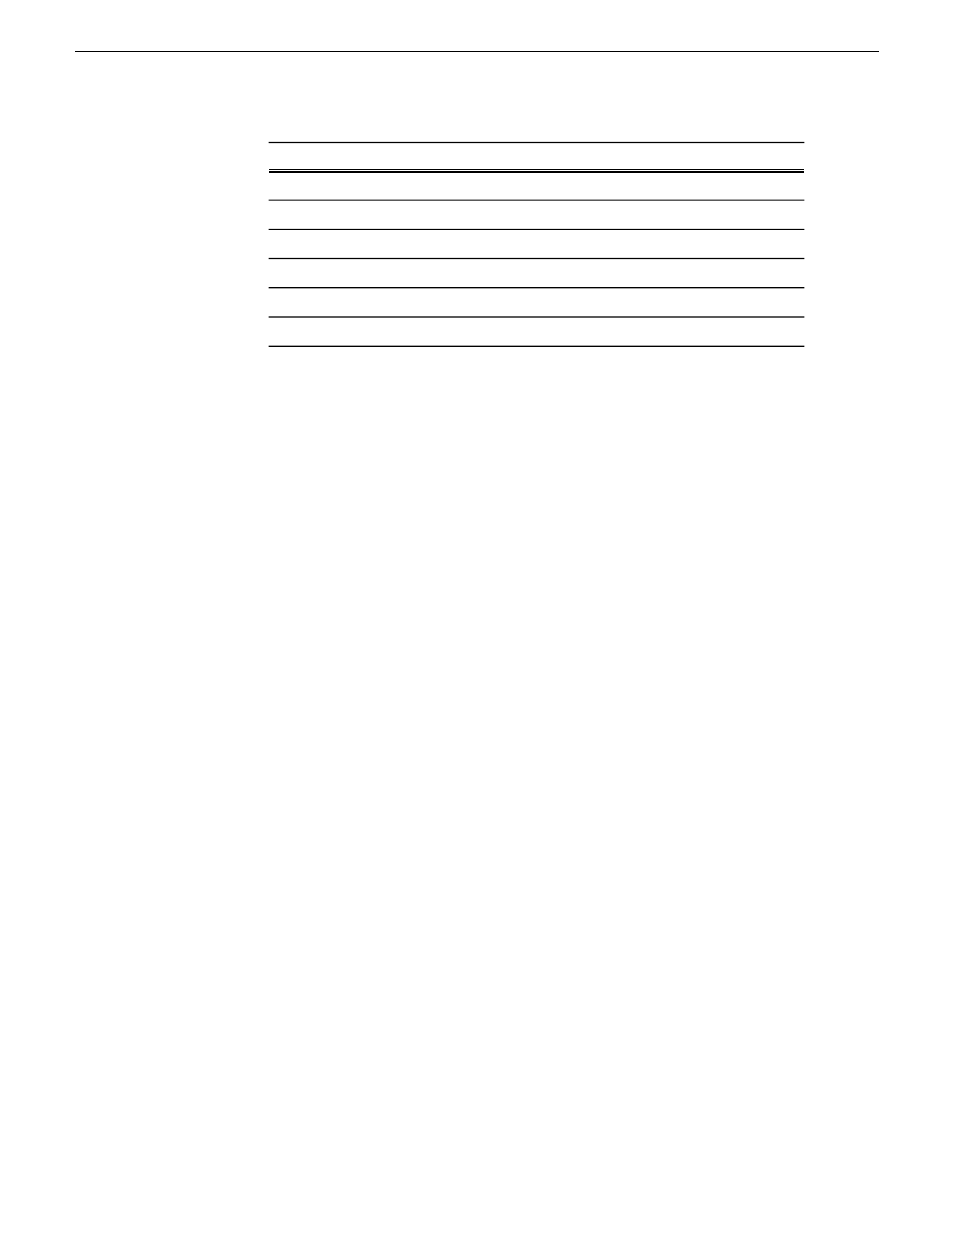
Selection
Option
16 bit
Bit Depth Conversion
Preserve clip gain
Effects
One OMF file (audio embedded)
Export Composition Options
All audio
Export Media Options
Resample @ 48000
Sample Rate Conversion
Other settings based on user preference
NOTE: The following presets are also compatible with Aurora Edit: Avid
MC, Ensoniq Paris, Pro Tools (Digitranslator), Pro Tools (Omftool).
You can now import your enhanced OMF files back into Aurora Edit.
Importing enhanced OMF files back into Aurora Edit
Once you’ve enhanced the audio tracks, you can import them back into the original
Aurora Edit sequence.
1. In Aurora Edit, select
File | Import | EDL
.
2. Select the OMF file that you exported from Pro Tools, Nuendo, or AVTransfer
and click
Open
.
The OMF file imports into the Aurora Edit Bin as a sub-bin with the name of
the Aurora Edit sequence; within that bin are a sequence and its audio files.
3. Open the sequence in the imported Bin folder.
4. Copy the enhanced audio tracks into the original Aurora Edit sequence as follows:
a) Make sure all necessary tracks are active.
b) In the enhanced audio sequence, select all tracks to copy, right-click and select
Copy Selected
.
Press
Shift + S
to select all tracks at once.
c) Open the original Aurora Edit sequence, place the cursor where you want to
audio files to go, right-click and select
Paste
.
You can also drag the enhanced sequence directly from the Bin into the original
Aurora Edit sequence.
The text on the clip names turns blue to indicate that the video and audio tracks
are now unlinked.
5. If you want to re-link clips, select all tracks for each clip then select
Link
from the
right-click menu.
6. Save the file.
164
Aurora Edit User Guide
08 April 2010
Audio