Changing the timeline view manually – Grass Valley Aurora Edit v.7.0 User Manual
Page 117
Changing the Timeline view manually
You can zoom in and out of the Timeline to see a specific area of the Timeline or to
get an overall perspective of your sequence.
Use one of these methods to change the Timeline view:
•
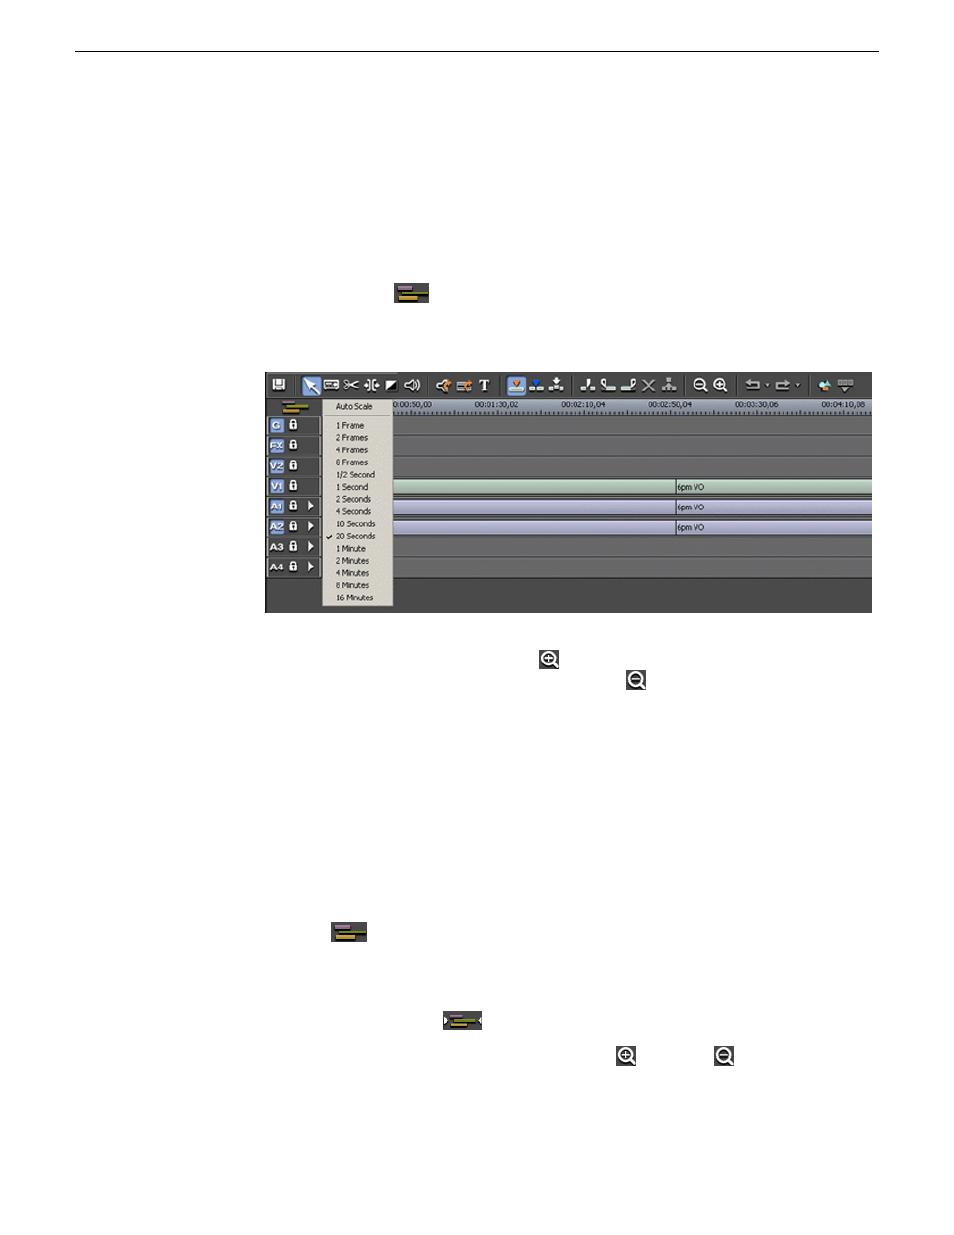
Right-click the
Turn Auto-Scale On/Off
button (shown in Auto-Scale Off
) and select an increment for the Timeline view to display
•
Press
+
on your keyboard or click the
Zoom In
button in the Timeline Toolbar
to zoom in the Timeline view. Press
-
or click the
Zoom Out
to zoom out
the Timeline view.
Related Links
Using Auto-Scale to adjust the Timeline view automatically
on page 117
Using Auto-Scale to adjust the Timeline view automatically
Use Auto Scale to have the Timeline view adjust automatically when your sequence
extends beyond the Timeline view.
•
Click the
Turn Auto-Scale On/Off
button in the Timeline.
The Timeline view compresses and displays the entire sequence in the Timeline each
time the sequence extends beyond the Timeline window.
To turn off Auto-Scale, click
Turn Auto-Scale On/Off
again.
NOTE: Auto-Scale turns off automatically once you click
Zoom In
or
Zoom Out
on
the Timeline toolbar.
Related Links
08 April 2010
Aurora Edit User Guide
117
Working in the Timeline