Audio eq parameters – Grass Valley Aurora Edit v.7.0 User Manual
Page 156
Sequences with 5 or more audio tracks cannot play both playback and live EQ at the
same time. During an edit, any unrendered EQ will not be heard to allow for input
EQ.
1. Press
7
on your keyboard or click the
Audio Effects Tool
button.
2. Select the clip you want to adjust. To select multiple clips, hold down the
Ctrl
key
while clicking on clips.
The EQ turns on automatically and the button turns red.
3. Adjust the High, Mid, and Low frequencies as needed by adjusting the dials.
You can double-click any dial to reset the default value.
4. Play back the clip to hear your changes.
While you are playing a clip, you can toggle the EQ button on and off to compare
the original and adjusted clips.
5. Make further adjustments as necessary.
6. Click
Apply
to apply your changes.
While you can hear the changes when you play back the clip, you need to render the
effect before you can send it to another workstation or editor. If you don’t render the
effect, Aurora Edit automatically renders before sending.
Related Links
Using a previously applied Audio EQ effect
Audio EQ parameters
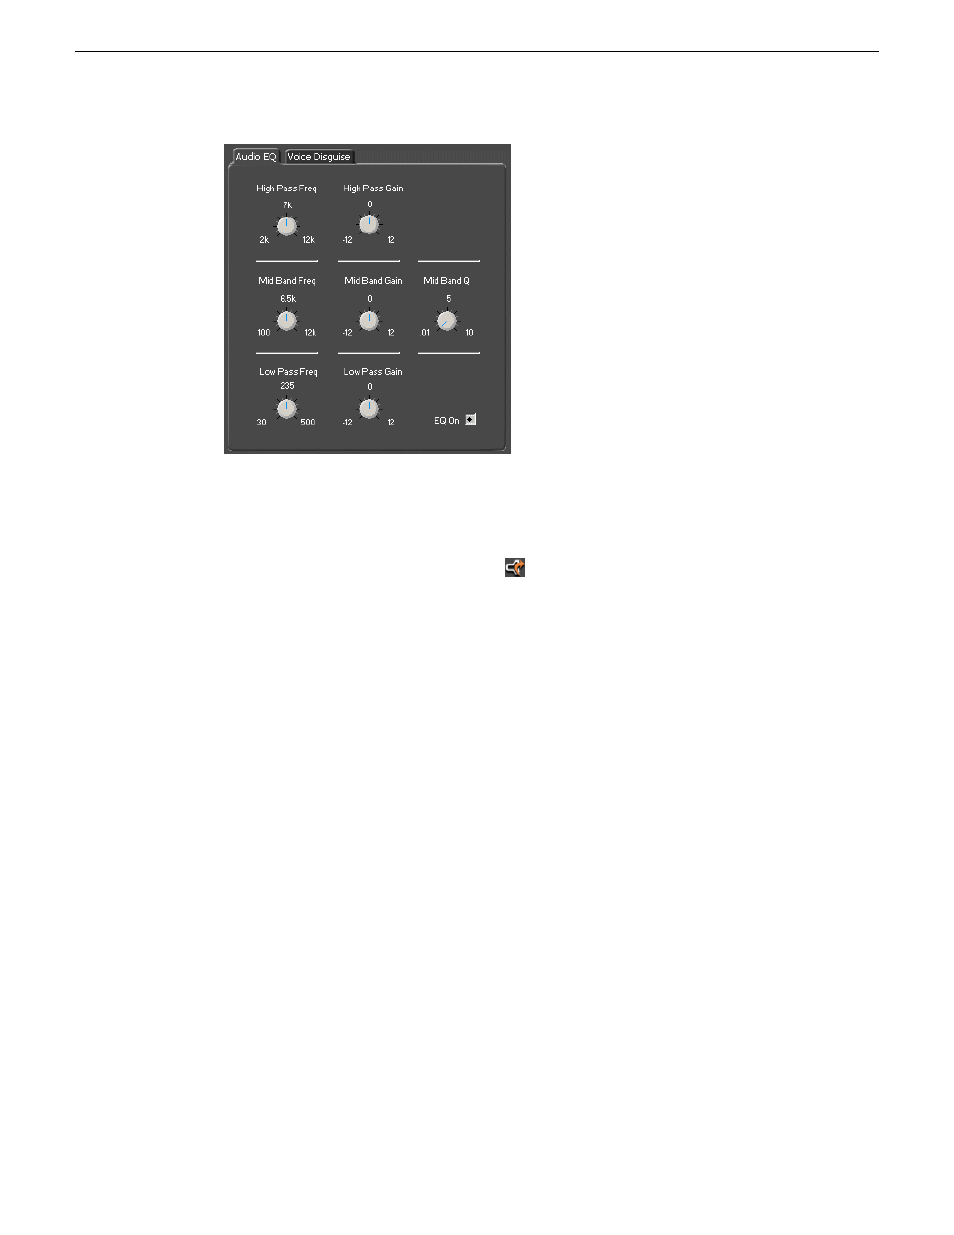
The audio equalizer is a 3-band parametric EQ, consisting of a low-pass filter, a
mid-band pass with a variable Q and a high-pass filter.
156
Aurora Edit User Guide
08 April 2010
Audio