Measurement Computing eZ-Analyst rev.14.1 User Manual
Page 119
eZ-Analyst
878193
Waterfalls, Order Tracking, & Slice Views 7-5
Show Waterfall 3D Cursor will show or hide the Waterfall plot 3D
cursor. The 3D cursor appears as a point in the plot that can be dragged
anywhere in the 3D space occupied by the virtual box that makes up the
waterfall plot. Any point in this space will represent a value at a specific
Record number and Spectral Line. If the 3D cursor is made visible, the
mouse pointer will change to a hand when the pointer is hovering over
the cursor. You can then click and drag the cursor to a specific Record
and Spectral line. If you just click on the cursor, you can then use the
Up, Down, Left and Right arrow keys to position the cursor within the
waterfall plot.
Reset on start of measurement applies to Measurement mode only. It will automatically clear any
previous plot data from the waterfall and frequency slice plots when you get new data by pressing the
Single, Continuous or Record buttons.
Auto Skip when averaging readings is another Measurement mode only property. If you want the
waterfall plot to automatically skip the same number of records that you have selected in the Averaging
group of the Analyzer Tab in the Configuration dialog, check this option. When selected, if averaging is
used the waterfall plot also automatically sets Zero based skipping.
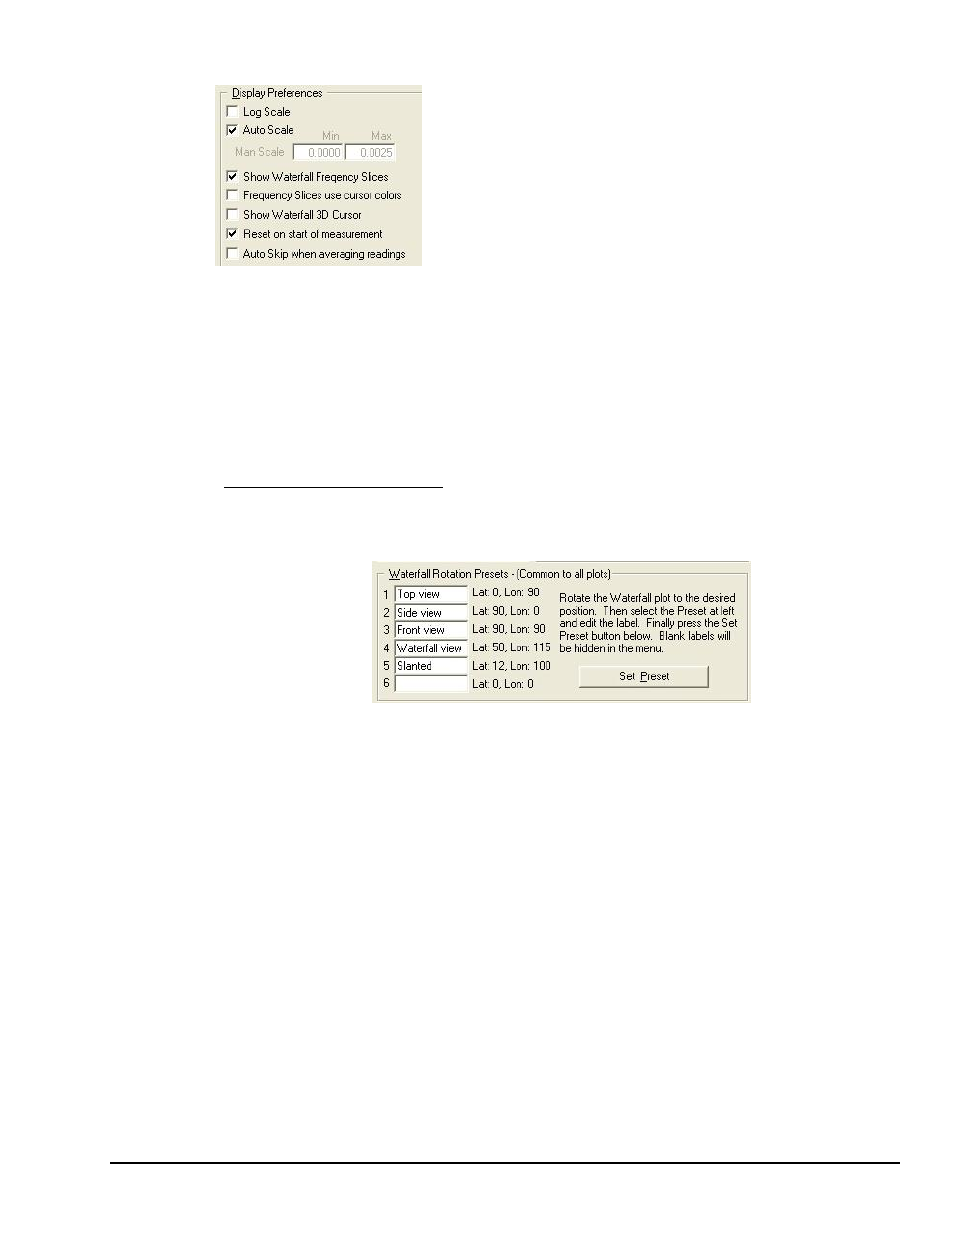
Waterfall Rotation Presets Panel
This feature allows you to define up to six custom named waterfall plot rotation settings. The names
assigned to the rotation presets will appear in the popup context menu that is displayed when you right
click the mouse with the pointer over a waterfall plot.
To assign a waterfall rotation setting to a named preset, perform the following steps:
1. Right click the mouse over a waterfall plot, and select Waterfall Configuration …
2. With the waterfall configuration dialog visible click and drag the waterfall plot to the desired
rotational position.
You will notice that the waterfall plot Longitude and Latitude position settings track the
movement of the waterfall plot in the configuration dialog.
3. If you find it difficult to drag the 3D plot close to the rotational position that you want, you
can type in the absolute value of Longitude and Latitude into the number entry fields.
4. Click the mouse pointer in one of the Rotation Preset name fields.
5. Type in the name that you want to assign to the preset.
6. Click the <Set Preset> button (see preceding figure) to assign the preset.
7. To make this rotation preset persist, you must either press the dialog box
press
Note: The rotation presets are global to all waterfall configurations. This is unlike the other
settings in the dialog that are unique to a single waterfall plot.