Set the area to be rendered, Render a preview – Adobe Premiere Elements 8 User Manual
Page 118
113
USING ADOBE PREMIERE ELEMENTS 8 EDITOR
Arranging clips in a movie
Last updated 8/12/2010
You designate the area to render by using the work area bar in the Timeline.
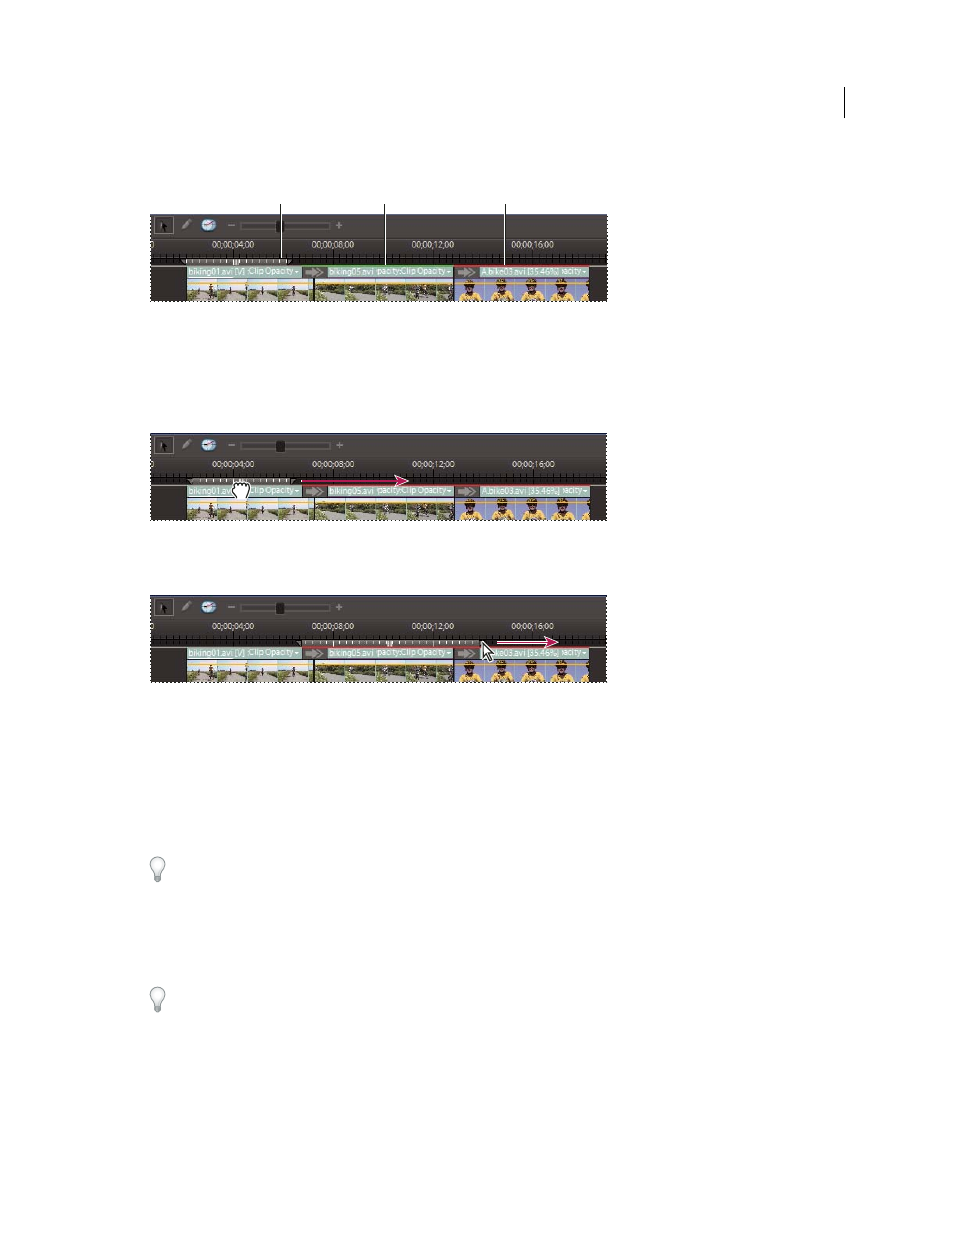
Timeline
A. Work area bar B. Green bar indicates fully rendered area C. Red bar indicates area needs rendering for best quality preview
Set the area to be rendered
•
Drag the textured center of the work area bar over the section you want to preview. Make sure that you drag the
work area bar from its center; otherwise, move the current-time indicator instead.
Grabbing the work area bar and dragging it over a section to preview
•
If the textured center is not visible, Alt-drag the work area bar over the section you want to preview.
Dragging a work area marker to mark the end of the work area
•
Position the current-time indicator, and press Alt+[ to set the beginning of the work area.
•
Position the current-time indicator, and press Alt+] to set the end of the work area.
•
Alt-double-click the work area bar to resize it to the width of the movie.
•
Double-click the work area bar to resize it to the width of the time ruler, or the length of the entire movie, whichever
is shorter.
Position the pointer over the work area bar to display a tool tip that shows the work area bar’s start timecode, end
timecode, and duration.
Render a preview
❖
Set the work area bar over the area you want to preview, and choose Timeline > Render Work Area. (The rendering
time depends on your system’s resources and the complexity of the segment.)
You can also render a preview by setting the work area bar and pressing Enter.
A
B
C