Create a new project – Zilog EZ80F916 User Manual
Page 22
UM014423-0607
Getting Started
ZiLOG Developer Studio II
eZ80Acclaim!
®
User Manual
2
•
ZILOGINSTALL is the ZDS II installation directory. For example, the default
installation directory is
C:\Program Files\ZiLOG.
•
version is the ZDS II version number. For example, version might be
4.11.0
or
5.0.0
.
Create a New Project
1. To create a new project, select New Project from the File menu.
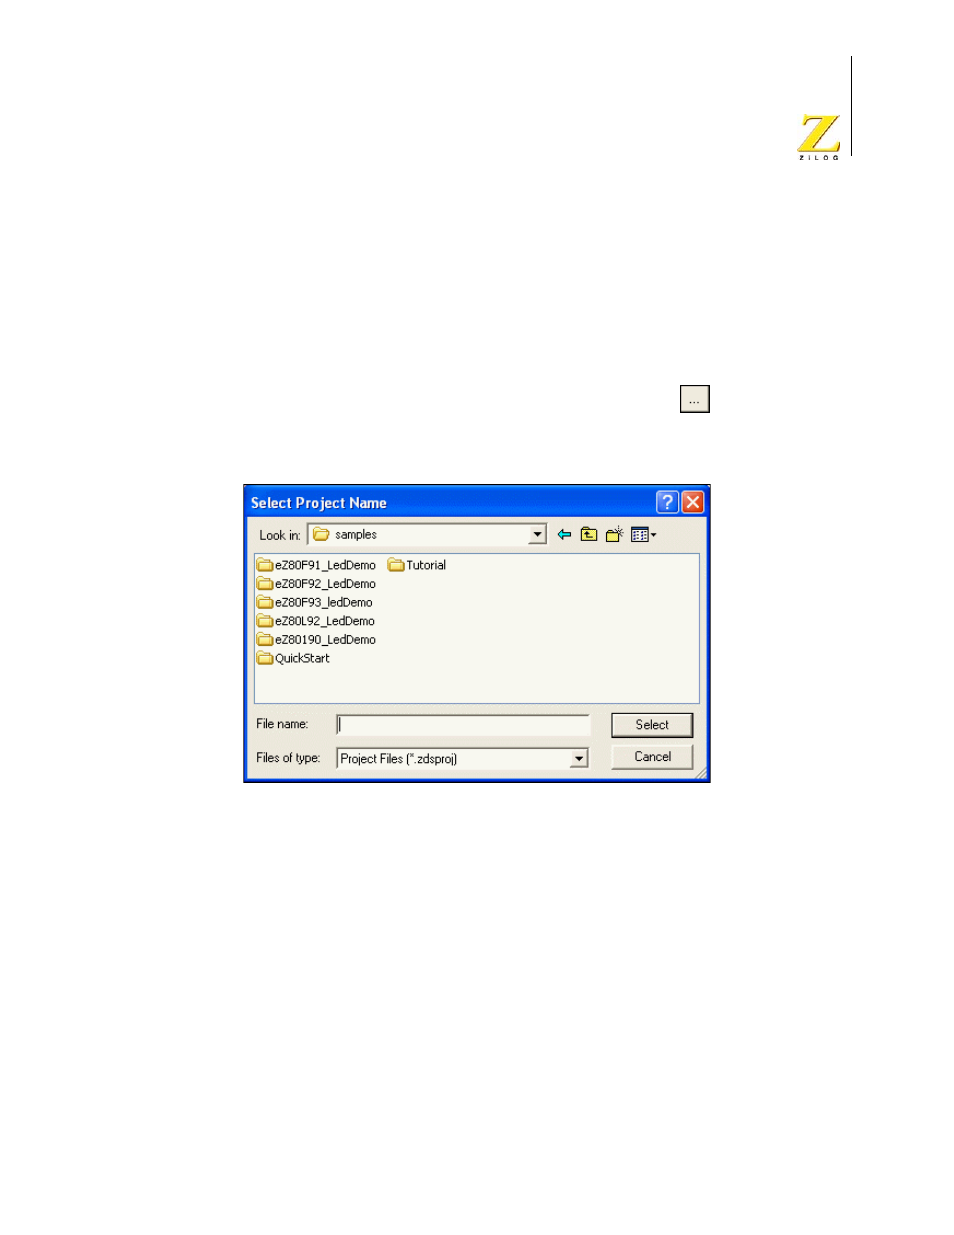
From the New Project dialog box, click on the Browse button (
) to navigate to the
directory where you want to save your project.
The Select Project Name dialog box is displayed as shown in the following figure.
Figure 1. Select Project Name Dialog Box
2. Use the Look In drop-down list box to navigate to the directory where you want to
save your project. For this tutorial, place your project in the following directory:
<ZDS Installation Directory>
\samples\Tutorial
If ZiLOG Developer Studio was installed in the default directory, the actual path
would be
C:\Program Files\ZiLOG\ZDSII_eZ80Acclaim!_4.11.0\samples\Tutorial
3. In the File Name field, type
sample
for the name of your project.
The eZ80Acclaim! developer’s environment creates a project file. By default, project
files have the
.zdsproj
extension (for example, <project name>
.zdsproj
). You do
not have to type the extension
.zdsproj
. It is added automatically.
4. Click Select to return to the New Project dialog box.