Setup menu selection – Dell PowerVault 136T LTO/SDLT (Tape Library) User Manual
Page 50
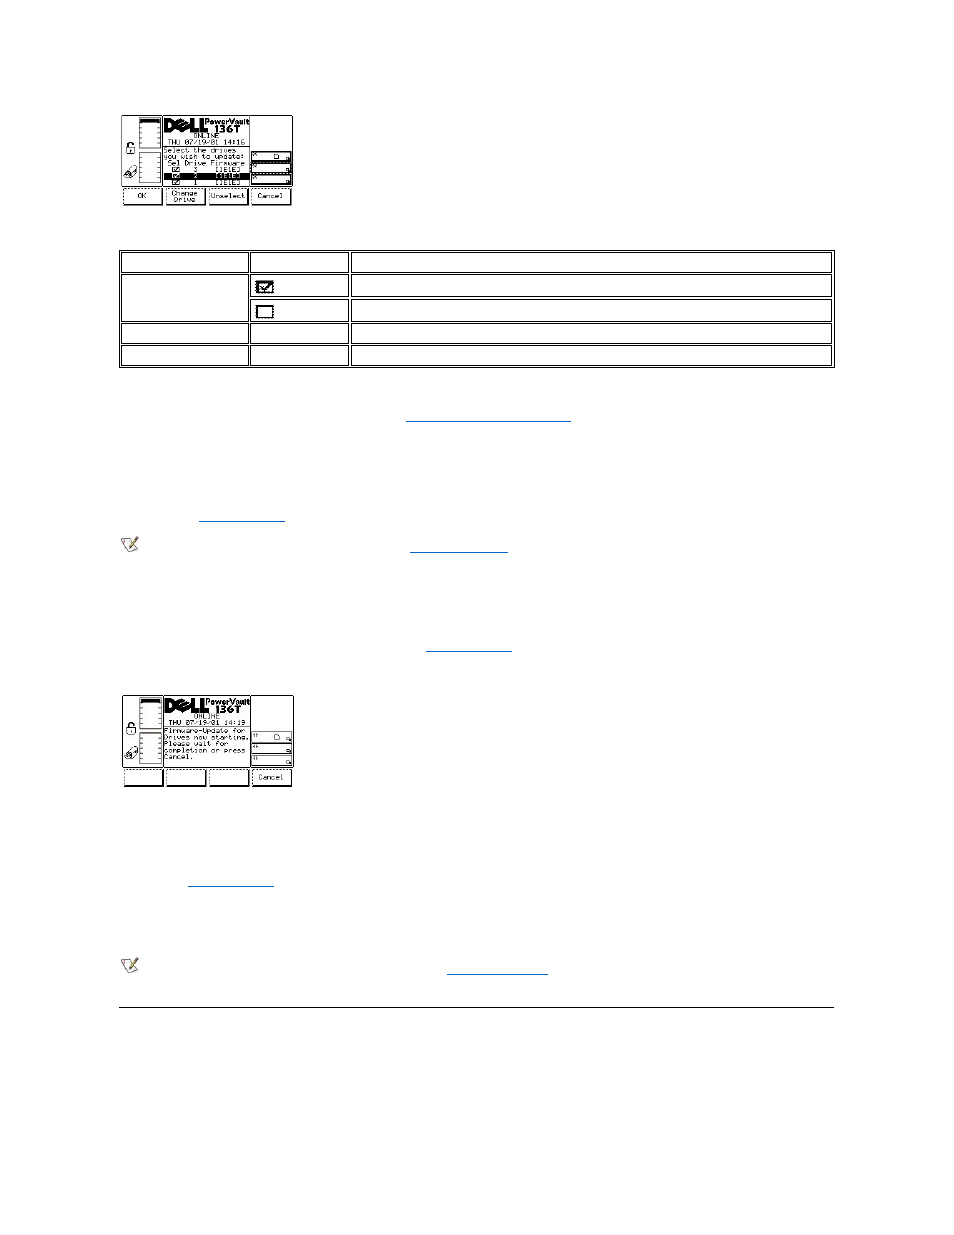
Figure 61. Command > Drives > Firmware Update > Select Drive Dialog
Step 5 Press the button beneath the desired softkey.
l
If the button beneath the OK softkey is pressed, the
Firmware Update Starting Dialog
is displayed.
¡
The picker retrieves the new drive firmware update tape cartridge from the first Mailbox slot and places it into the first selected drive.
¡
The drive updates the firmware, and unloads the tape.
¡
The picker retrieves the tape from the drive and places it into the next selected drive.
¡
After the firmware on the last selected drive is updated, the picker retrieves the tape from the drive and places it into the first slot of
the mailbox. The operator panel displays the Drive Migration Complete Screen.
¡
Press the button beneath the OK softkey
¡
NOTE: After updating the drive firmware, return to the
to view the current firmware version that is loaded on each drive.
l
If the button beneath the Change Drive softkey is pressed, the next drive in the list becomes the blackened active drive field.
l
If the button beneath the Unselect softkey is pressed, the checkbox of the blackened active drive field is unchecked.
¡
Also, the Unselect softkey becomes the Select softkey.
n
If the button beneath the Select softkey is pressed, the checkbox of the blackened active drive field is checked, and the Select
softkey becomes the Unselect softkey.
l
If the button beneath the Cancel softkey is pressed, the
Figure 62. Command > Drives > Firmware > Update > Firmware Update Starting Dialog
Step 6 Press the button beneath the desired softkey.
l
If the button beneath the Cancel softkey is pressed, the drive firmware update is stopped after the currently selected drive finishes its
update.
¡
For example, suppose drives 1, 2 and 3 are selected to be updated with the new drive firmware tape.
n
Drive 1 becomes updated, drive 2 is in the process of being updated, and drive 3 is not updated.
n
If the button beneath the Cancel softkey is pressed, drive 2 completes its update and drive 3 is not updated.
n
Drives 1 and 2 have the new firmware version loaded, drive 3 does not.
NOTE: After canceling the drive firmware update, refer to the
to view the current firmware version that is loaded on
each drive.
Setup Menu Selection
The Setup Menu is primarily used to configure the system. Setup is selected from the Main Menu alternate screen by following this procedure. This
menu offers four selections.
Step 1 Press the button beneath the Setup softkey from the Main Menu (Alternate Screen).
Field
Value
Description
Sel
Drive firmware is to be updated
Drive firmware is not to be updated
Drive
1..6
Drive number
Firmware
A..Z, 0..9
Drive firmware version currently loaded