Installing storage column(s) – Dell PowerVault 136T LTO/SDLT (Tape Library) User Manual
Page 21
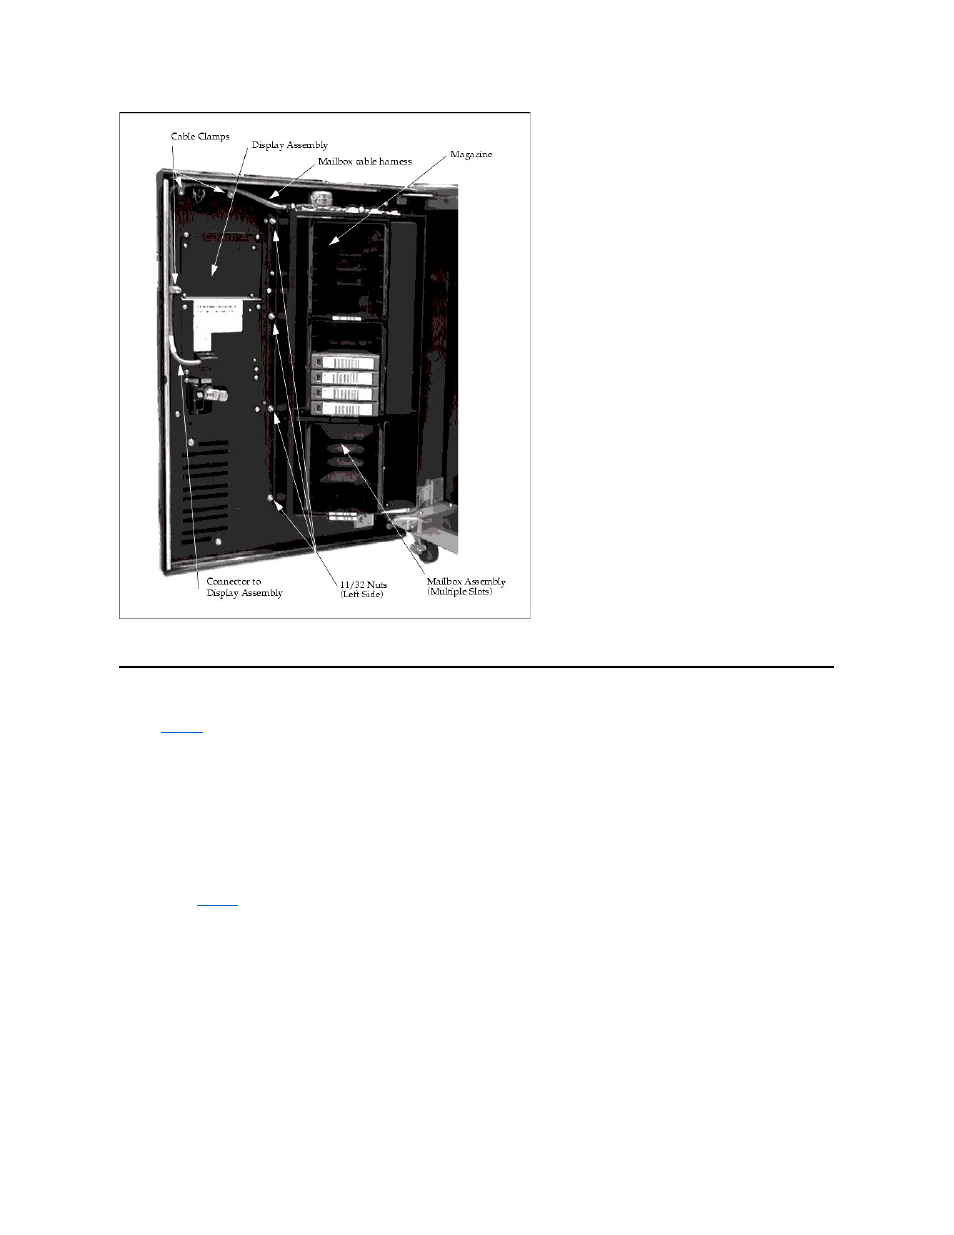
Figure 5. Installing the Multiple-Slot Mailbox Assembly
Installing Storage Column(s)
Tools required: 11mm or 7/16 Nut driver, T20 Torx driver and flashlight.
Step 1 Power off the Dell PowerVault 136T LTO Library by setting the main switch on the AC Input Power Module to the Off position.
Step 2 Open the Dell PowerVault 136T LTO Library front door.
Step 3 If necessary, move the Picker Assembly to a position in the Y-axis to allow access room and gently slide the storage column in place.
NOTE: The Y-axis refers to the vertical movement of the Picker Assembly. It can be moved gently, manually. The rotary axis refers to a
spinning action and requires the Picker Assembly to be rotated by turning the gear on the Rotary Motor by hand.
for the storage column topography and perform one of the following two steps depending on the column you are installing:
l
If you are installing column 4, use the T20 Torx wrench to tighten two bottom screws attaching the storage column to the bottom chassis.
l
If you are installing column 5, use the 7/16 nut driver to tighten the bolt attaching the storage column to the bracket.
Step 5 Install the top bolt using the 7/16 Nut driver.
Step 6 Install any magazines in the storage column.