Installing a stand-alone library, Installing a tape drive module – Dell PowerVault 136T LTO/SDLT (Tape Library) User Manual
Page 18
Installing a Stand-alone Library
Tools required: None.
Step 1 Position the Dell PowerVault 136T LTO Library in place.
NOTE: The doors must be closed when performing this step.
Step 2 Open the front door and move the Picker Assembly along its vertical axis to ensure that all packing material was removed and no binds
exist.
CAUTION: Do not move the Picker Assembly along the rotary axis by hand as it will be damaged. The Picker Assembly can be
rotated by turning the gear on the Rotary Motor by hand.
Step 3 If you have other library features to install, go to
to find the correct procedure, otherwise go to
.
Installing the Dell PowerVault 136T LTO Library in a Rack
Refer to the Dell Rack Installation Guide supplied with the rack mount hardware for instructions on how to install the Dell PowerVault 136T LTO
Library in a Dell rack.
Installing a Tape Drive Module
.
CAUTION: To ensure SCSI bus integrity, power down the library before starting this procedure.
Tools required: None.
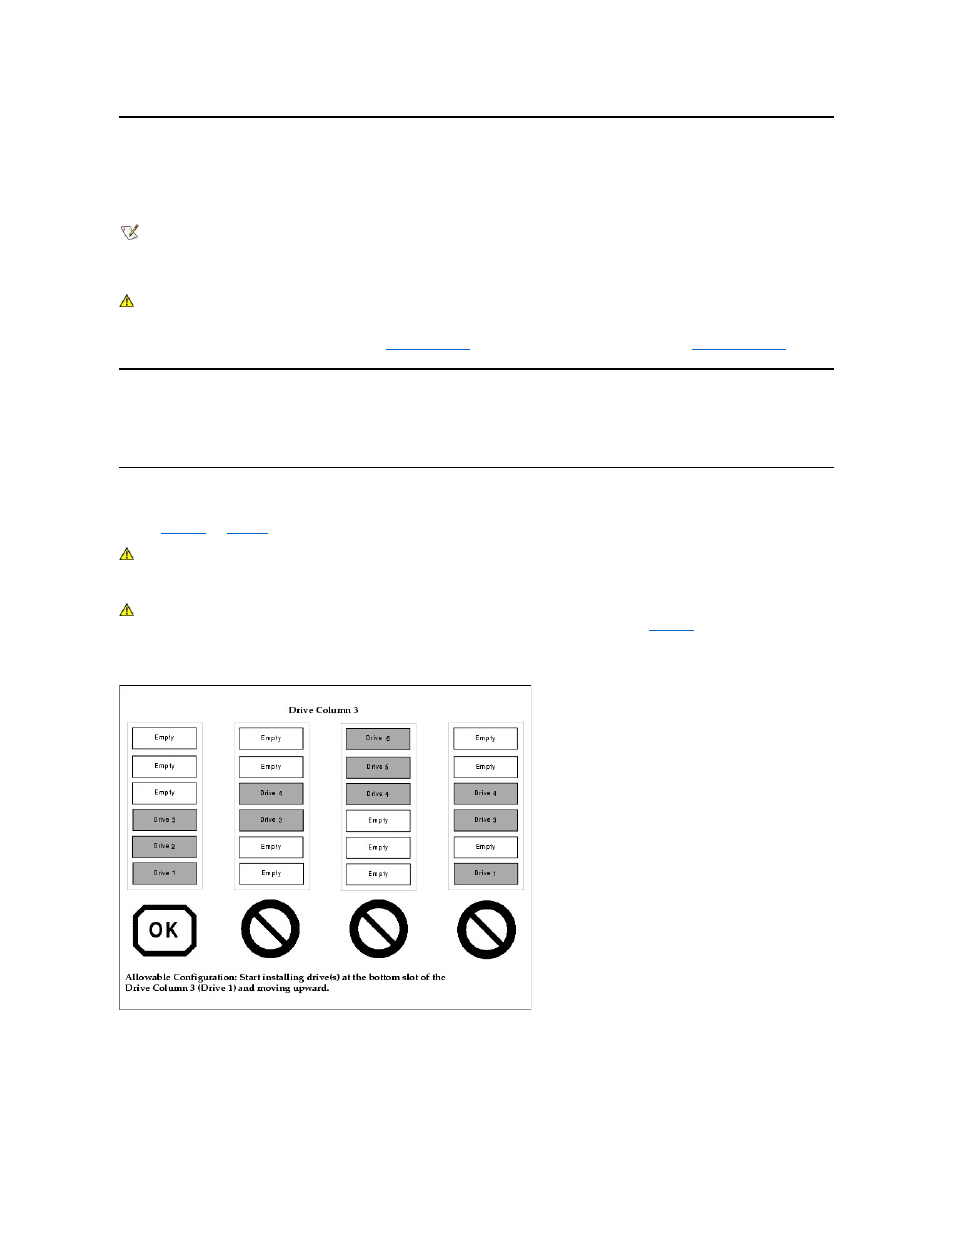
CAUTION: It is mandatory that you install the first Tape Drive Module in the library in the bottom drive slot of the drive column
(Column 3 - slot A) and additional Drive Modules occupying subsequent slots (B to F) as shown in
. If this configuration is
not followed, the library will not be able to complete its initialization and the drive(s) are not recognized during the teaching process.
Figure 1. Tape Drive Module Installation Allowable Configuration
Step 1 From the rear of the Dell PowerVault 136T LTO Library, locate the drive slot where the Tape Drive Module will be installed.
l
Loosen the two captive thumbscrews on the filler plate and remove the filler plate.
l
Save the filler plate for future drive maintenance activity.