Installation checkout – Dell PowerVault 136T LTO/SDLT (Tape Library) User Manual
Page 24
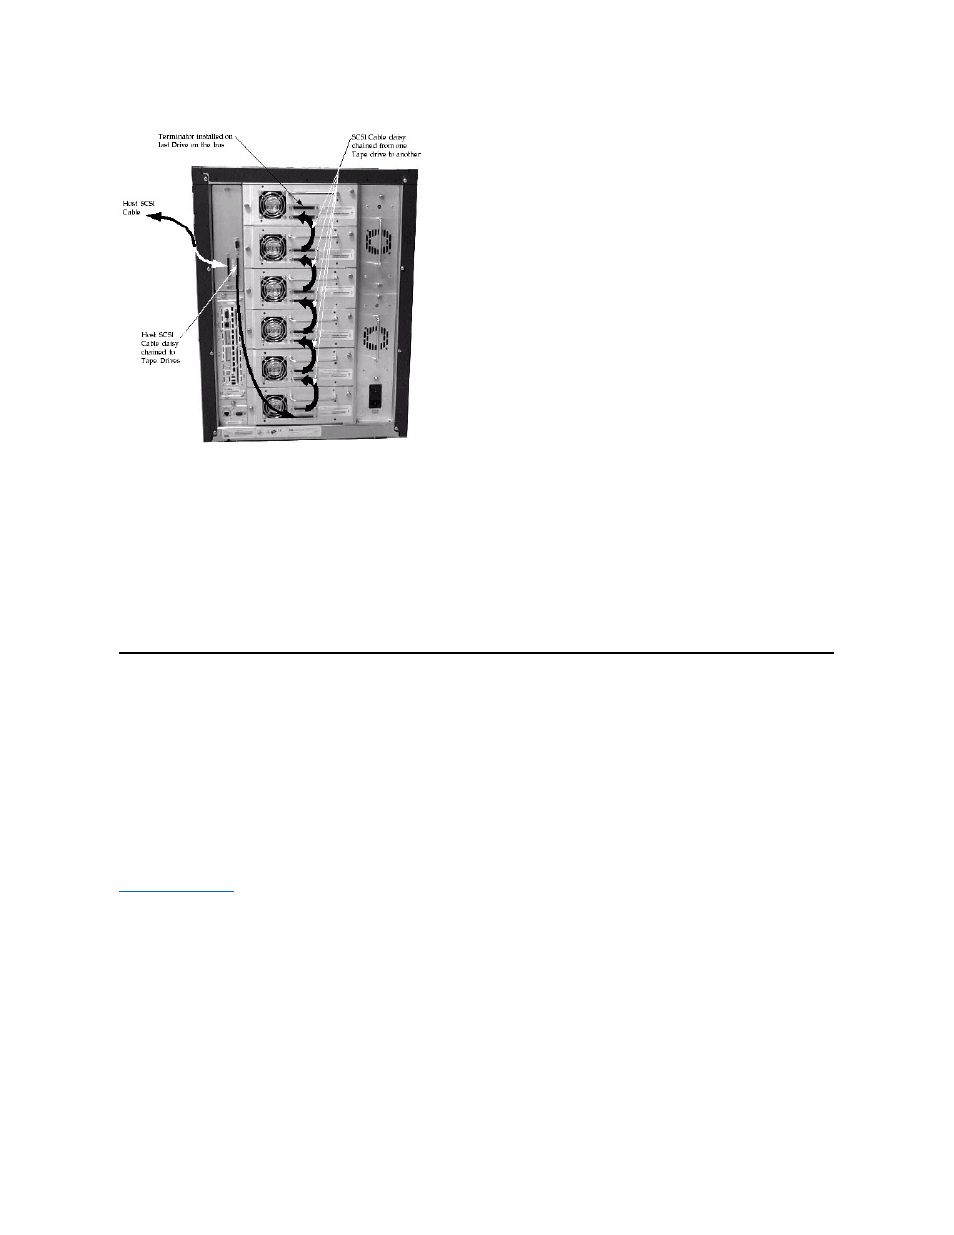
Figure 8. SCSI cables connection from the host
Host to Library
Step 1 Route the cable from the host to the back of the Dell PowerVault 136T LTO Library.
Step 2 Connect the cable straight into one of the two SCSI connectors on the Host SCSI Interface PCBA.
Step 3 If this is the last device on the SCSI bus, install an LVD terminator on the other connector of the SCSI PCBA.
Step 4 If attaching to the next device in the chain, install the next cable into the other connector of the Host SCSI Interface PCBA
Installation Checkout
Step 1 Ensure there is at least one cartridge in the storage area of the library. Make sure that the front door of the library is closed.
Step 2 Make sure the Main Switch on the AC Input Power Module in the back of the library is turned on.
Step 3 Turn the Power On/Off Switch on the Dell PowerVault 136T LTO Library front door to on.
Step 4 The library firmware will initialize and begin the Teach/Inventory process automatically. This process can take several minutes depending
on the number of drives installed in the library.
Step 5 Run library demo from the Operator Panel (Main Menu >More >Service >Library>Exercise >Demo).
l
Run this test for at least 5 cycles.
Back to Contents Page