Install standard (204-024k) mounts, Assemble coulters, Install applicator arms – Great Plains YP625PD Predelivery Manual User Manual
Page 71
Great Plains Manufacturing, Inc.
Planter Assembly
67
07/05/2011
401-754Q
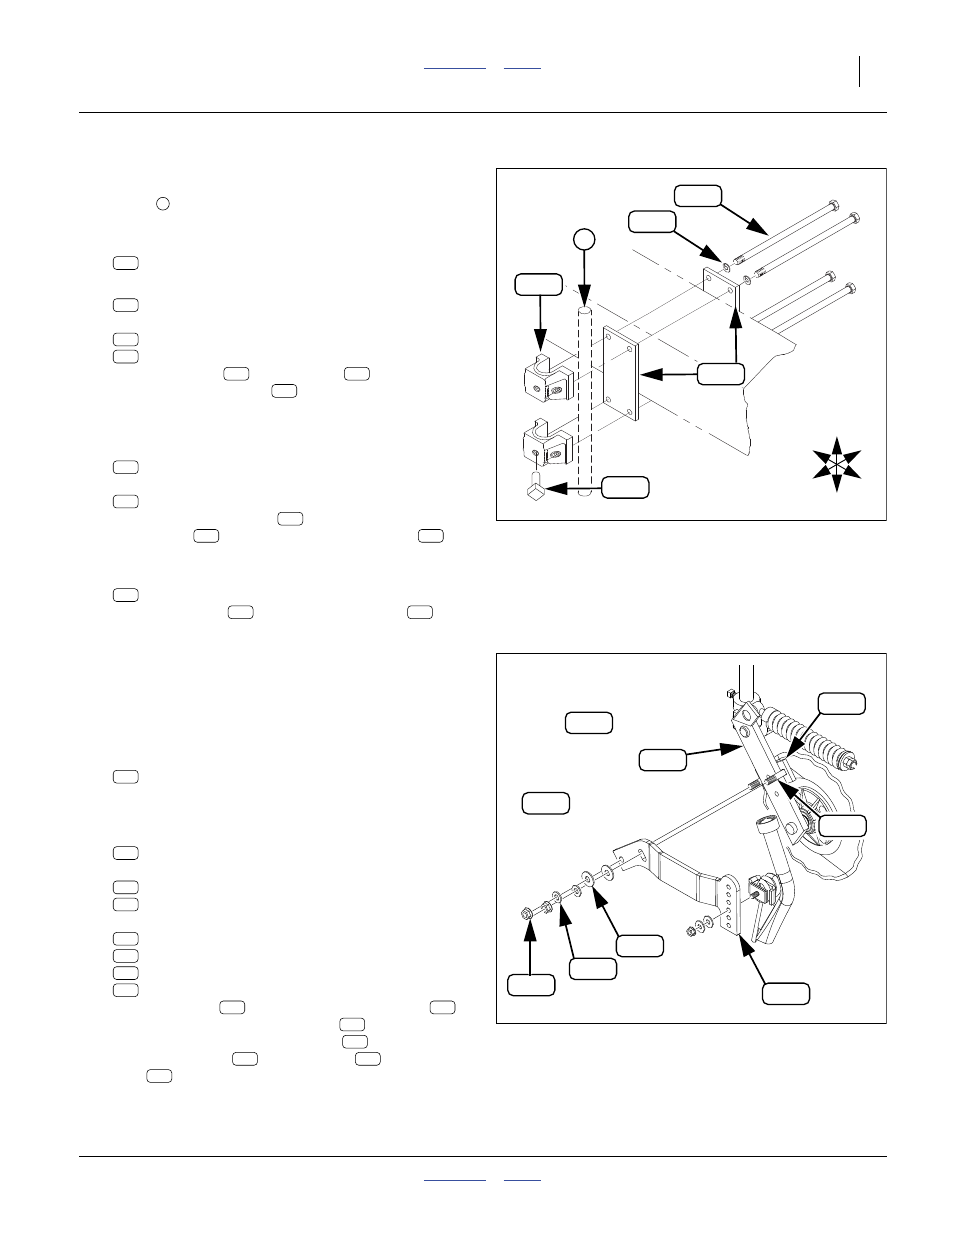
Install Standard (204-024K) Mounts
Refer to Figure 134
The shank
is installed at “Mount Coulters” on
295. Select all of:
204-024K CLAMP KIT 7X7 BAR
296. For each, select one:
204-040D CLAMP PLT 7 BAR
and four sets:
802-269C HHCS 1/2-13X9 GR5
804-015C WASHER LOCK SPRING 1/2 PLT
Place a washer
on each bolt
. Insert all
bolts through the plate
. At a coulter alignment,
place the plate around the front tool bar from the
rear.
297. Select one:
204-040D CLAMP PLT 7 BAR
and two sets:
204-072D CLAMP SHANK 1 1/2
DIA
Place this second plate
on the threaded ends
of the bolts
. Position each shank clamp
,
and loosely hold them on by threading in the bolts.
298. Select 18 or 24 (all of):
801-040C SCREW SQ HD 5/8-11 X 1 CUP PT
Add a set screw
to each coulter clamp
.
Thread it in well short of the shank gap.
Assemble Coulters
Install Applicator Arms
Refer to 401-754M or 401-755M Operator manual for
details on extension arm position adjustment.
Refer to Figure 135
299. Select one:
204-252K YP COULTER ASSEMBLY
This may or may not already have a shank and disc
installed.
300. Select one:
407-435K YP COULTER FERT ASSY ATTACH
specifically one each:
204-172D BACKING PLATE
204-179D EXTENSION ARM (CPH)
and two sets:
802-338C RHSNB 5/8-11X3 GR5
804-019C WASHER FLAT 5/8 USS PLT
804-095C WASHER FLAT 5/8 HARD ASTMF436
803-196C NUT HEX FLANGE 5/8-11 PLT
Place the bolts
through the backing plate
,
and then around the coulter arm
from the hub/
disc side. Add the extension arm
, and secure
with flat washers
, flat washers
and
nuts
.
Null4: .
Figure 134
204-024K Front Coulter Mount
32103
U
D
F
B
L
R
1
125
126
252
310
274
1
123
125
274
310
310
274
125
125
126
125
274
125
252
252
126
Null4: .
Figure 135
Coulter Applicator Arm
31872
131
214
{
298
320
312
128
129
{
278
142
131
214
128
129
278
312
320
298
278
128
142
129
312
320
298