Install front weldments, Install slide gates, Install front weldments install slide gates – Great Plains YP625PD Predelivery Manual User Manual
Page 63
Great Plains Manufacturing, Inc.
Planter Assembly
59
07/05/2011
401-754Q
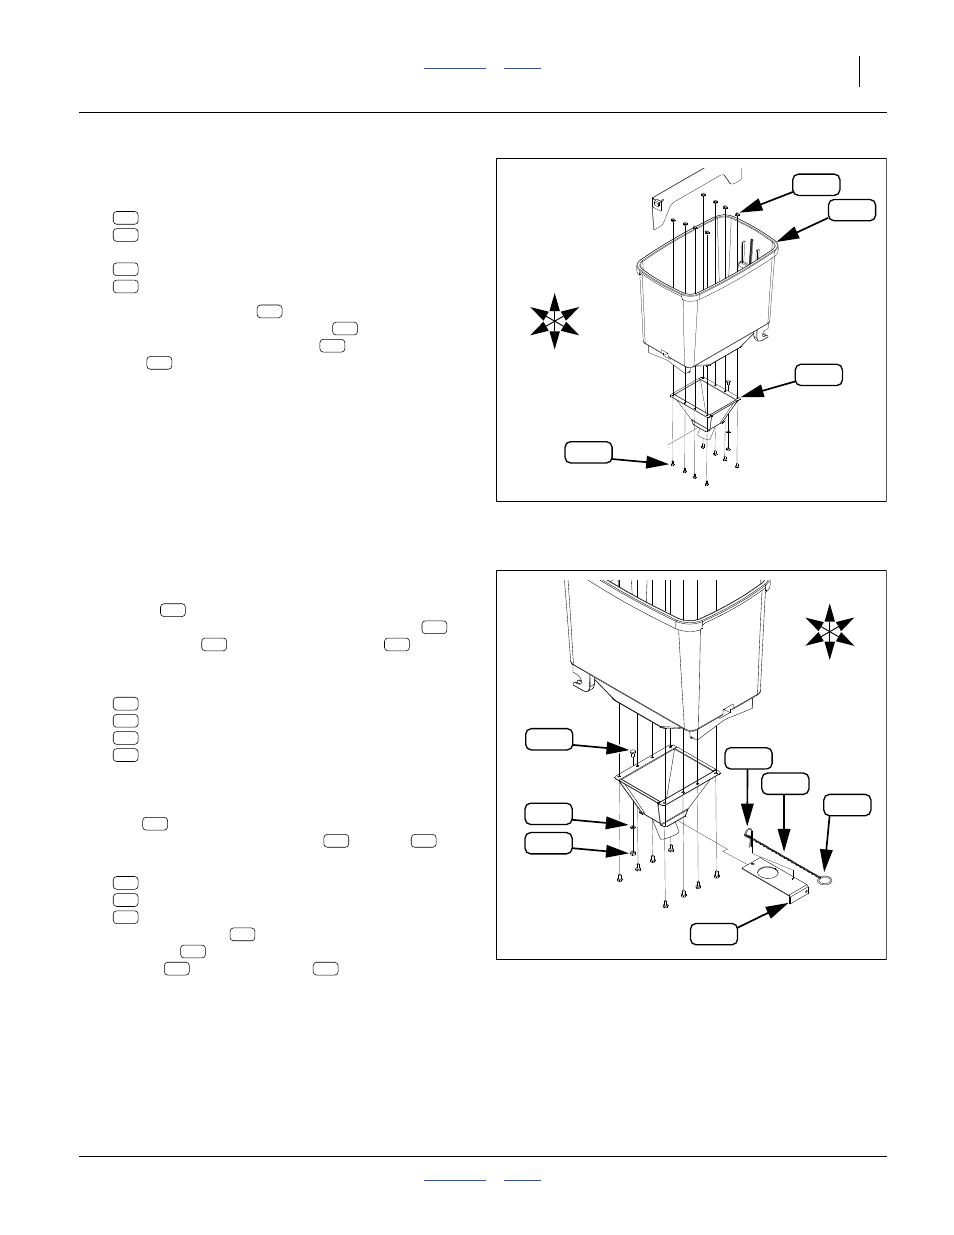
Install Front Weldments
Refer to Figure 121
263. Select one each:
817-268C 96 CHEMICAL HOPPER
403-468H SEED HOPPER DSCHRG WELD FRONT
and eight sets:
802-283C HHCS 1/4-20X1/2 GR2
803-230C NUT HEX FLANGE 1/4-20 PLT
264. Orient the weldment
with the exit tube angled
toward the rear. Insert the bolts
from below the
weldment and into the hopper
. Secure with lock
nuts
.
Null4:
Install Slide Gates
Refer to Figure 122
Slide gates
are installed from the rear, with the short
break (handle) down. They are captured by a bolt
at
the front. A chain
with removable cotter
is used
to hold the gate in the open position.
265. Select one set:
403-429D SLIDE GATE
802-283C HHCS 1/4-20X1/2 GR2
804-006C WASHER LOCK SPRING 1/4 PLT
803-006C NUT HEX 1/4-20 PLT
From the rear of the hopper assembly, with the slide
gate break down, insert the slide gate into the slot at
the top of the weldment tube. From above, insert the
bolt
through the front center hole of the slide
gate. Secure with lock washer
and nut
.
266. Select one set:
502-060D DUST PLUG CHAIN 10
800-051C RING, SPLIT 1-1/4 I.D.
805-031C PIN HAIR COTTER .092 WIRE
Pry the split ring
and rotate it onto one end of
the chain
and through the hole in the slide gate
handle
. Insert the cotter
through the other
end of the chain.
Null4:
Null4:
Figure 121
Install Front Hopper Weldment
Q0085
365
191
302
275
U
D
B
F
R
L
365
191
275
302
191
275
365
302
Null4:
Figure 122
Install Slide Gate and Chain
Q0085
283
187
306
275
U
D
L
R
B
F
322
240
243
187
275
240
322
187
275
306
283
275
306
283
240
243
322
243
240
187
322