Mount openers – Great Plains YP625PD Predelivery Manual User Manual
Page 33
Great Plains Manufacturing, Inc.
Planter Assembly
29
07/05/2011
401-754Q
Mount Openers
Depending on planter model and shipment method, the
planter may have all openers (row units) already
installed, or may have the rear (long mount) openers
removed, or may have all the row units removed.
Check the planter configuration against the opener
station drawings on page 82 through page 94. If all rows
are installed, continue at “Install Drive Shaft” on
page 30.
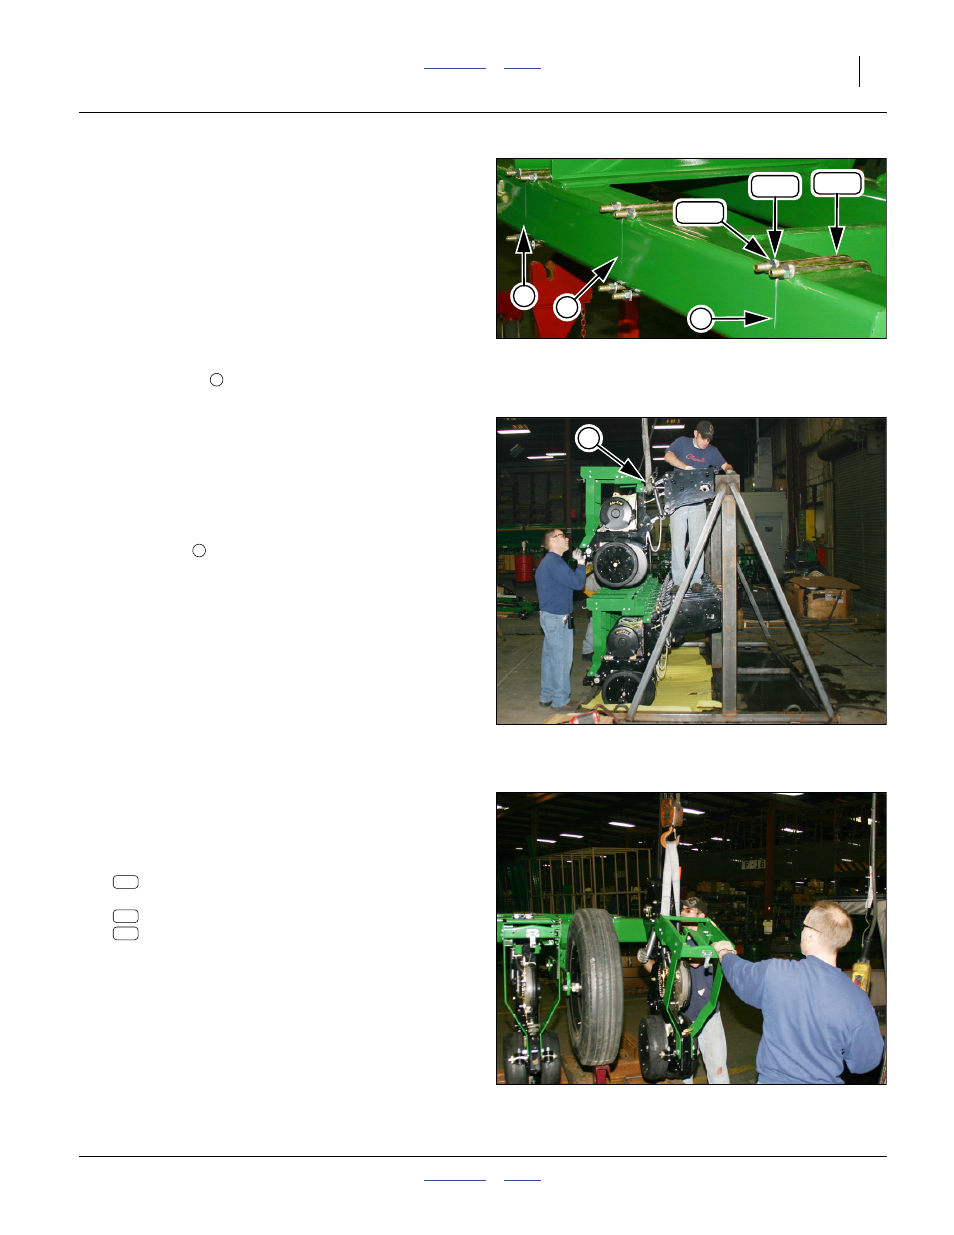
Refer to Figure 52
101. Inspect the rear face of the rear tool bar for opener
station marks
. Any factory marks present denote
the opener center-lines.
If no marks are present, measure and make marks
with grease pencil or paint pencil. Distances from
implement center-line to opener stations are given
in the drawings on page 82 through page 94.
Refer to Figure 53
102. Attach a hoist line to an opener on the rack.
Attaching under the parallel arms, just aft of the
adjust cam
is near the center of gravity.
Have one worker stabilize the opener while another
removes the shipping bolts.
Note: Uninstalled openers are shipped on the opener
rack. The U-bolts used on the opener rack are only
for shipping.
Null4:
Refer to Figure 54
103. Move the opener from the shipping rack to the main
frame. Center the opener on the station mark.
Secure the opener mount to the frame using the
fasteners provided:
806-050C U-BOLT 3/4-10 X 7 X 8 1/2
and four sets:
804-023C WASHER LOCK SPRING 3/4 PLT
803-027C NUT HEX 3/4-10 PLT
Tighten to Grade 5 torque.
Note: To provide a clear work-space above the
mainframe, hoppers are not installed until page 49.
Null4:
Figure 52
Opener Station Marks, U-bolts
Q0034
313
339
287
1
Null4:
Figure 53
Dismount Opener
Q0035
2
Null4:
Figure 54
Mount Opener
Q0036
338
314
291