Planter assembly, Support the main frame, Install parking stands – Great Plains YP625PD Predelivery Manual User Manual
Page 22: Re-align shifted openers
18
Great Plains Manufacturing, Inc.
YP625PD/TD/925TD
401-754Q
07/05/2011
Planter Assembly
Support the Main Frame
46. Hoist or lift the main frame onto stands, jacks or
other supports rated for the full final weight. Elevate
so that the openers are not touching the ground.
Use supports that cannot tip.
Install Parking Stands
If the implement is a pull-type planter, continue at “Erect
Manifold Supports”.
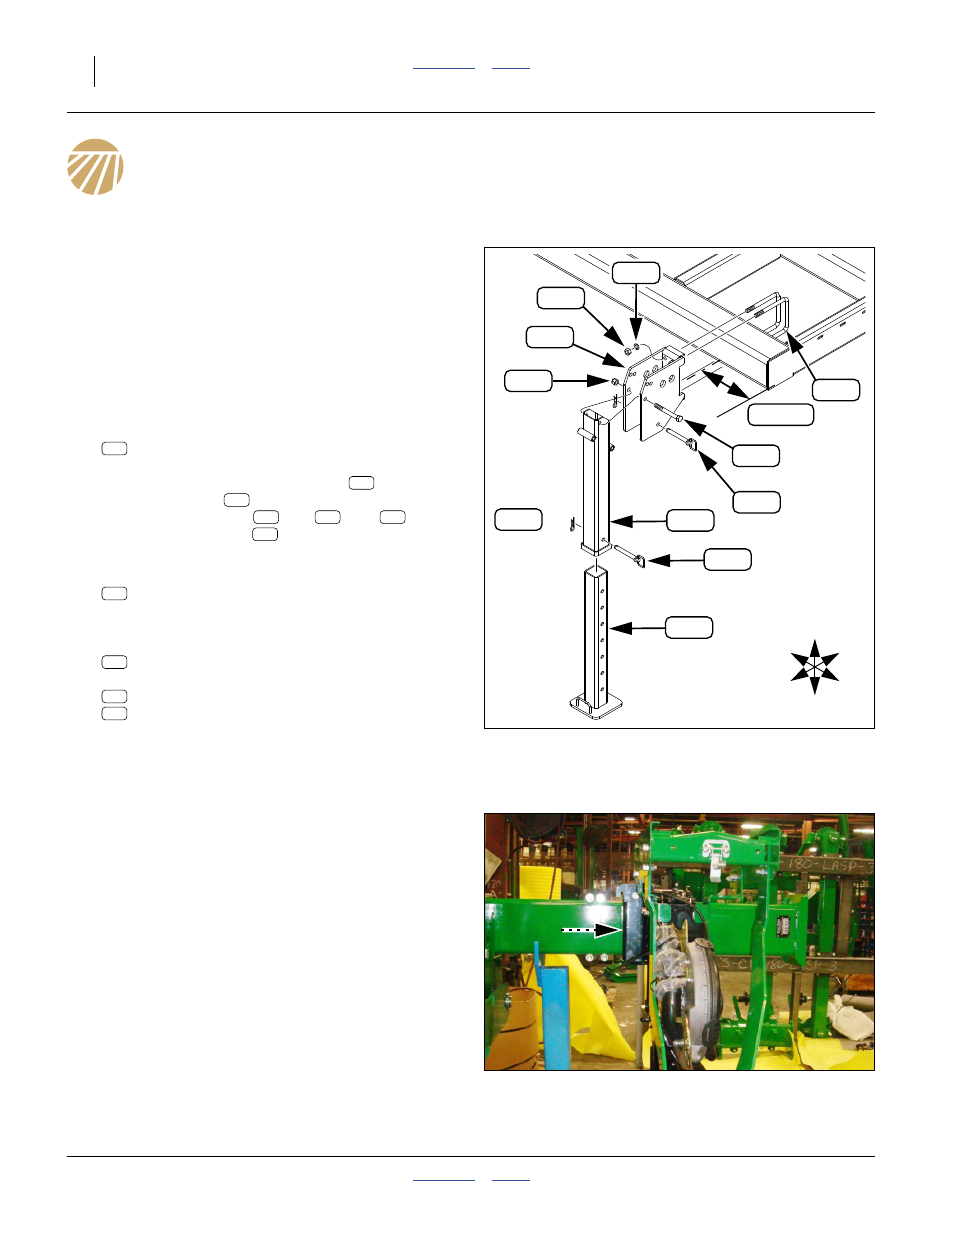
Refer to Figure 29
47. Select one parking stand:
401-760A YP925 3P PLANTER ASY 65
To ease installation, remove leg pin
and slide
out the inside leg
. For easiest installation, also
remove weldment pin
, nut
, bolt
and
outside leg weldment
.
48. For each side of the frame, on front face of front tool
bar, align the weldment
401-273H BRACKET PRK STD SUP WLDMT
at 15 to 30 cm from the end of the frame.
Secure with two:
806-050C U-BOLT 3/4-10 X 7 X 8 1/2
and four sets:
804-023C WASHER LOCK SPRING 3/4 PLT
803-027C NUT HEX 3/4-10 PLT
49. Re-assemble any parts removed from the stands.
50. Extend the legs to assist in supporting planter
weight during assembly.
Re-align Shifted Openers
If the planter was in the top rack, one or both outside row
units may have been shifted slightly toward center, to
avoid interference with the planter in the middle rack.
51. Check the position of the outside rows against the
opener station layouts on page 82 through page 94.
52. If any need to be moved, first mark the center-line
(which mark may already be present). Loosen the
nuts on the U-bolts. Move the opener and re-tighten.
See “Mount Openers” on page 29 for details on
mount fasteners.
Null4:
Null4:
Figure 29
Parking Stand
31791
{
U
D
F
B
L
R
149
15-30 cm
334
150
279
290
291
314
162
338
148
334
162
334
149
149
290
279
148
148
338
314
291
Null4:
Figure 30
Opener Shift
Q0091