Install seed hoppers, Assemble seed hoppers, Hopper orientation – Great Plains YP625PD Predelivery Manual User Manual
Page 62: Discharge weldment identification, Quantities per planter model, Install rear weldments, Ud b f
58
Great Plains Manufacturing, Inc.
YP625PD/TD/925TD
401-754Q
07/05/2011
Install Seed Hoppers
Assemble Seed Hoppers
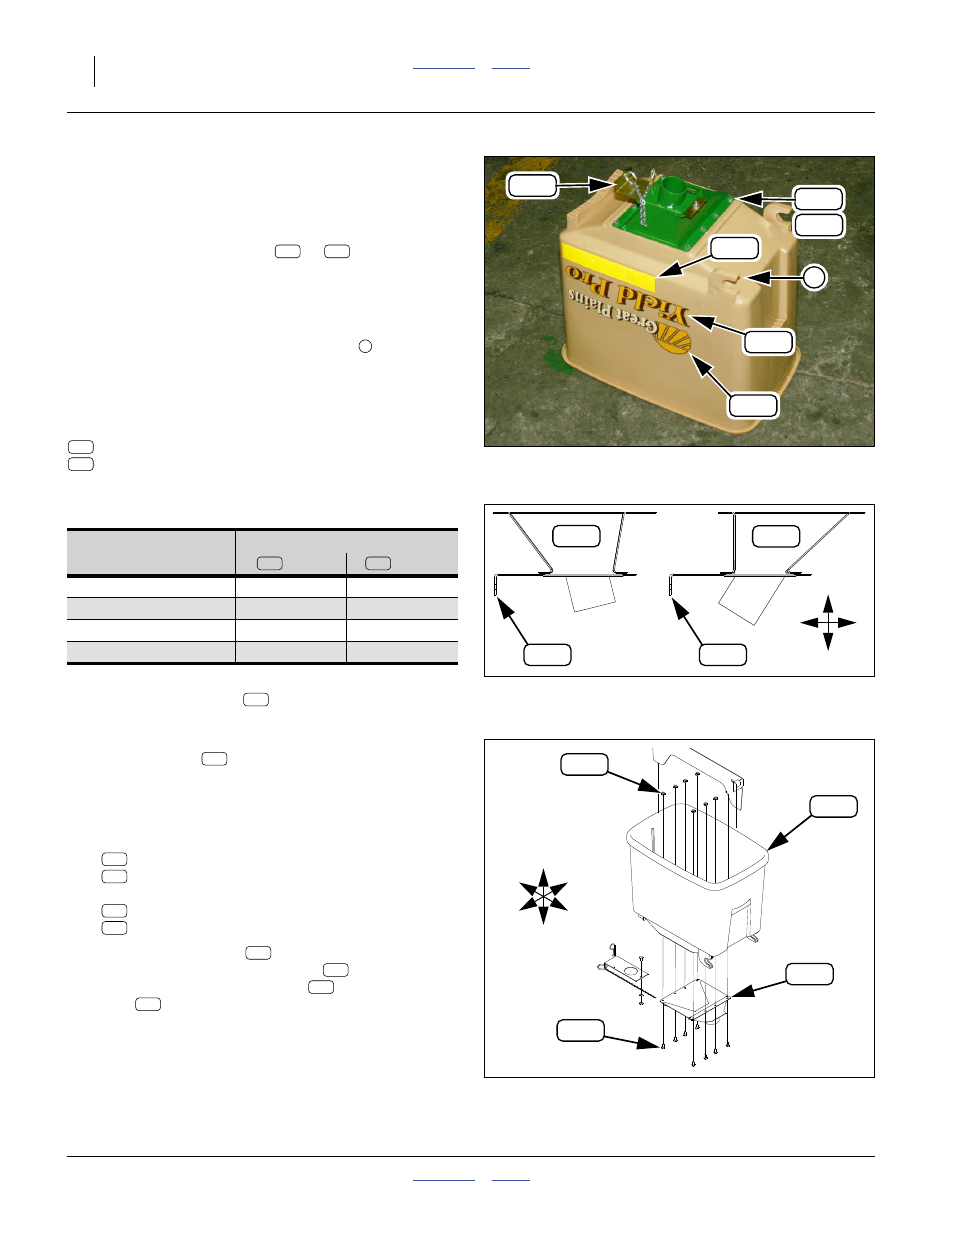
Refer to Figure 118 - depicting a left end hopper with “rear”
style discharge weldment and decals.
If seed discharge weldments (
or
) are already
present on all hoppers, continue at “Mount Seed
Hoppers” on page 60. Any hoppers pre-installed on row
units have the discharge weldments installed.
Hopper Orientation
Seed hoppers install with the lower hooks
toward the
front of the implement.
Discharge Weldment Identification
Refer to Figure 119
Discharge weldments are provided in one or two styles:
403-467H SEED HOPPER DSCHRG WELD REAR
403-468H SEED HOPPER DSCHRG WELD FRONT
depending on the type of row unit:
Quantities Per Planter Model
• Mid-length and long-mount row units use a hopper
with a “rear” weldment
. The discharge tube
angles to the front.
• Short-mount (front) row units use a hopper with a
“front” weldment
. The discharge tube angles to
the back.
Install Rear Weldments
Refer to Figure 118 and Figure 120
261. Select one each:
817-268C 96 CHEMICAL HOPPER
403-467H SEED HOPPER DSCHRG WELD REAR
and eight sets:
802-283C HHCS 1/4-20X1/2 GR2
803-230C NUT HEX FLANGE 1/4-20 PLT
262. Orient the weldment
with the exit tube angled
toward the front. Insert the bolts
from below the
weldment and into the hopper
. Secure with lock
nuts
.
Null4:
Planter
Model
Weldment Quantities
Rear
Front
6
12
6
6
6
12
9
0
Null4:
Figure 118
Assembled End Hopper
Q0082
190
191
392
393
386
187
1
190
191
190
191
Null4:
Figure 119
Discharge Weldment Side View
Q0083
190
191
U
D
B
F
187
187
190
191
190
Null4:
Figure 120
Install Rear Hopper Weldment
Q0084
365
190
302
275
U
D
R
L
F
B
191
365
190
275
302
190
275
365
302