ClearOne Converge 590 User Manual
Page 28
28
Technical Services: 800.283.5936
CONFIGURING SYSTEM SETTINGS
System settings include Communication, Regional, and Telephone settings.
COMMUNICATION SETTINGS
The Communication Settings window allows you to adjust the connectivity settings of
external devices that communicate with the Converge, including the network and serial
connections. You can connect a PTZ camera to the Camera port and use the Voice
Tracking feature. You can also change the RF frequency (RF controller only) to match the
frequency of your controller or if you are experiencing interference on the current channel.
To open Communication Settings
1. Click
the
Communications icon in the Configuration screen.
> Note: When Converge is connected to a DHCP network, the
network, IP, gateway and subnetwork addresses are automatically
assigned. Unless you want to specify a static IP address, there is
no need to configure network settings.
To create a static IP address
> Note: Contact the network administrator for
network settings.
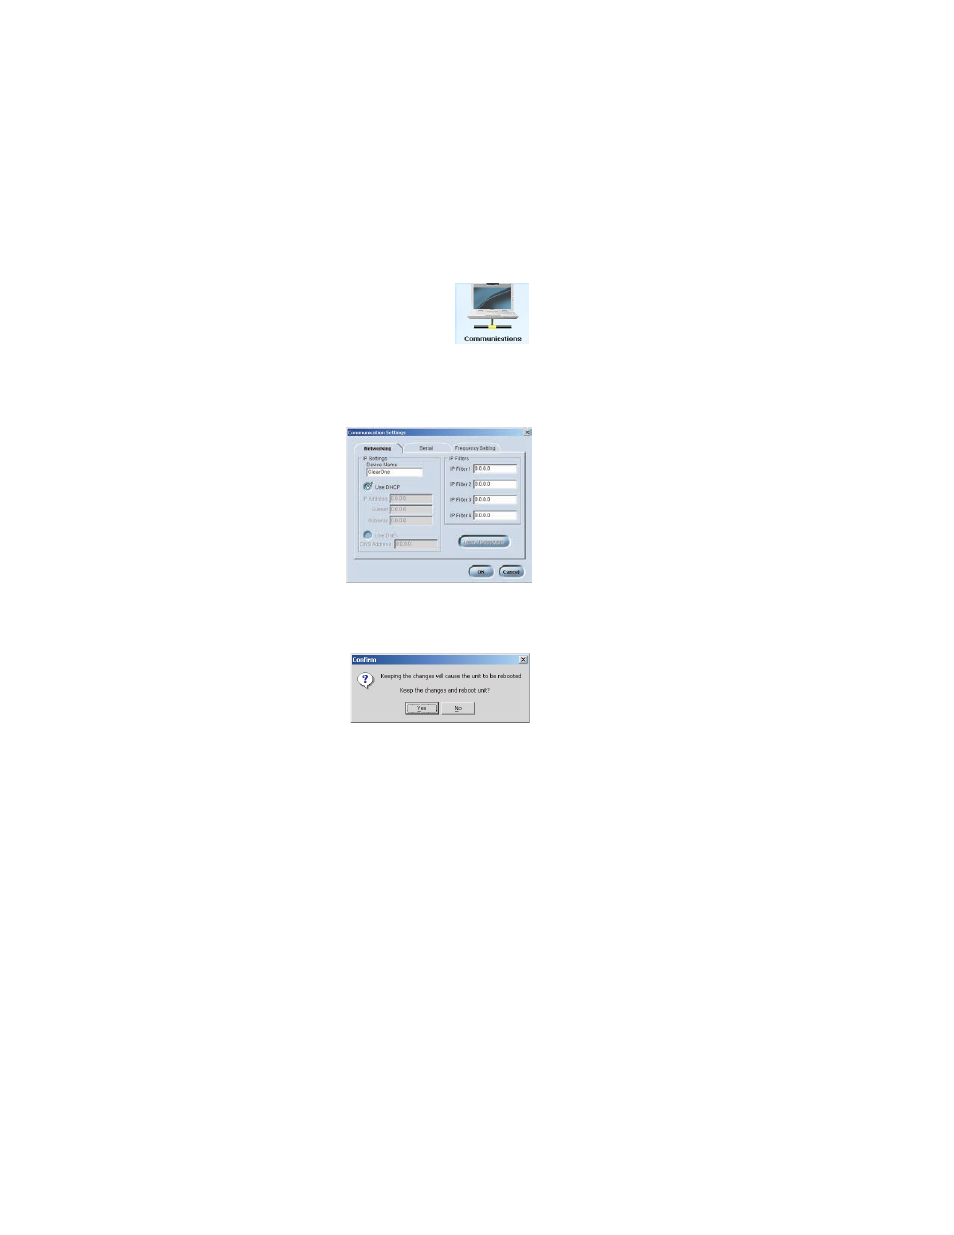
1. In the Networking tab, create a unique net-
work name and enter it in the Device Name
field. (Default is ClearOne-XX where XX is the
last two digits of the MAC address.)
2. Clear
the
Use D
DHCP option and enter the IP,
Subnet and Gateway addresses.
3. Select
Use D
DNS if you have a Domain Name
Server and want name resolution (to use a
network name) for your static IP address.
4. In the IP Filters section, enter specific IP
addresses that will be allowed to access the
Converge system. You can specify a range of
IP addresses by using zeros. For example,
entering 192.168.105.0 will allow any IP
addresses in the 192.168.105.1 to
192.168.105.254 range to access the
Converge system.
5. Click
OK.
6. Click
Yes to save your settings.