Rockwell Automation GV3000/SE AC Drive AutoMax Network Communication Board, M/N 2AX3000 User Manual
Page 33
2-24
AutoMax Network Communication Option Board for the GV3000/SE AC Drive
Step 5.
Reinstall the Keypad Bracket in the Drive
Step 5.7 Reconnect the keypad bracket to the keypad support bracket by inserting
the mounting tabs into the slots in the support bracket and tightening the
thumb screw.
Step 5.8 Route the Network Drop Cable through the left-most opening at the bottom
of the drive.
Step 5.9 Connect the brown wire to terminal 1 of the 2-connector terminal strip.
Connect the white wire to terminal 2.
Step 5.10 Reconnect any wiring that was removed from the Regulator board.
Step 5.11 NEMA 4X/12 drives only: Before installing the cover, check that the gaskets
on the cover are flat and within the gasket channels.
Step 5.12 Reinstall the cover. Align all cover screws into the heat sink before
tightening any of them.
To maintain the integrity of NEMA 4X/12 drives, sequentially tighten the
cover screws to ensure even compression of the gaskets. Do not exceed
2.2 Nm (20 in-lb) of torque on these screws.
This completes the hardware installation of the AutoMax Network option board. Do not
remove the lockout and tag until you have completed section 2.10, which provides
instruction on connecting to the AutoMax network.
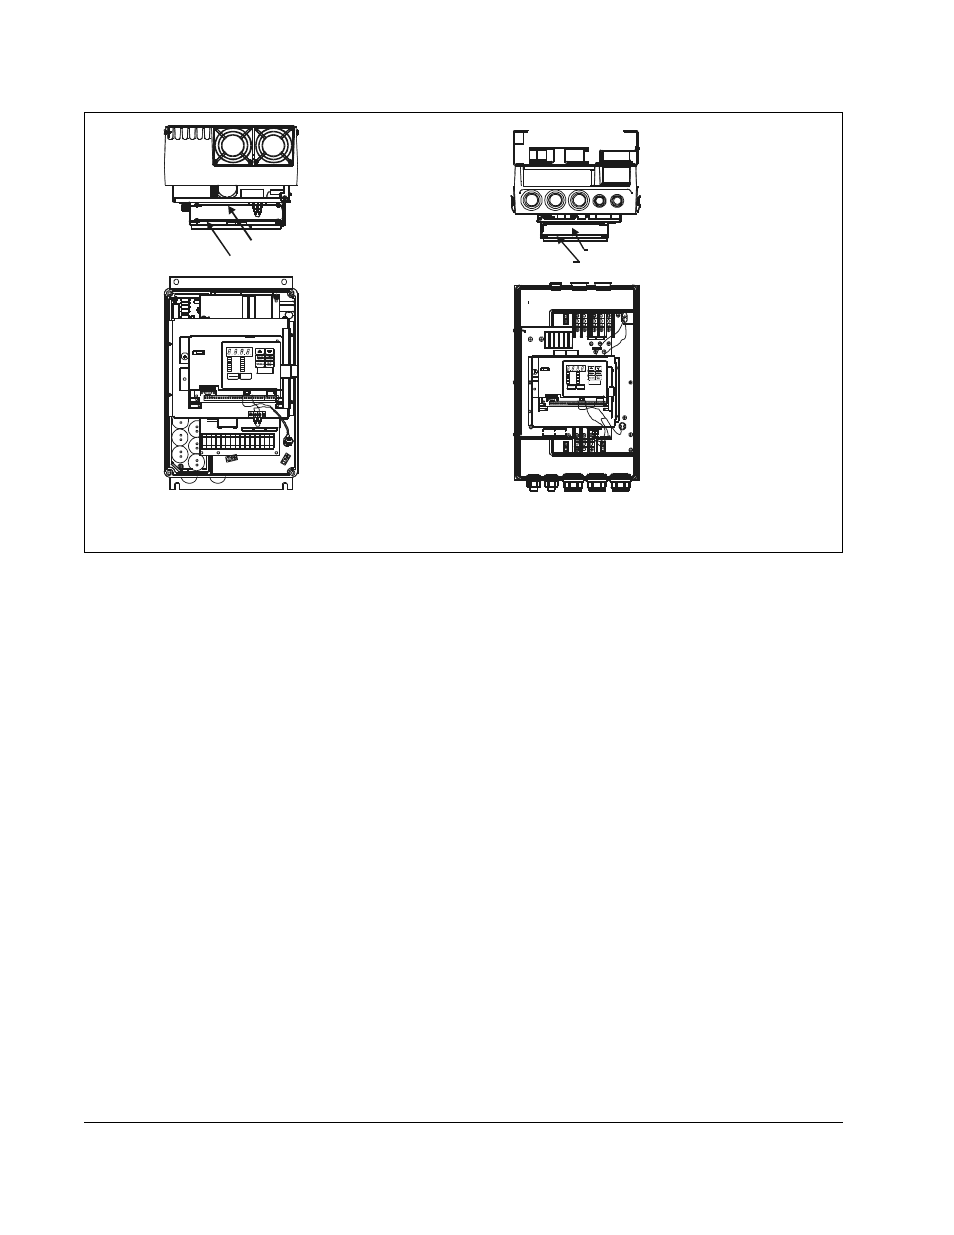
Figure 2.13 – 15 to 25 and 25 to 60 HP @ 460V GV3000/SE Drive
RESET
PRO GRAM
REVERSE
FO RWARD
AUTO
JOG
REMOTE
RUNNING
Pa sswo rd
TORQUE
Hz
RPM
Kw
AMPS
VO LTS
STOP
START
ENTER
20A
16A
Network Option Board
Regulator Board
Front View
Top View
15 to 25 HP @ 460V
RESET
P R OG R A M
R E V E R S E
F OR W A R D
A U T O
JO G
R E M OT E
R U N N I N G
P a ssw ord
T OR QU E
H z
R P M
K w
A MP S
V OLT S
STO P
STA RT
ENTER
709579-1
GRD
GRD
G R
D
Network Option Board
Regulator Board
Front View
Top View
25 to 60 HP @ 460V