2 installing wheel and tire assembly onto machine, 6 brakes, 7 towing a disabled machine – JLG G12-55A AccuPlace Service Manual User Manual
Page 65: 1 manually releasing the park brake, Brakes, Towing a disabled machine, Installing wheel and tire assembly onto machine, Manually releasing the park brake
5.11
G10-55A & G12-55A AccuPlace
Axles, Drive Shafts, Wheels and Tires
5.5.2
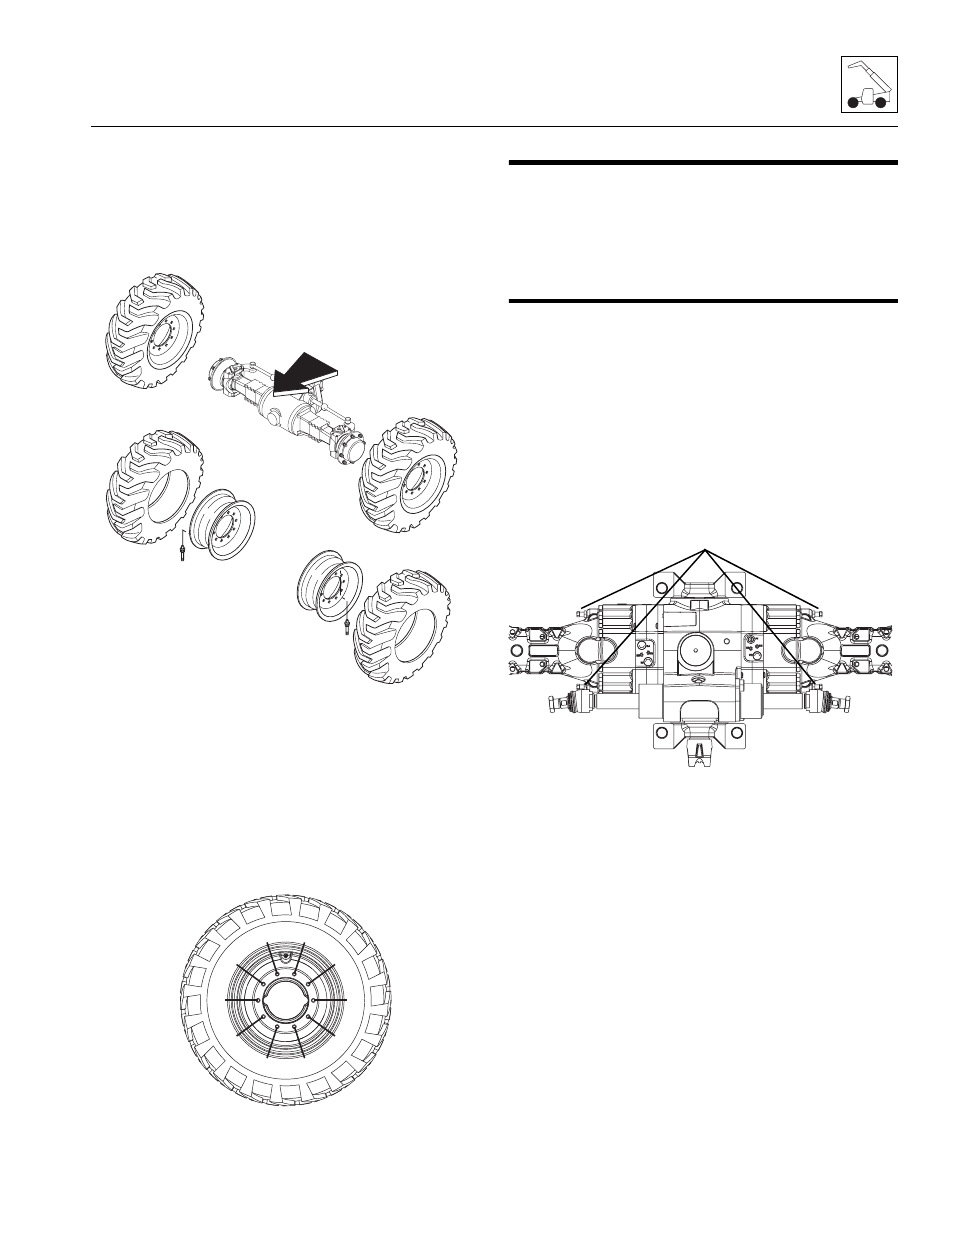
Installing Wheel and Tire Assembly
onto Machine
Note: The wheel and tire assemblies must be installed
with the directional tread pattern “arrows” facing in the
direction of forward travel.
1. Position wheel onto studs on wheel end of axle.
2. Install wheel lug washers.
3. Start all nuts by hand to prevent cross threading. DO
NOT use a lubricant on threads or nuts.
4. Tighten lug nuts in an alternating pattern as
indicated in figure. Torque to 350-400 lb-ft
(475-542 Nm).
5. Remove machine from supports.
5.6
BRAKES
Check the brake disks for wear every 1,000 hours of
operation or yearly.
For more information on brake disk inspection, refer to
the appropriate axle repair manual.
5.7
TOWING A DISABLED MACHINE
Towing a disabled machine should only be attempted as
a last resort, after exhausting all other options. Make
every effort to repair the machine, and move it under its
own power, before using the emergency towing
procedures outlined below.
IMPORTANT: Block the wheels of the machine
BEFORE attempting to release the park brake. Once
the park brake is released, the machine’s park brake
AND service brakes are inoperable.
5.7.1
Manually Releasing the Park Brake
1. Loosen the nuts of the screws (5) for the manual
release of the braking units. Draw the nuts back
approximately 6 mm.
2. Tighten the screws until they are gently seated on
the driving plate
3. Carefully tighten each release screw a 1/4 turn at a
time in sequence until all have been turned on full
turn 360°.
4. Repeat steps 1 thru 3 for the other side of the
differential.
Note: After the machine has been towed to a secure
location, reactivate the parking brake. Carefully follow
the procedures from start to finish. Consult your local
JLG distributor or the JLG Service Department if you are
unsure about any part of the procedure, or for specific
instructions concerning your particular situation.
MAH0460
Tread “arrows” must point
forward
Install tires onto wheels
to rotate in proper direc-
tion
OY1220
1
2
3
4
5
6
7
8
9
10
MZ1020
5