2 accumulator pre-charge & check procedure, Accumulator pre-charge & check procedure, Warning – JLG G12-55A AccuPlace Service Manual User Manual
Page 113
8.23
G10-55A & G12-55A AccuPlace
Hydraulic System
6. Before starting the machine, check fluid level of the
hydraulic fluid reservoir and if necessary fill to full
mark with Mobilfluid 424
®
(ISO 46).
7. Start the machine and run at low idle for about one
minute. Test the functions of the accumulator and lift
valve.
8. Inspect for leaks and check level of hydraulic fluid in
reservoir. Add hydraulic fluid if needed. Shut the
engine OFF.
9. Close and secure the engine cover.
8.9.2
Accumulator Pre-Charge & Check
Procedure
Note: If water pumped nitrogen is not available, oil-
pumped nitrogen may be used.
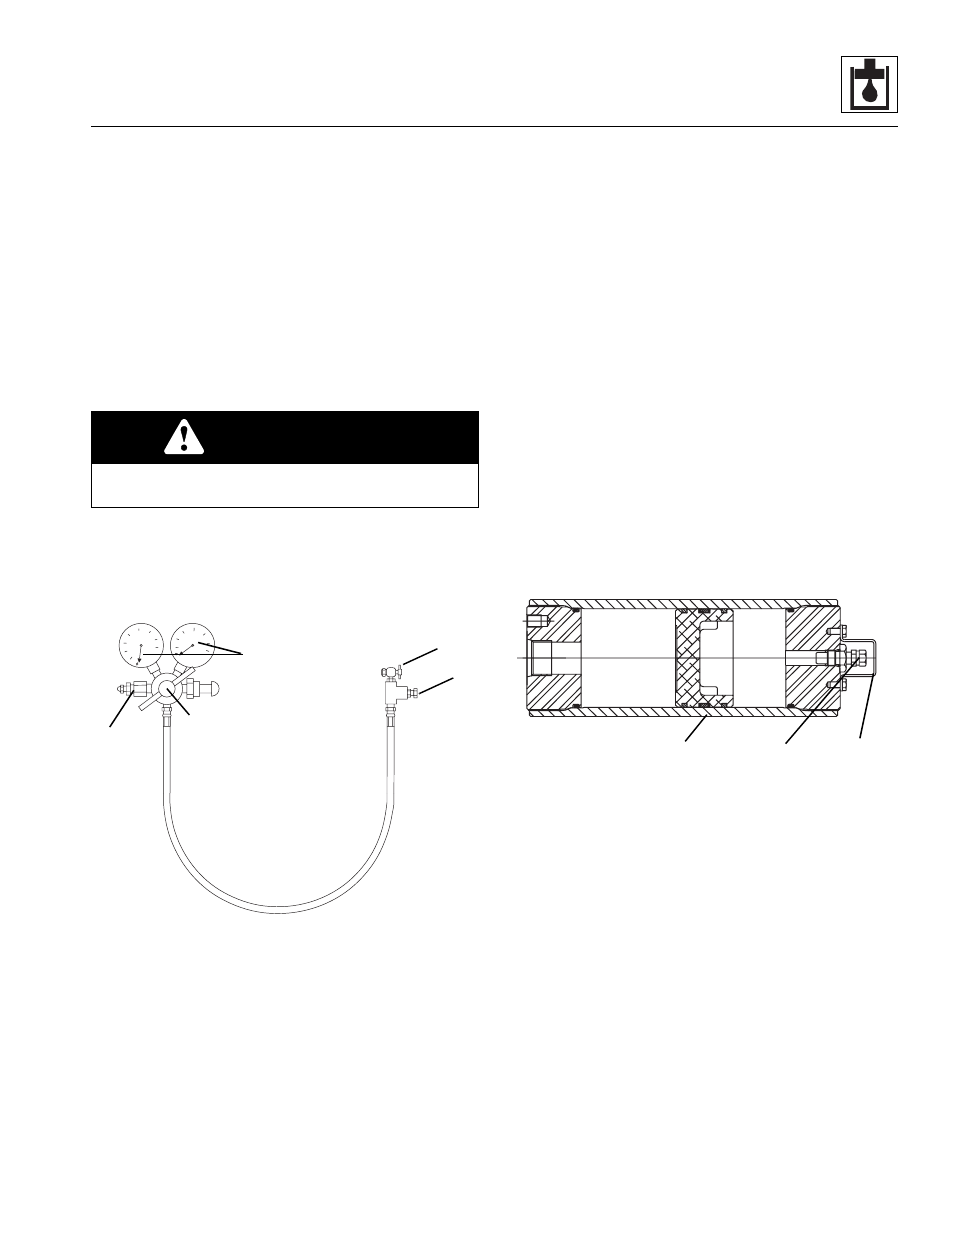
• Use the Accumulator Fill Kit (JLG P/N 10268992)
when charging and checking the pressure in the
accumulator. Refer to the illustration below.
Note: If equipment other than the above listed is used,
make sure it is compatible with the gas valve assembly.
1. Park the machine on a firm, level surface, level the
machine, fully retract the boom, lower the boom,
place the transmission control lever in (N) NEUTRAL,
engage the park brake and shut the engine OFF.
2. Place a Do Not Operate Tag on both the ignition key
switch and the steering wheel, stating that the
machine should not be operated.
3. Open the engine cover. Allow the system fluids to
cool.
Note: Attaching the charging assembly to the
accumulator will relieve any residual pressure in the
accumulator.
4. If applicable, discharge all the oil from the
accumulator by placing a suitable container under
the hydraulic hose connection on the accumulator
and removing the hose attached to the accumulator
The piston must bottom against the hydraulic end
cap. Transfer the used hydraulic oil into a suitable
covered container, and label as "Used Oil". Dispose
of used oil at an approved recycling facility. Clean
and reinstall the drain plug.
5. Wipe up any hydraulic fluid spillage in, on, near and
around the machine and the work area.
6. Make sure nitrogen supply is shut off.
7. Attach the nitrogen fitting adapter (5) on the charging
assembly to a proper hose attached to the nitrogen
bottle.
8. Remove the gas valve guard (8) and gas valve cap
from the accumulator (9).
9. Back the handle (4) all the way out (counter-
clockwise) before attaching the fill kit assembly to
accumulator gas valve (10).
10. Close the bleed valve (7).
11. Making sure not to loop or twist the hose, attach the
gas valve on the fill kit (3) to the gas valve on the
accumulator.
12. Slowly turn the handle until the regulator (6) starts
showing the pressure in the accumulator. Do not turn
the handle all the way down, as it will damage the
valve core.
13. Crack open the nitrogen bottle valve and slowly fill
the accumulator. Shut off when gauge indicates 600
psi (41 bar).
14. Let the pre-charge set for 10 to 15 minutes. This will
allow the gas temperature to stabilize. If the desired
pre-charge is exceeded, close the nitrogen bottle
WARNING
Use an inert gas such as nitrogen for pre-charging the
piston accumulator. DO NOT use oxygen or shop air.
MAP0720
3
5
6
4
7
MAP0200
8
10
9