Allied Telesis AT-S25 User Manual
Page 74
74
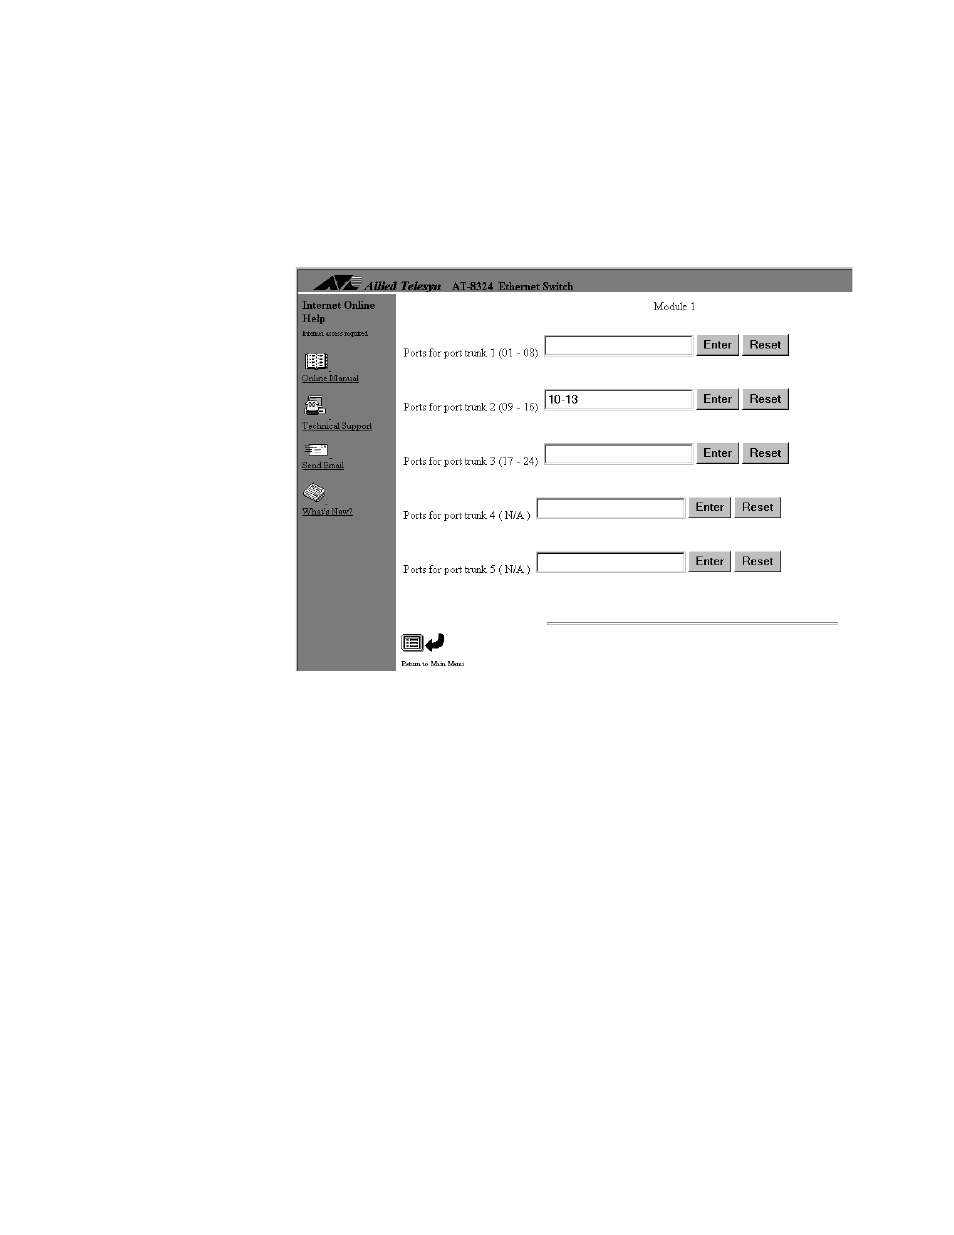
4. Select the port group in which to create the port trunk and enter the
port numbers for the trunk. You can use either of the following
formats to enter the port numbers:
Single, consecutive ports (for example, 1,2)
Range of ports (for example, 10-13)
Figure 29 is an example. In the example, ports 10 through 13 in
port group 2 have been designed as a port trunk.
Figure 29 Example of Two Port Trunks
5. Press
The port trunk is activated on the switch.
6. If desired, repeat steps 4 and 5 to create another port trunk in another
port group on the switch
7. Return to the Main Menu.
8. To confirm the creation of a port trunk, select Port status and
configuration to display a list of ports. All ports in a port trunk are
automatically assigned the name “Trunk” and a number to help you
identify the individual port trunks on a switch.
9. Return to the Main Menu.
10. Connect the port trunks on the switch to the end device, being sure
to follow the guidelines discussed earlier in this chapter.
- AT-GS908M (54 pages)
- AT-x230-10GP (80 pages)
- AT-GS950/48PS (64 pages)
- AT-GS950/10PS (386 pages)
- AT-GS950/16PS (386 pages)
- AT-GS950/48PS (386 pages)
- AT-9000 Series (258 pages)
- AT-9000 Series (1480 pages)
- IE200 Series (70 pages)
- AT-GS950/48 (60 pages)
- AT-GS950/48 (410 pages)
- AT-GS950/8 (52 pages)
- AT-GS950/48 (378 pages)
- SwitchBlade x8106 (322 pages)
- SwitchBlade x8112 (322 pages)
- SwitchBlade x8106 (240 pages)
- SwitchBlade x8112 (240 pages)
- AT-TQ Series (172 pages)
- AlliedWare Plus Operating System Version 5.4.4C (x310-26FT,x310-26FP,x310-50FT,x310-50FP) (2220 pages)
- FS970M Series (106 pages)
- 8100L Series (116 pages)
- 8100S Series (140 pages)
- x310 Series (116 pages)
- x310 Series (120 pages)
- AT-GS950/24 (404 pages)
- AT-GS950/24 (366 pages)
- AT-GS950/16 (44 pages)
- AT-GS950/16 (404 pages)
- AT-GS950/16 (364 pages)
- AT-GS950/8 (364 pages)
- AT-GS950/8 (52 pages)
- AT-GS950/8 (404 pages)
- AT-8100 Series (330 pages)
- AT-8100 Series (1962 pages)
- AT-FS970M Series (330 pages)
- AT-FS970M Series (1938 pages)
- SwitchBlade x3112 (294 pages)
- SwitchBlade x3106 (288 pages)
- SwitchBlade x3106 (260 pages)
- SwitchBlade x3112 (222 pages)
- AT-S95 CLI (AT-8000GS Series) (397 pages)
- AT-S94 CLI (AT-8000S Series) (402 pages)
- AT-IMC1000T/SFP (23 pages)
- AT-IMC1000TP/SFP (24 pages)
- AT-SBx3106WMB (44 pages)