From edge display, Initial setup, Nitial – Ag Leader ParaDyme Operation Guide User Manual
Page 12: Etup
10
Ag Leader Integra and Versa Firmware Version 4.3 / Edge Firmware Version 5.1
3. Under the Guidance/Steering drop-down menu, select
ParaDyme Steering.
4. The Liability Notice appears. Press the green check mark
button to accept.
5. Press the Setup (wrench) button on the Setup Screen to
begin ParaDyme operations.
Note: In order for the User Display's Run Time Environment to be active, you must complete the initial configuration
steps as described in the Setup chapter of your display’s User Manual.
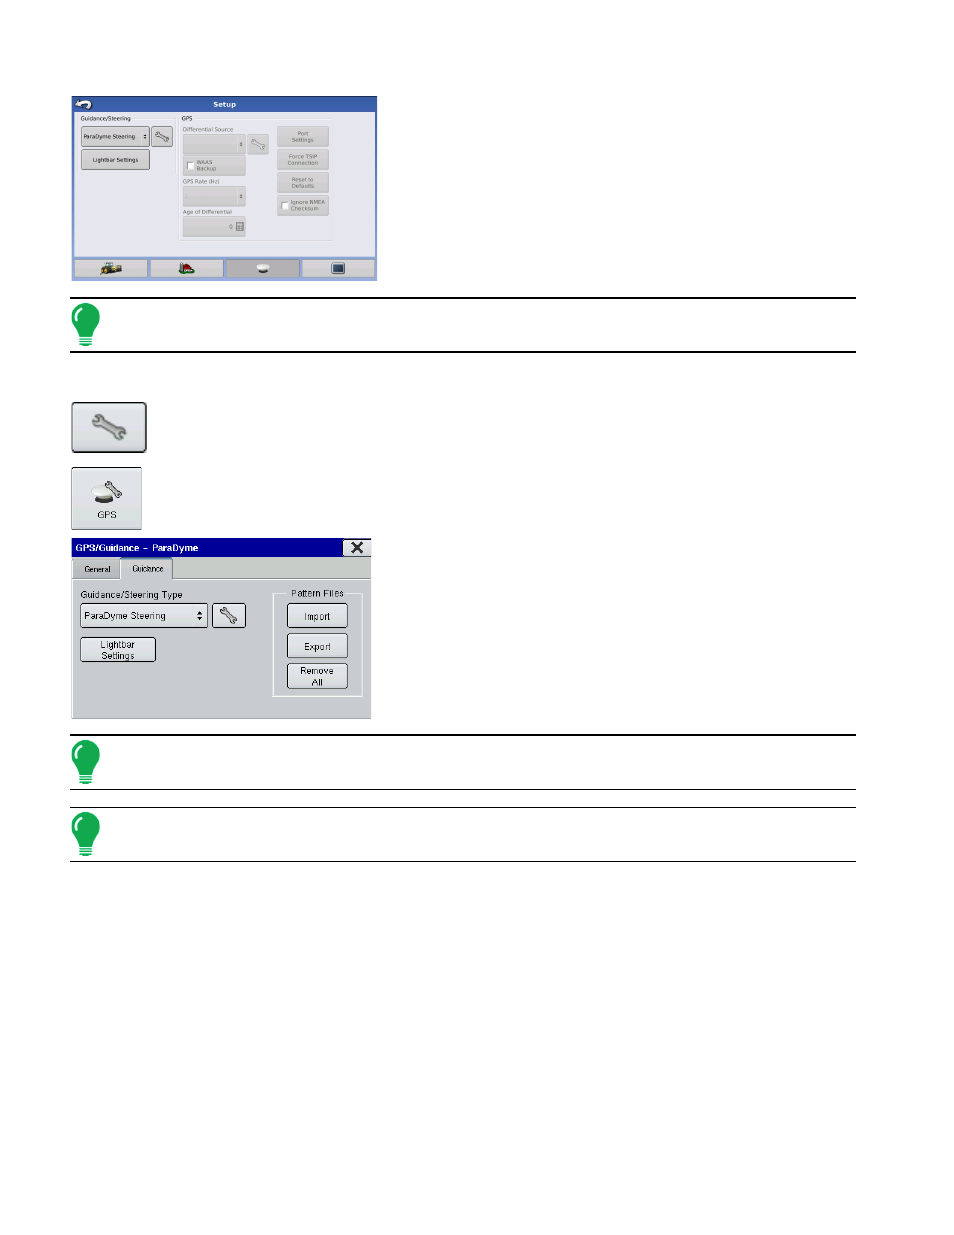
From EDGE Display
1. From the Home Screen, press the Setup (wrench) button to open the Setup screen.
2. At the Setup Screen, press the GPS Guidance icon, as shown at left.
3. Navigate to the Guidance Tab, as shown below.
4. Underneath the Guidance/Steering Type drop-down menu,
select ParaDyme Steering.
5. The Liability Notice appears. Press the green check mark
button to accept.
6. Press the Setup (wrench) button to begin ParaDyme
operations.
Note: In order for the User Display's Run Time Environment to be active, you must complete the initial configuration
steps as described in the Setup chapter of your display’s User Manual.
Note:
In order for the User Display's Run Time Environment to be active, you must complete the
initial configuration steps as described in the Setup chapter.
I
NITIAL
S
ETUP
The steps listed below give an overview of procedures that must be successfully completed in order to
ensure proper ParaDyme system operation. See
“Using the Vehicle Menu” on page 12
for details.
1. Configure the radio channel to match your Base Station and configure your GPS options. See
2. Create a new vehicle. See
3. Calibrate the vehicle using the Calibration Wizard. See
4. The system will perform a GPS survey, and then the vehicle will be ready to AutoSteer.