Service, 3 exchange of transducers – KROHNE ALTOSONIC V12 EN User Manual
Page 74
8
SERVICE
74
ALTOSONIC V12
www.krohne.com
04/2013 - 4002643502 - MA ALTOSONIC V12 R02 en
8.3 Exchange of transducers
Transducers are not likely to break down. In the unlikely situation that a transducer fails, the
transducer has to be replaced. Although not strictly required, it is common practice to replace
the other transducer on the same acoustic path at the same time.
If possible, depressurise the flowmeter. If this is not possible, use the extraction tool to remove
the transducer under pressure (maximum 150 bar(g)).
8.4 Exchange of transducers - Depressurised condition
Switch off the power supply to the meter and wait at least 1 minute before opening the Ex-d
enclosure. Advisable is also to use a gas detector in detecting possible hazardous environmental
conditions. Also during raining conditions make sure no water/rain can penetrate in the
electronic housing, same accounts for dusty environments.
It is preferred to disconnect power supply from the equipment by unscrewing the right lid of the
electronic housing . After disconnecting close lid fully and attach labels to switching gear to
prevent from unwanted switching on again.
The transducers are installed and fixed mechanically at a very precise manufactured position
inside the meter body. To access the transducer position that needs to be replaced use the
following instructions.
WARNING!
The ALTOSONIC V12 is a pressurised UFM. Do not remove transducer, bolts or other pressurised
parts without the garantuee that the meter is fully depressurised.
DANGER!
Always read instructions for safe handling of the equipment and installations first.
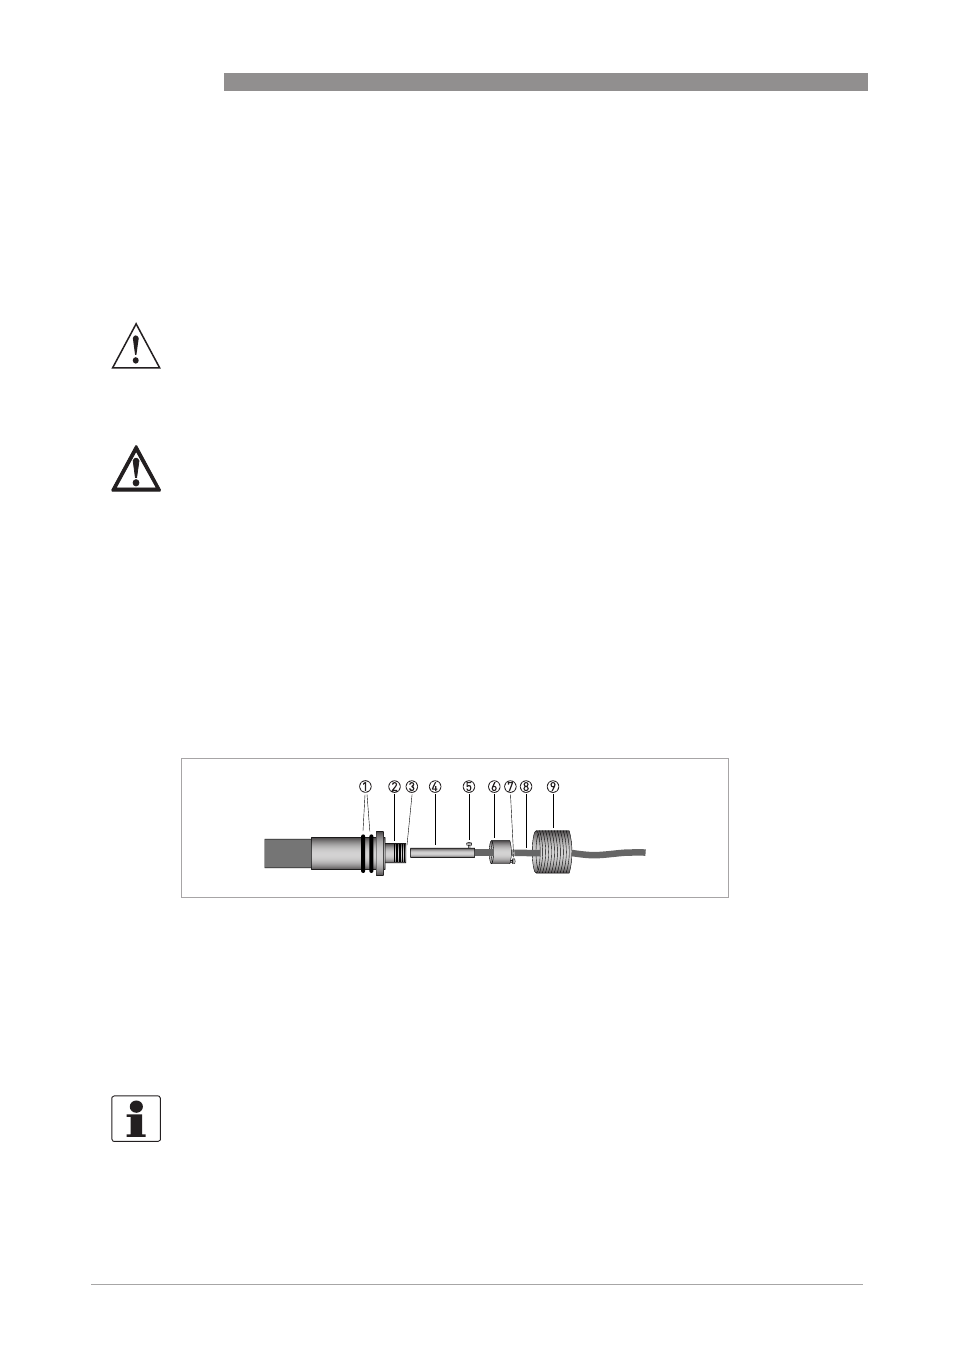
Overview installation of transducer
Figure 8-1: Sensor assembly
1 Double O-ring
2 Slot in the socket
3 Ex-d socket
4 Ex-d plug
5 Alignment pin
6 Cap
7 Securing screw M2
8 Coaxial wire
9 Transducer nut
INFORMATION!
Different types of transducers can be used!