Select a timecode source for timecode burn-in – Grass Valley PVS Series System Guide v.4.0 Dec 10 200 User Manual
Page 188
Chapter 7
Modifying a Channel: Timecode Settings
188
Profile XP System Guide
July 27, 2001
Select a timecode source for timecode burn-in
After enabling the timecode burn-in on the optional Video Monitor board, you must
select a timecode source for the Video Monitor output using Channel Configuration
dialog box. (For information on enabling the timecode burn-in, see “Enabling Video
Monitor timecode burn-in” on page 144.)
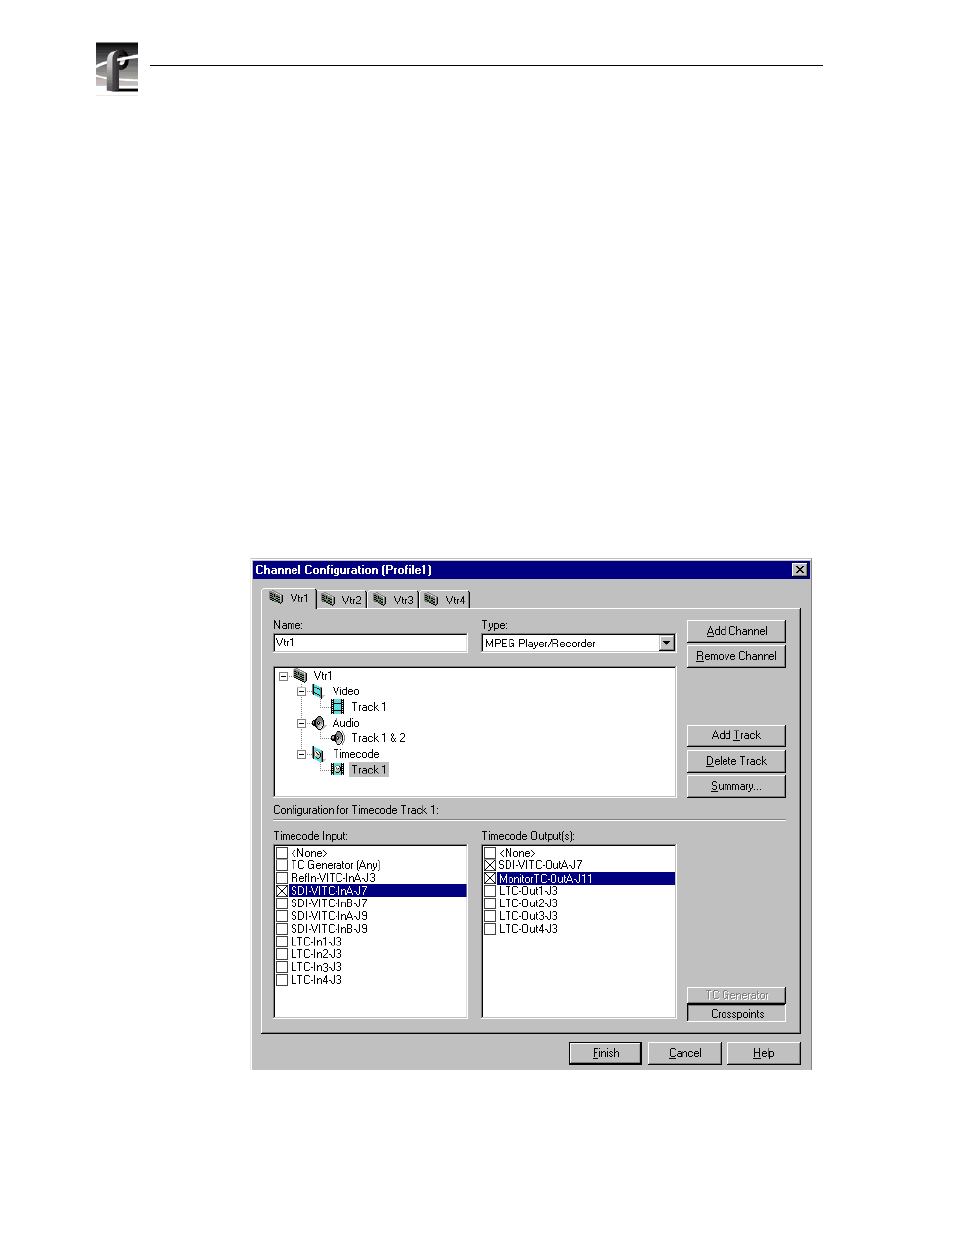
To select timecode source for the Video Monitor burn-in:
1. Select Channel Configuration in the Configuration Manager window.
2. Click the tab for the channel you want to configure.
3. Click on a timecode track in the configuration tree, or click
Add Track
to add a new
one.
4. Click the
Crosspoints
button, then select the Video Monitor output listed in the
Timecode Output list.
NOTE: The Video Monitor is displayed in the Timecode Output list when it is
assigned to the channel as a video output. For example, MonitorTC-OutA-J11, is
listed in the following figure because Monitor-OutA-J11 is selected as a video
output for the channel. Refer to “Selecting the video I/Os used by a channel” on
page 117 for instructions on selecting the video outputs for a channel.
5. Click
Finish
to save your settings.