Receive, Stop, Menu directory – Xerox 7024 User Manual
Page 9: Quick reference guide
Attention! The text in this document has been recognized automatically. To view the original document, you can use the "Original mode".
Quick Reference Guide
Send _________________________
1. Load originals face down.
2. Dial telephone number
using one of the following
methods;
Keypad Dial:
1. Enter telephone number
and press [Start].
One Touch Dial:
1. Press one touch key.
Speed dial:
1. Press [Speed Dial).
2. Enter 2-digit speed dial
number and press [Start].
Redial:
1. Press [Redial] and [Start].
Confirmation Report________
Press [Send Confirm] to verify
each successful transmission.
To print automatically, refer to
Menu 09, Feature 03, Set
Confirm Report.
Receive
Automatic:
1.
Terminal answers and
receives document.
Manual:
1. Lift handset and listen for
tones. Remove documents
from ADF.
2. Press [Start] and replace the
handset.
Cancel a Job__________________
Communicating with 1 terminal:
1. Press [Stop].
Communicating with multiple
terminals:
1. Press [Speed Dial] and
[Stop].
2. Cancel pending job from
memory.
Cancel pending job from memory:
1. Print Pending Job List.
2. Erase Pending Job.
Copy
One Copy (No reduction):
1. Load originals face down.
2. Press [Copy] and [Start].
Copies (Auto reduction):
1. Load originals face down.
2. Press [Copy].
3. Enter number of copies.
4. Press [Start].
Copies (Selected reduction):
1. Load originals face down.
2. Press [Copy].
3. Enter number of copies.
4. Press [Enter].
5. Press [Select] for desired
reduction rate.
6. Press [Start].
Group Number Setup________
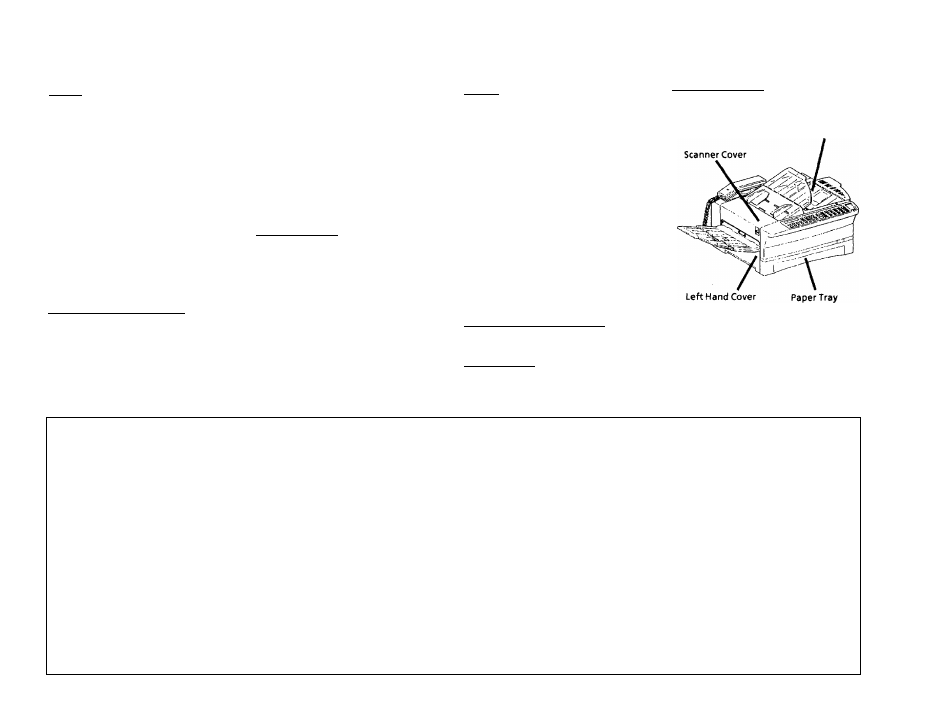
Clearing Jams
See Dial Directory.
Group Dial
1. Open the scanner, printer or
left hand cover.
Printer Cover
2. Remove jammed paper.
3. Check paper tray.
4. Close cover.
See Delayed Group Send.
Menu Directory
TO ACCESS MENUS
02 SENDOPTIONS2
04 CALL RESPONSE
09 USER SETTINGS
18 Set # of Redials
AND FEATURES:
1 Delayed Send
Set TAD Time
01 Set Polled Mode
19 Redial Interval
1. Press [Menu].
2 Group Send/
05 ONE-TOUCH SETUP
02 Set Auto Rev. Time
20 Set Date & Time
2. Enter menu number
Delayed Group Send
One-Touch 1 to 24
03 Set Confirm Report
21 Set Local ID/Name
(e.g. press [0], [9] for
3 Relay Send
06 SPEED DIAL SETUP
04 Set Scanner Width
10 PROGRAM ONE TOUCH
User Settings.)
4 Send Secure Mail
Speed Dial 01 to 55
05 Set Halftone
1 Enter One Touch
3. Press [Enter].
03 POLLING OPTIONS
07 PRINT REPORTS
06 Set Res Default
2 Program One Touch
4.
Enter feature number
1 Polling/
1 Activity Report
07 Set Contrast
(e.g. press [0], [3] for
Delayed Polling
2 Options Report
08 Set Time Pause
Set Confirm Report.)
2 Multi-Pol ling
3 Dial Directory Report
09 Set Number Rings
NOTE: To select "t
5. Press [Enter].
3 Store for Polling
08 PENDING JOBS
10 Set 2nd Telephone
Store for Polling, press
(To select the following
1 Pending Job List
11 Set Ans Machine
[Enter] when "3 Store
features, see Note.)
2 Print Pending Doc.
12 Activity Report
for Polling" is
01 SEND OPTIONS1
1 Store for Polling
3 Erase Pending Job
13 Set Rev Reduction
displayed.
1 Long Original Mode
2 Erase Polling Doc.
14 Block Junk Fax
2 Secure Send Mode
3 Print Polling Doc.
15 Set ECM Mode
3 Forced 4800 Mode
16 Set Copy Protect
17 Set Dialling Type