Set rs-232 settings, To print rs-232 settings (menu 11, feature 1), Set rs-232 settings -13 – Xerox 7024 User Manual
Page 131: To print rs-232 settings (menu 11, feature 1) -13
Attention! The text in this document has been recognized automatically. To view the original document, you can use the "Original mode".
CUSTOM FEATURES AND SETTINGS
Set RS-232 settings
The RS-232 interface option allows your terminal to be used as a
printer for asynchronous ASCII computers, like your personal
computer. The terminal cannot receive or transmit documents
when it is being used as a printer.^
Use the procedures in this section to change the baud rate,
parity, length of stop bit and character bit.
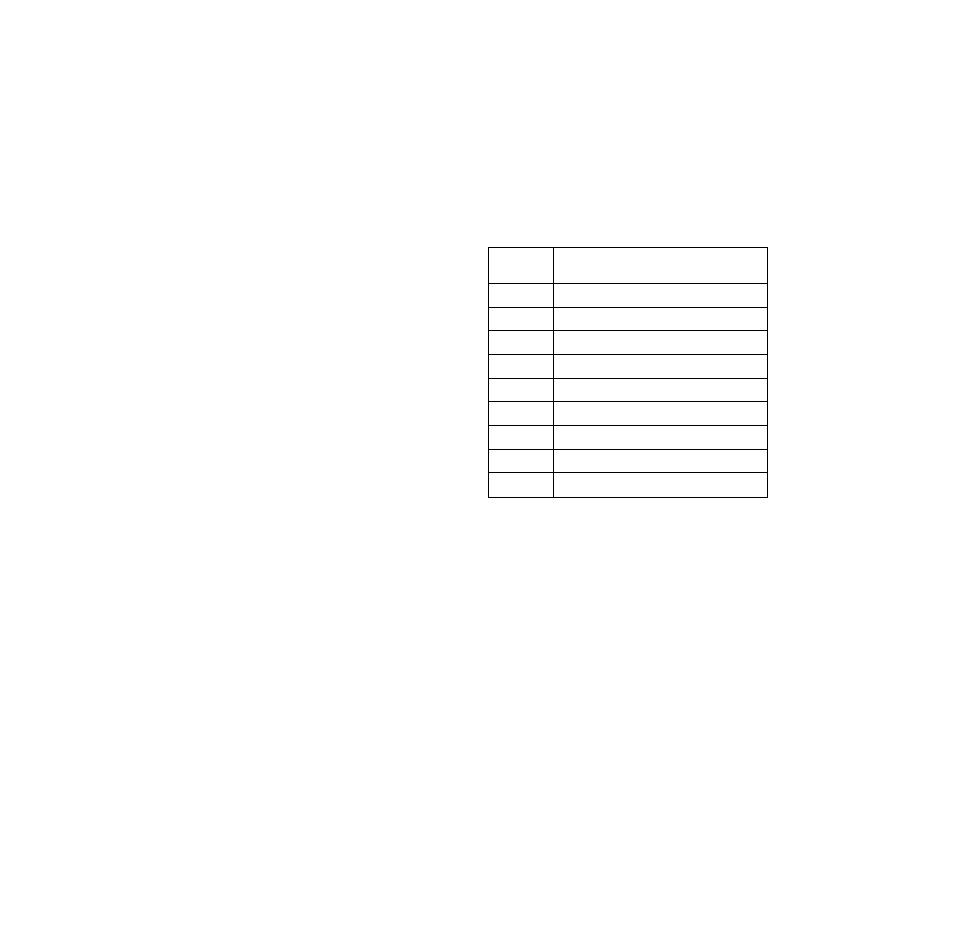
The following is the pin assignment for the terminal.
Pin No.
Signal name
1
Frame Ground (FG)
2
Transmit data (TXD)
3
Receive data (RXD)
4
Request to send (RTS)
5
Clear to send (CTS)
6
Data set ready (DSR)
7
Signal Ground (S.G.)
8
Data carrier detect (DCD)
20
Data terminal ready (DTR)
To print RS-232 settings (Menu 11, Feature 1)
1. Press [Menu] to select the menu table.
l.SEND OPTIONSl
01-11
SELECT/ENTER
B
2. Press [1 ], [1 ] to select menu 11
11.RS-232
01-11
SELECT/ENTER
3. Press [Enter] to select RS-232 PRINT.
1. RS-232 PRINT
1-2
SELECT/START
4. Press [Start].
RS-232 PRINT
PRINTING
1. This feature is available only if you have a RS-232 board installed in your terminal.
TELECOPIER 7024 USER HANDBOOK
7-13