Panel layout and connectors, Front panel – Elektron Octatrack User Manual
Page 16
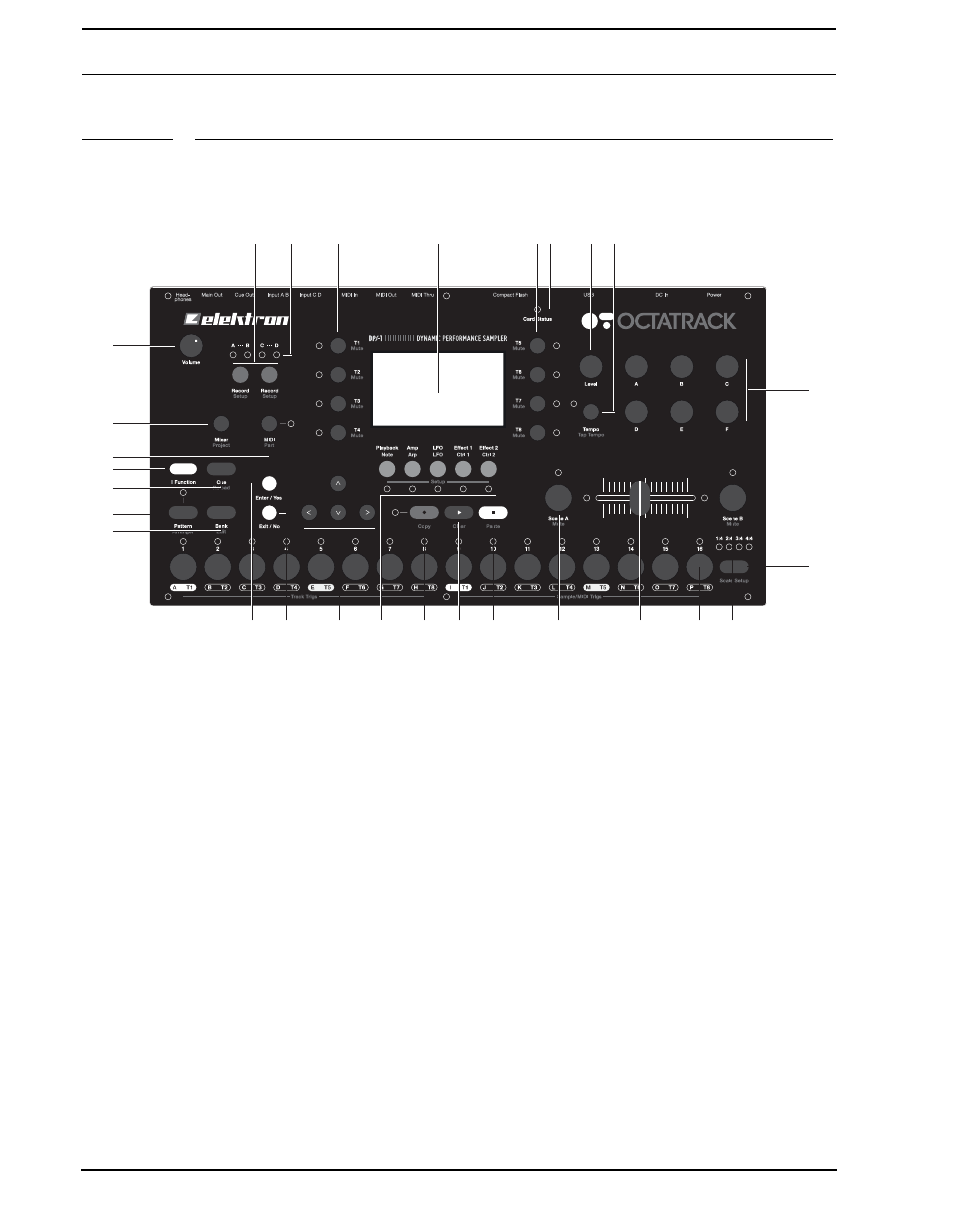
PANEL LAYOUT AND CONNECTORS
4
PANEL LAYOUT AND CONNECTORS
FRONT PANEL
The Octatrack front panel. For a more comprehensive list of key combinations, please see
“SUMMARY OF BUTTON COMBINATIONS” on page 142.
1.
HEADPHONES VOLUME CONTROL sets the volume for the stereo headphones jack.
2.
[AUDIO RECORD] buttons are used for real-time sampling through the external inputs.
There is one [AUDIO RECORD] button per audio input pair. The functionality of these
button change if a Pickup machine is assigned to the active track.
3.
The
nal inputs. When in the RECORD SETUP menu these LEDs also indicate the source
selection for recorder trigs.
4.
[TRACK] buttons. Press a [TRACK] button to move the focus to the corresponding
track. Pressing a [TRACK] button + an [AUDIO RECORD] button will record audio to
the recorder of the selected track. [FUNCTION] + [TRACK] will mute the selected track.
[CUE] + [TRACK] will cue the selected track. The
5.
The LCD graphical interface.
6.
7.
The LEVEL encoder sets the overall volume level of the active track. [FUNCTION] +
LEVEL controls the main output volume.
8.
[TEMPO] key. Brings up the TEMPO menu. The current tempo is always indicated by
the flashing speed of the
TION] and then repeatedly tapping [TEMPO].
9.
DATA ENTRY knobs. Used for tweaking parameters.