Removing entries from the exclude list – Storix Software SBAdmin User Guide User Manual
Page 71
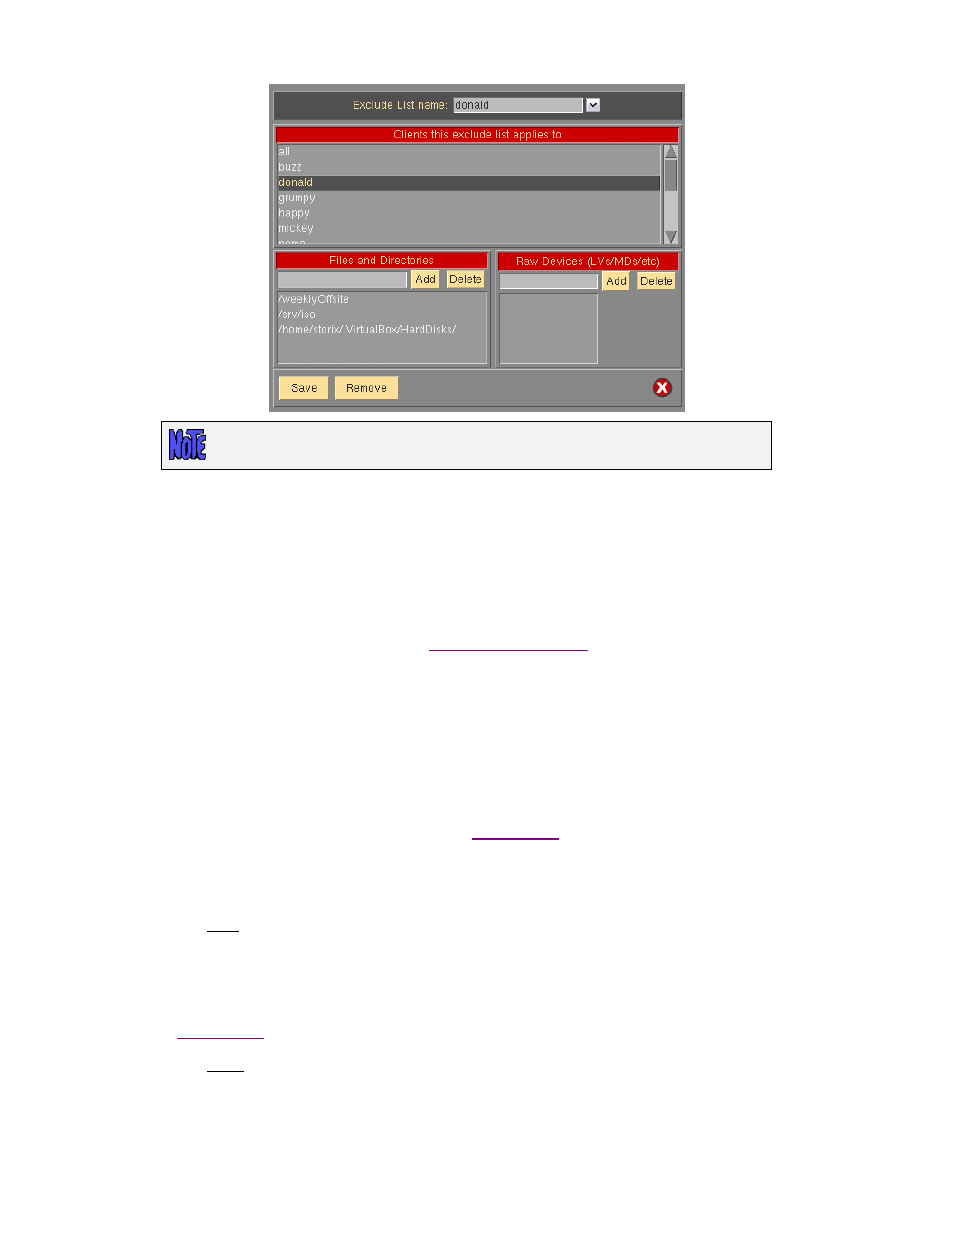
The Clients listbox will only appear when using
Network Edition
and
TSM Edition
.
You may enter a new exclude list name in the entry field at the top of the screen, or select an existing exclude
list name using the arrow button to the left of the entry field. When doing so, the current settings for the selected
exclude list, if any, are displayed.
In the first (Clients) listbox, you may select “all” to apply this exclude list to all clients (when assigned to a
backup job), or select individual clients the exclude list should apply to. Note that, if this exclude list does not
apply to a particular client, that exclude list will not appear as a selectable option when configuring a backup
job. If, however, the exclude list is applied to a client, this does not automatically apply to all jobs. You must
also select to use the exclude list (or lists) when
.
To exclude files or directories, type the file or directory name (or wildcard string) in the entry field under the
Files and Directories heading. To add a logical volume, partition (Linux), slices and ZFS volumes (Solaris) or
meta-disk (Linux/Solaris) to the exclude list, enter the device name (do not prefix with /dev) in the entry field
under the appropriate heading. Note that the heading will only show the device types that are supported for the
various client operating system types enabled.
Press
Enter
or select the
Add
button next to the corresponding entry field to add the item to the list.
When all selections have been made, press the
Save
button at the bottom of the screen to save the entries and
clear the entries. To undo all changes made, press the
at the bottom.
Removing Entries from the Exclude List
To remove an entry from the exclude list, display the exclude list screen by selecting
Configure
!Exclude Lists
from the menu bar and selecting the exclude list to change. Then, to remove a file or directory entry, select the
item in the Files and Directories listbox and press the
Remove
button next to the file or directory entry field.
Likewise, to remove a logical volume from the list, select the item in the Logical Volumes listbox and press the
Remove
button next to the logical volume entry field. When you have removed all desired selections, press the
Save
button at the bottom of the screen to save the remaining entries and exit. To undo all changes made,
press the
at the bottom.
To remove an entire exclude list, select
Configure
!Exclude Lists
from the menu bar, enter or select the
exclude list at the top of the screen, then press the
Remove
button at the bottom of the screen. Note that, when
Storix System Backup Administrator
71
Version 8.2 User Guide