Backup devices, Add a backup device – Storix Software SBAdmin User Guide User Manual
Page 46
Storix System Backup Administrator
46
Version 8.2 User Guide
8. Backup Devices
Before any backups may be performed, you must define the backup devices to be used on the local system
(Workstation Edition) or on each server (Network Edition). This includes both tape devices (standalone drives,
libraries or autoloaders) as well as backup directories on disk.
A backup “device” can be named anything you wish, but typically a single tape drive would be simply called by
its physical device name (i.e. “st0” or “rmt0”) and a single directory device would be called the directory itself
(i.e. /backups). You may also wish to name a device “Tape1” or “SharedDirectory”, etc. The name that you
choose will be how the device will appear in all of the selections, such as when selecting the device to use
when configuring a
Add a Backup Device
To add a new device, select one of the following:
1.
Configure
!Backup Devices
from the menu bar.
2. When
Clients, Servers and Devices are shown in the
(Network Edition), select a server,
then press the
Add
button directly below the Devices pane.
3.
Configure
!Servers
(Network Edition), select a device from the Device listbox, then press the
Add
button below.
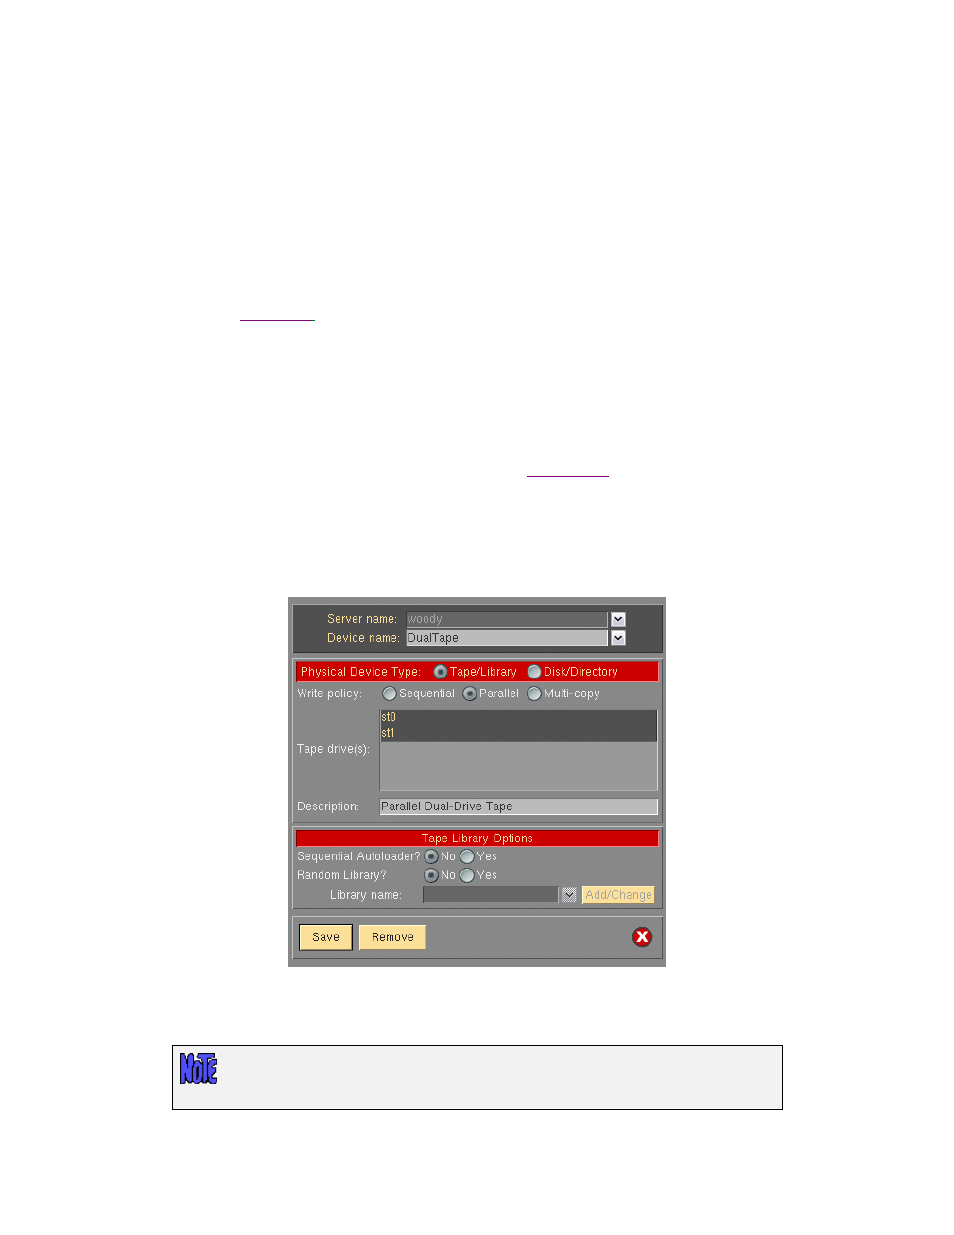
After doing so, a screen such as the following will be displayed:
From this window, you must first select the server (Network Edition). Then, to add a new device, type a device
name in the Device Name field. To change or remove an existing device, select it using the arrow button to the
right.
Be sure to type a name that will easily identify the device. When using a single tape
drive or directory, the device name (i.e. “st0” or “rmt0”) or directory name itself (i.e.
“/backups/shared”) will usually suffice.