Welch Allyn Acuity and Mobile Acuity LT Central Monitoring Systems - User Manual User Manual
Page 44
40
Chapter 3 Admit and begin monitoring
Welch Allyn Acuity Central Monitoring System
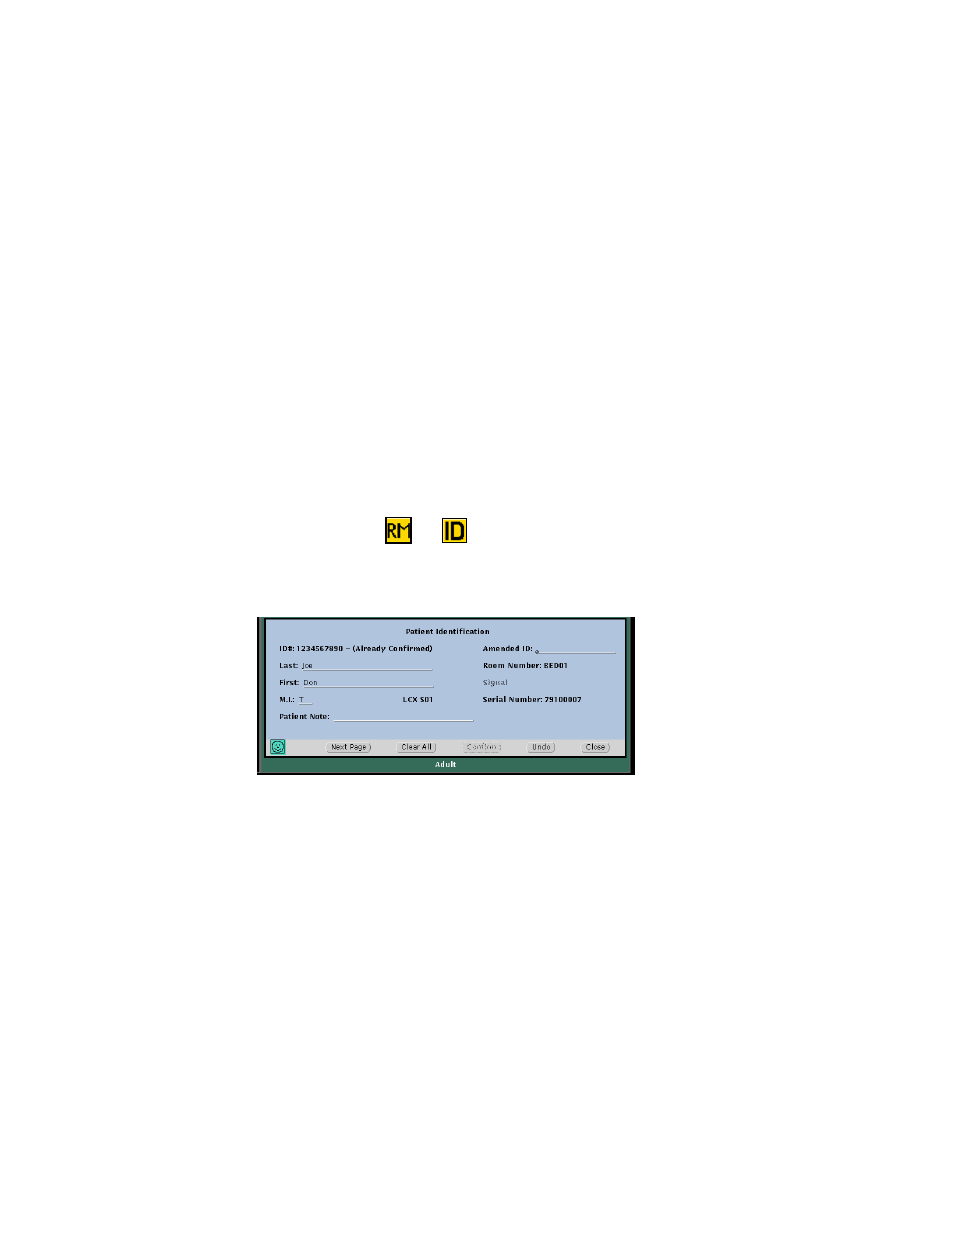
Enter and confirm a patient’s ID or room at the central
station
A patient’s Acuity System window borders and icons are in a yellow (alert) state if the
patient’s ID and room number have not been confirmed.
You can scan or type missing patient information and confirm the information at the
central station in the Patient ID Setup window.
Once the information is confirmed, the patient’s window borders and icons change to the
green, “patient monitoring OK” state. If the borders and icons do not turn green, another
alert or patient alarm is occurring.
To enter patient information
At the Acuity Central Station screen, hardwired monitors are identified by room number,
and wireless monitors are identified by their serial numbers.
1.
Click the patient’s
or
icon in the patient’s Waveform Window or on the
map.
The Patient ID Setup windows appear.
2.
Scan or type the patient’s ID number in the ID# field.
3.
Press the Tab or Enter key on your keyboard to advance a line.
If you are prompted, this patient ID was pre-entered via the hospital central
information system, the Acuity Patient List window, a wireless monitor, or a mobile
device running AcuityLink Clinician Notifier software.
If the prompt information is correct, click Accept and other information fills in.
4.
If necessary, scan or type the patient’s name, and press Tab or Enter to advance.
5.
If necessary, scan or type the room number.
Up to five characters, including numbers, letters and dashes, are accepted.
6.
Check the listed patient monitor model and serial number to ensure that they indicate
your patient’s monitor.
Note
The Acuity System does not accept these scanned items: Double quotation
marks, middle names (one middle initial is accepted) and spaces and periods.
Patient ID window 1