Kant3 or kat3, right side and rear panels – Elecraft K3 Assembly Manual User Manual
Page 21
20
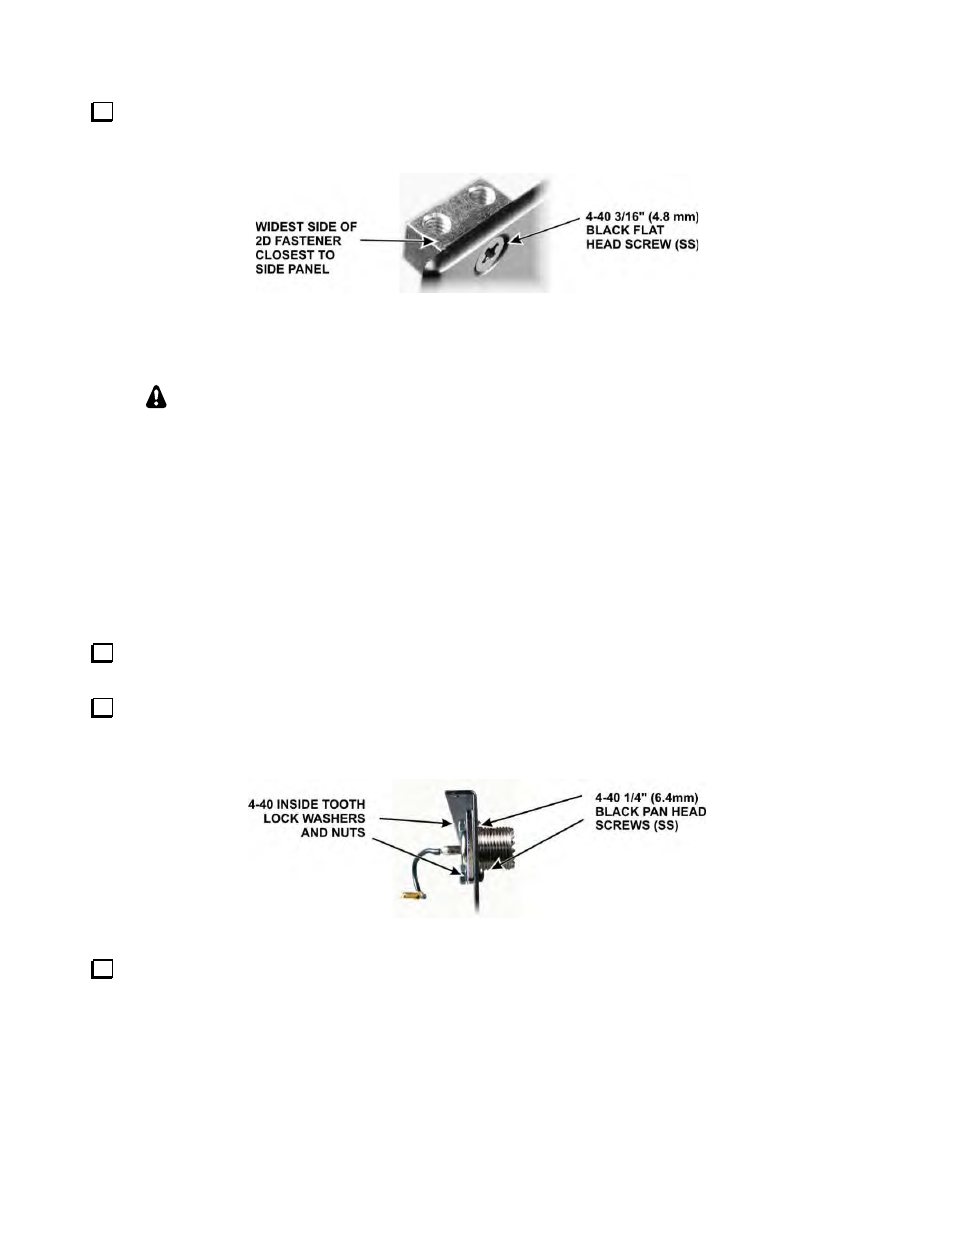
Mount a 2D fastener at the top back corner of the left side panel (the one you just installed) with a 4-40
3/16” (4.8 mm) black flat head screw (SS) as shown in Figure 17. Do not use washers. Be sure the 2D fastener
is oriented correctly as shown in the figure.
Figure 17. Installing Left Side Panel 2D Fastener.
KANT3 or KAT3, Right Side and Rear Panels
If you purchased a KAT3 with your kit, you did not get a KANT3 board with your kit.
For more information, see the KANT3 AND KAT3 Circuit Description below.
KANT3 or KAT3 Description
The basic K3/10 includes a KANT3 antenna input module. If you’ve ordered a KAT3 antenna tuner, the
KANT3 is not required and will not be supplied with the kit. In either case, the module plugs into the RF board
at the back-right corner. Both the KANT3 and KAT3 provide antenna surge protection, as well as resistors for
bleeding off static DC charge. The KAT3 provides a wide-range, switchable C-in/C-out L-network. See Theory
of Operation, KANT3 and KAT3, in the K3 Owner’s Manual for more details.
Installing KANT3 or KAT3 Antenna Connectors
Locate the rear panel and check the inside for any masking tape still covering screw holes. If found, peel it
off.
Mount the SO239 connector in the ANT1 position on the rear panel using two 4-40 1/4” (6.4 mm) black
pan head screws (SS), two 4-40 inside tooth lock washers and two 4-40 nuts as shown in Figure 18. The flange
of the SO239 connector is on the inside (unpainted side) of the rear panel.
Figure 18. Mounting the ANT1 Connector.
If you are installing the KAT3, install the second SO239 connector in the ANT2 position on the rear panel
using two 4-40 1/4” (6.4 mm) black pan head screws (SS), two 4-40 inside tooth lock washers and two 4-40 nuts
just as you did for the ANT1 connector. Set the rear panel aside for now.
Installing KRX3 AUX RF (ANT) Connector
If you do not have the KRX3 Subreceiver option kit on hand, skip this section and go directly to Preparing
Right Side Panel for Installation below to continue assembly.