6 charging circuit, 1 alternator – SkyTrak 6036 Service Manual User Manual
Page 282
Section 10.
Electrical System
10-20
Model 6036/6036T S/N 9B0500 thru 14833
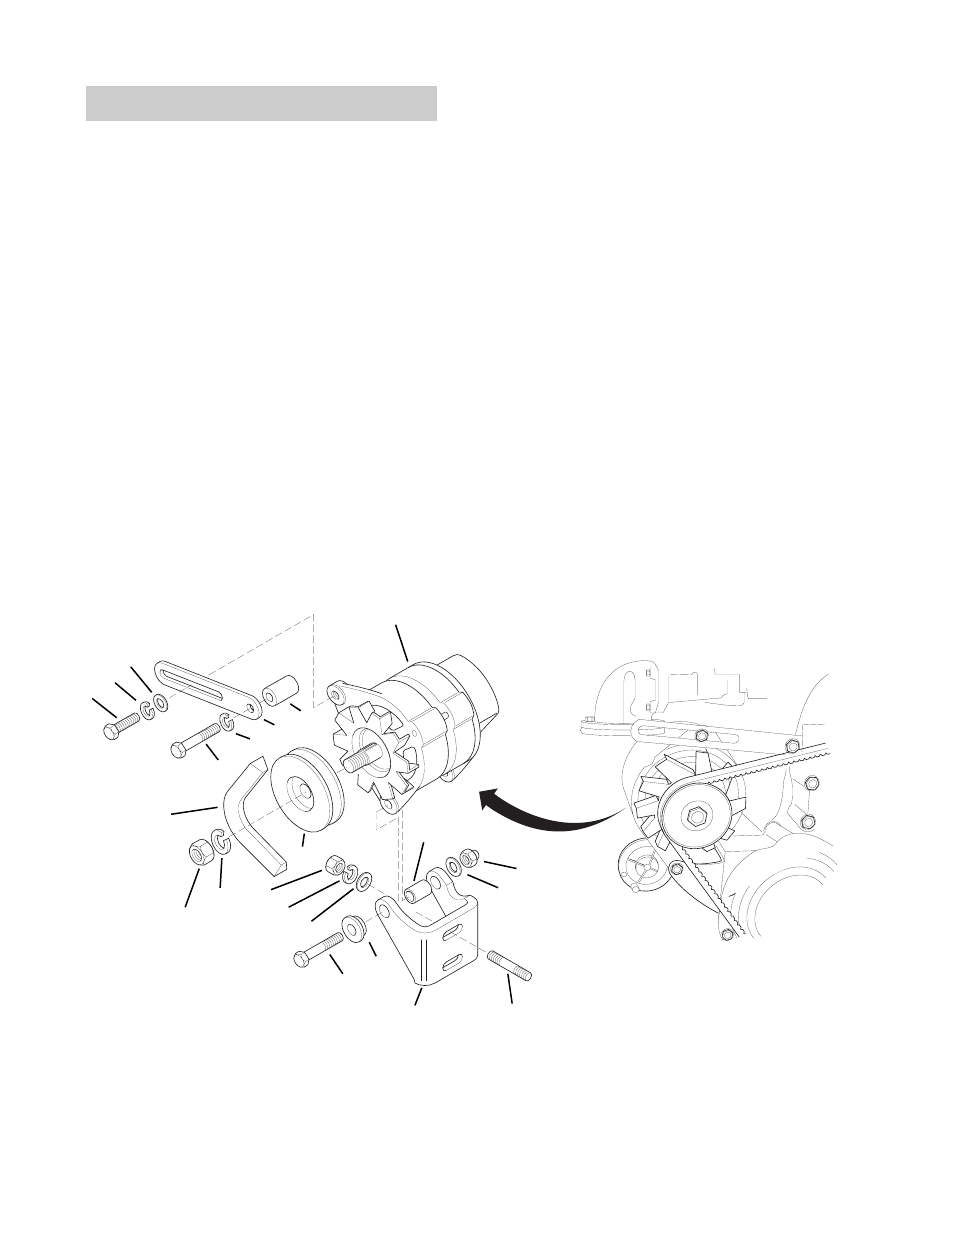
20. Belt
21. Pulley
22. Alternator
1.
Screw
2.
Lock Washer
3.
Washer
16. Bracket
17. Stud
18. Hex Nut
19. Washer
12. Sleeve
13. Nut
14. Washer
15. Washer
8.
Self-locking Nut
9.
Washer
10. Screw
11. Sleeve
4.
Bolt
5.
Lock Washer
6.
Lever
7.
Spacer
Fig. 10.13 Alternator Removal - Perkins Engines
1
5
4
6
7
8
9
12
11
10
13
14
15
16
17
18
19
20
21
3
2
22
MA1111
a.
Alternator Removal - Perkins
1.
Disconnect negative (–) cable (2, Fig. 10.16)
from batteries.
2.
Remove screw (1, Fig. 10.13), lock washer
(2), and washer (3) from tapped hole in
alternator.
3.
Remove screw (4), lock washer (5), lever (6),
and spacer (7) from tapped hole in engine.
4.
While supporting the weight of the alternator
(22), remove self-locking nut (8), washer (9),
screw (10), sleeve (11), and sleeve (12); lift
the alternator from the forklift and carry it to a
clean work bench.
5.
If necessary, remove hex nuts (13), washers
(14), washers (15), bracket (16), and stud
(17).
6.
If necessary, remove hex nut (18), washer
(19), belt (20), and pulley (21).
10.6 CHARGING CIRCUIT
10.6.1 Alternator
Alternator Removal - Cummins
1.
Disconnect negative (–) cable (2, Fig. 10.16)
from batteries.
2.
Remove the belt (3, Fig. 10.14) by carefully
lifting the tensioner (2) with a 1/2" square drive
installed in the square hole in the tensioner
bracket.
3.
Tag and remove all the wires from the rear of
the alternator (1).
4.
Remove the lower mounting capscrew (4)
holding the alternator to the lower mounting
tab (5).
5.
While supporting the alternator with one hand
remove the upper mounting "longer" capscrew
(6) from the upper mounts (7).