6 placing clips onto the timeline, 1 introduction, Placing clips onto the timeline – EVS IPDirector IPD XEDIO PLUGIN Version 6.0 - January 2013 User Manual User Manual
Page 28: Introduction
Issue 6.0.B
IPD Xedio Plugin Version 6.0 – User Manual
EVS Broadcast Equipment – January 2013
18
You want to …
You need to …
Add the clip to the database, but not to
the timeline.
Drag the clip to a bin without activating the
Fill button
.
Add the media to the database, and place
it at the end of the timeline.
Activate the Fill button, then drag the clip to
a bin.
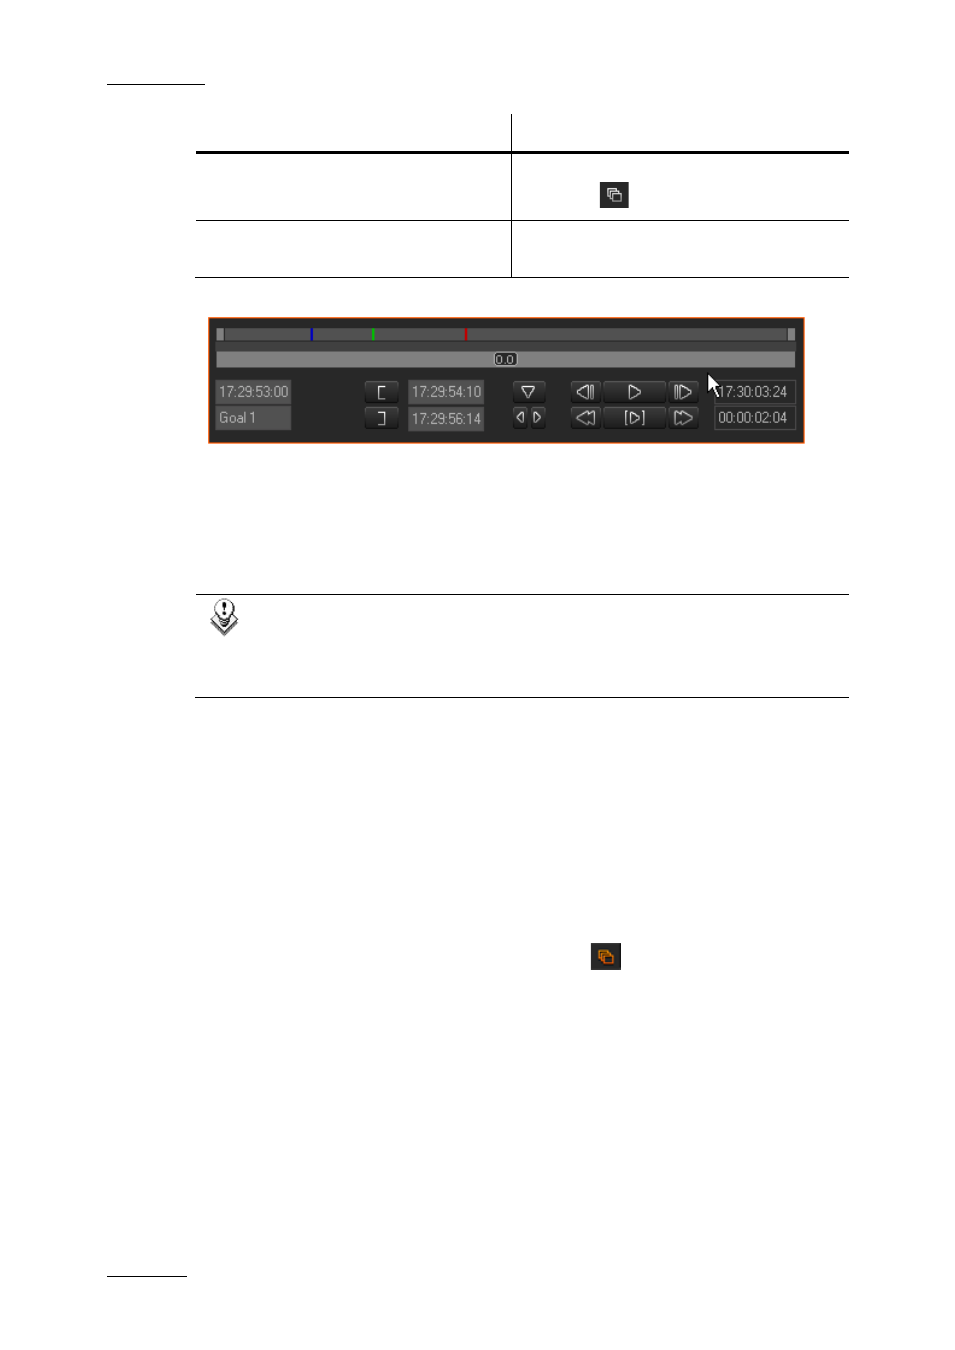
The top area represents the whole length of the original media.
The current position within the clip is shown by a blue marker.
The IN point is displayed below the Player window as a green marker.
The OUT point will be represented by a red marker line.
For more information on these items, refer to the section 7.2.1 ‘Overview’, on page 62
Note
IN and OUT points can be moved by selecting the marks on the media bar and
dragging them to the required position, or by typing directly the timecode in the
fields besides the mark IN and mark OUT buttons.
3.6 Placing Clips onto the Timeline
3.6.1 Introduction
There are many different ways to add clips onto your edit. The main methods for placing
a clip to your edit are one of the following:
•
Dragging the clip into a bin when the Fill button
(next to the Editing buttons in
the timeline area) is active.
This adds the clip to the end of the timeline.
•
Dragging the clip from the Elements grid to a given position in the edit.
•
Dragging the clip from the Player to a given position in the edit.
You will find comprehensive information on the various ways to place clips into an edit in
the section 8.3 ‘Placing Clips onto the Timeline’, on page 113.