Section 3.4 rack mounting, Section 3.5 input connections, 1 connect a/v sources – NewTek TriCaster 2 Elite (3 RU) User Manual
Page 36
P a g e | 18
SECTION 3.4
RACK MOUNTING
NewTek’s
TriCaster
is designed for convenient mounting in standard 19” racks (mounting rails
are available
separately from NewTek Sales). Please assure the chassis is properly secured when being mounted in a rack,
and also keep in mind that adequate cooling is a very important requirement for virtually all electronic and
digital equipment.
We
recommend allowing 1.5 to 2 inches of space on all sides for cool (i.e., comfortable ‘room temperature’)
air to circulate around the chassis. Good ventilation at the front and rear panel is important, and the system
also requires ventilated space above the unit (1RU minimum is recommended).
Hint: When operating your system in a ‘road case’ for mobile production, it’s best to do so with both the front
and back covers (of the road case) removed.
When designing enclosures or mounting the unit, supplying good free air movement around the chassis as
discussed above should be viewed as a critical design consideration. This is especially true in fixed
installations where the unit is installed inside furniture-style enclosures.
SECTION 3.5
INPUT CONNECTIONS
3.5.1
CONNECT A/V SOURCES
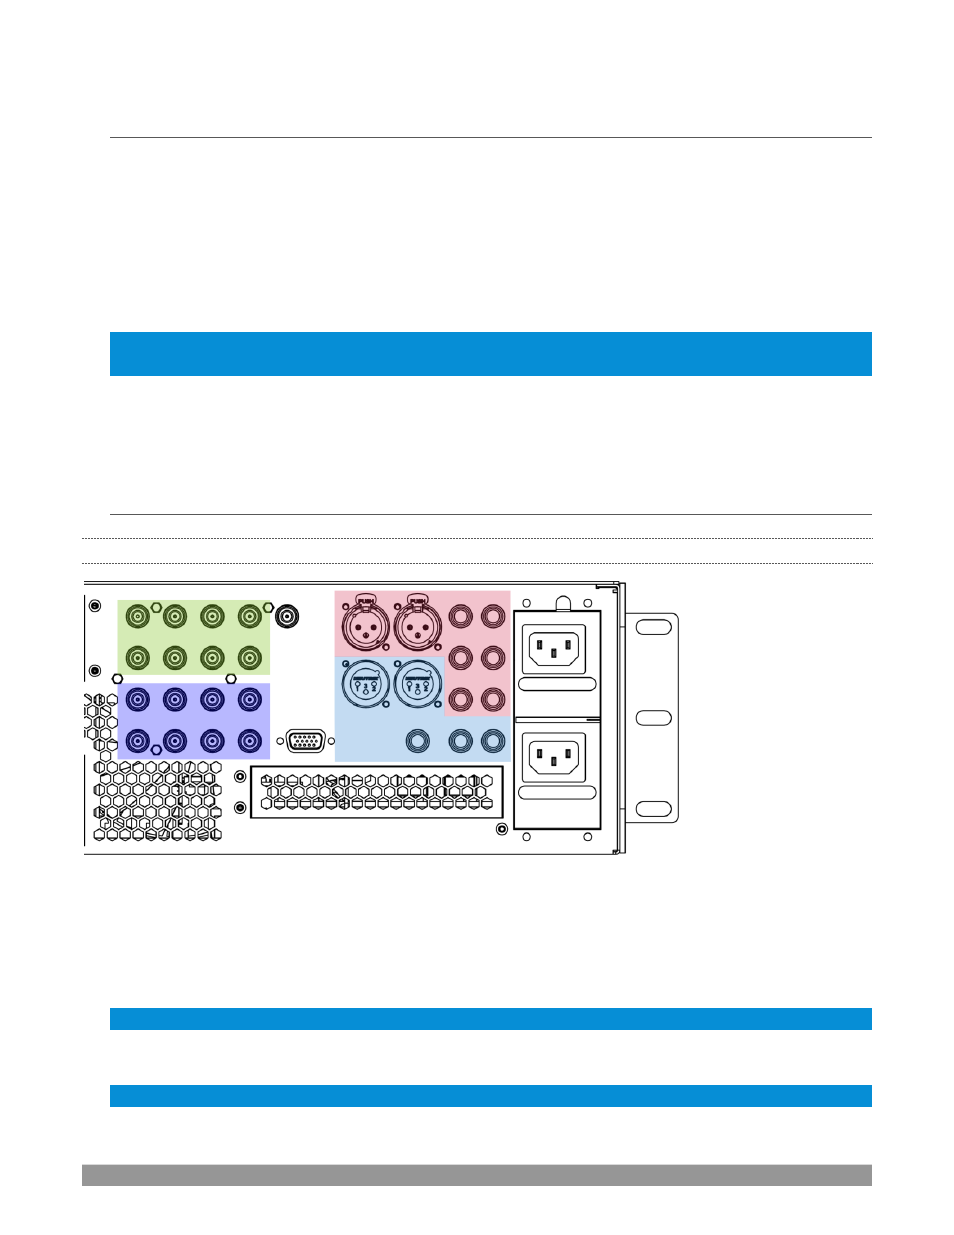
FIGURE 12
•
Analog audio inputs: 1-4
•
Analog audio outputs: Master, AUX 1, and Phones jack
•
SDI Video Inputs 1-8 and Genlock input. (TriCaster 1 Pro 1-4)
•
SDI Video Outputs 1-8 and Tally connector (TriCaster 1 Pro 1-4)
Note: Hardware details as depicted are subject to change without prior notice.
1.
Connect local SDI video sources to BNC connectors in the
SDI IN
section.
Note: SDI video sources with embedded audio do not necessarily require separate audio connections.