1 instant and deferred replays, 2 switcher source, 3 mixed output – NewTek TriCaster 2 Elite (3 RU) User Manual
Page 218: Section 20.3 grab

P a g e | 200
•
Replay Duration
–
determines the length of replay clips added to the
DDRs
•
Replay Speed
–
set the playback speed for clips added to the
DDR
using the replay workflow
•
Replay in DDR
–
select a DDR as the target for replay clip playback
20.2.1
INSTANT AND DEFERRED REPLAYS
The method of triggering a replay varies depending on whether your want to replay a clip captured from a
Mix
(output) or directly from a
Switcher
input.
20.2.2
SWITCHER SOURCE
When the
Record
and
Replay
switches in the
Capture
control group for a
Switcher
source are both enabled,
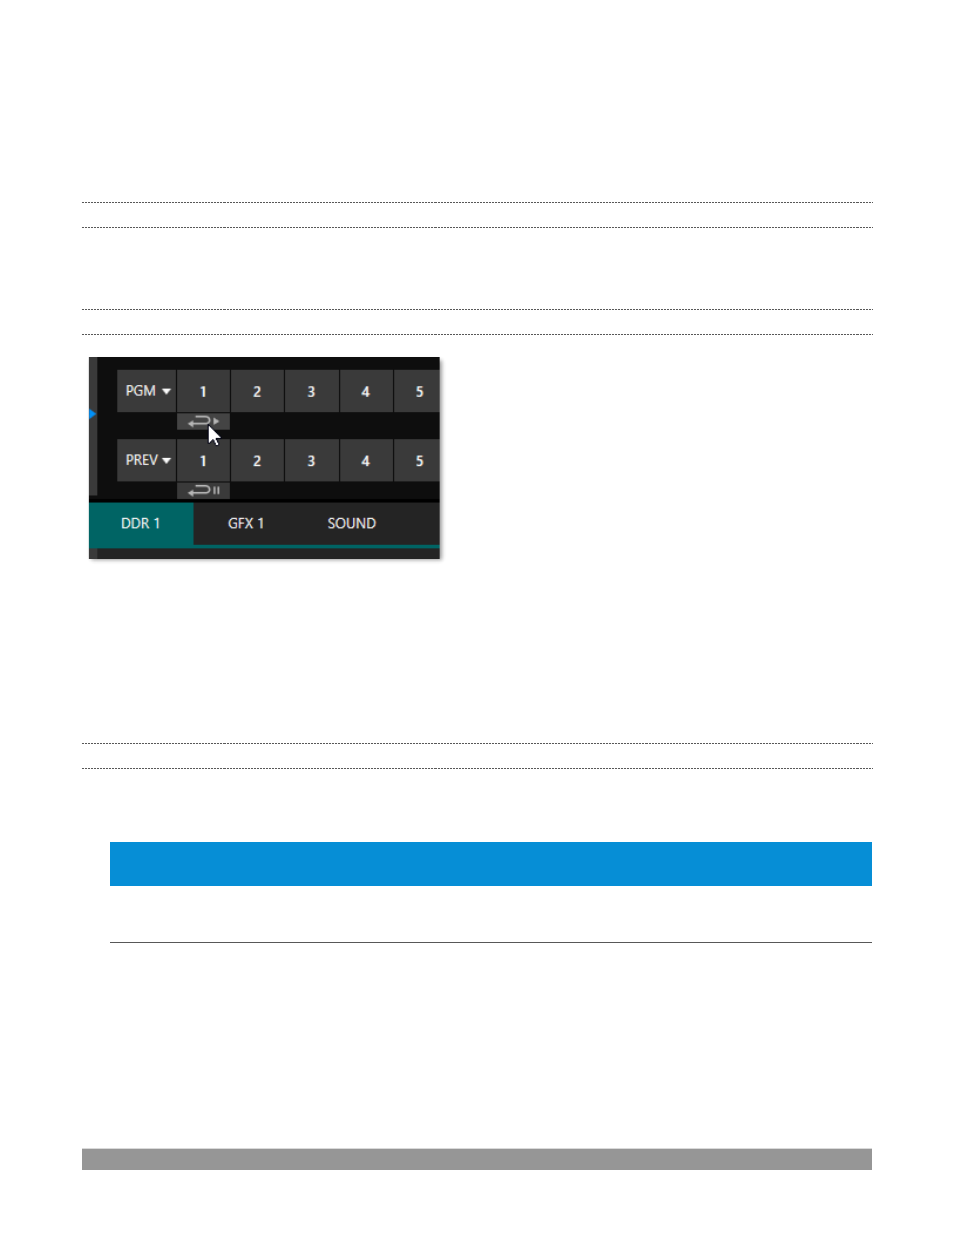
special replay controls are shown beneath its buttons
on the
Program
and
Preview
rows of the
Switcher
(Figure 246).
Click the replay button beneath the
Program
row to
trigger an instant replay using the DDR’s
Show On
(PGM) feature and settings. (Or hold down CTRL and
click the larger Switcher button itself to do the same
thing.)
The similar button beneath the
Preview
row is even more useful; it adds the replay clip to the
DDR
, and leaves
it selected, but does not play it on
Program
Out
immediately. When you are ready to insert the replay clip
into your program, press the keyboard
CTRL
key and the
Spacebar
. This will trigger the
Show On
(PGM)
feature for the DDR currently assigned to replay duties. This workflow lets you defer replay playback until
a more appropriate moment.
20.2.3
MIXED OUTPUT
Since outputs do not appear on the
Switcher
rows, the methods above do not apply. Instead, simply press a
number pad key from 1-4 to trigger an instant replay from the corresponding output (Mix 1-4) recorder.
Hint: It’s possible to assign an NDI output from the system to one of its own inputs if you prefer to use the same
method as described earlier for your output replays.
SECTION 20.3
GRAB
At times, all you really want to capture is a still image from the current
Program Output
video stream (or
perhaps, an input). This is the purpose of the
Grab
function.
Grab is represented by a large button
in the
Dashboard
at the top of the screen, and smaller grab (camera)
icons which appear at upper-right on
Switcher
source viewports. The former grabs stills from MIX outputs
(when enabled individually), while the latter grabs an image from specific
Switcher
sources.
FIGURE 246
