Connecting your computer/connecting the power cord – Ricoh PJ WU6181N 6200-Lumen WUXGA LCD Projector (No Lens) User Manual
Page 30
15
2. Projecting an Image (Basic Operation)
❷
Connecting Your Computer/Connecting the Power Cord
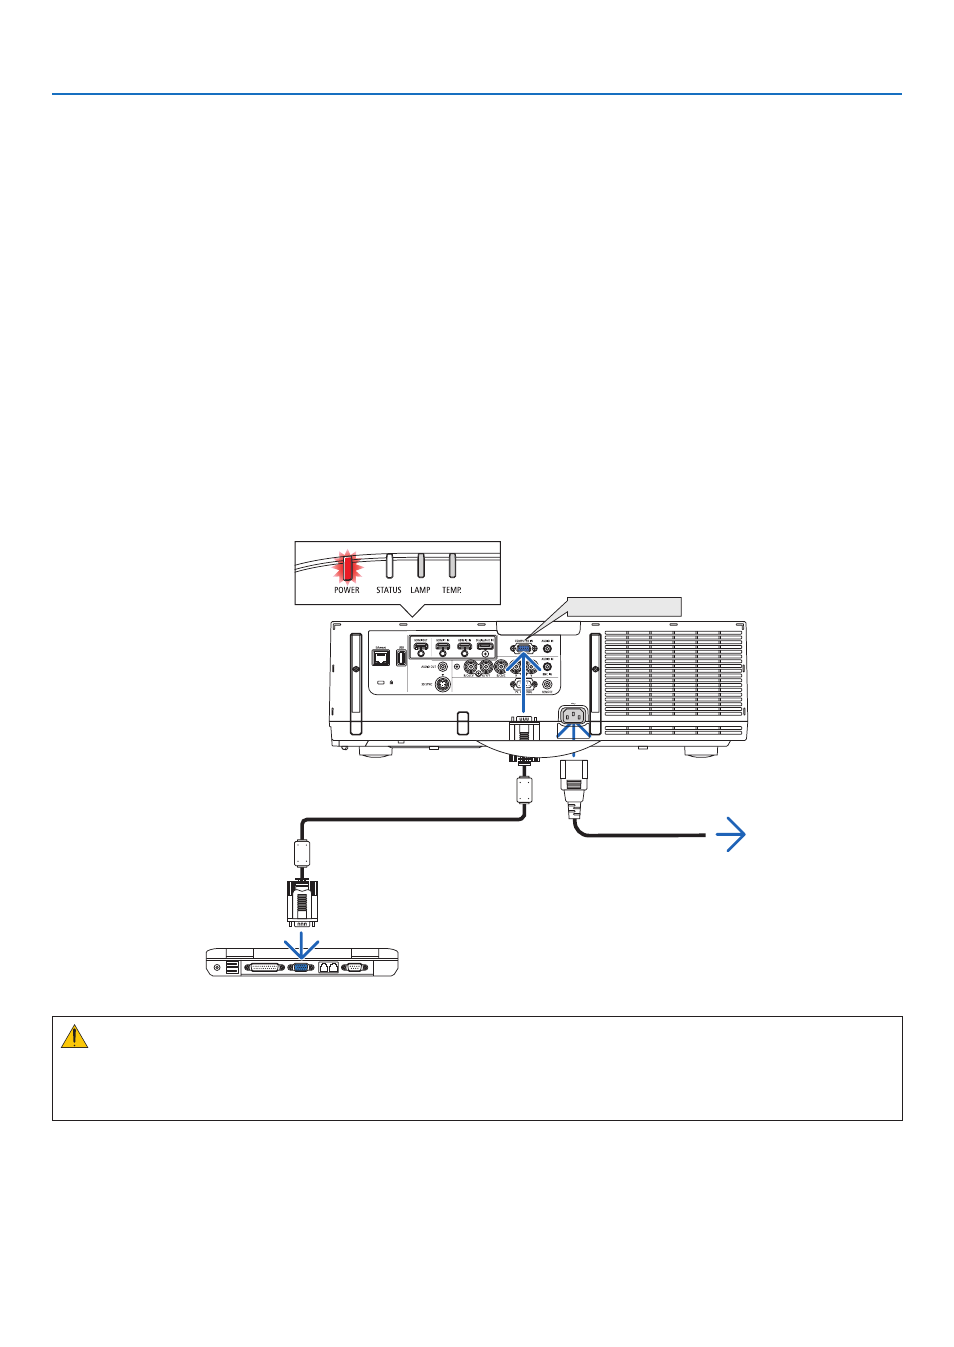
1. Connect your computer to the projector.
This section will show you a basic connection to a computer. For information about other connections, see “(2) Making Con-
nections” on page
Connect the display output terminal (mini D-sub 15 pin) on the computer to the computer video input terminal on the projector
with a commercially-available computer cable (with ferrite core) and then turn the knobs of the connectors to secure them.
2. Connect the supplied power cord to the projector.
First connect the supplied power cord’s three-pin plug to the AC IN terminal of the projector, and then connect the other plug
of the supplied power cord in the wall outlet.
Upon connecting the power cable, the POWER indicator of the projector will light up in orange. If there are no input signals,
the device will go into the standby mode after about 10 seconds and light up in red*.
The STATUS indicator will light off*.
* This will apply for both indicators when [NORMAL] is selected for [STANDBY MODE]. See the Power Indicator section. (
→
)
COMPUTER IN
Make sure that the prongs are fully inserted into
both the AC IN and the wall outlet.
To wall outlet
Computer cable (with ferrite core)
(sold commercially)
CAUTION:
Parts of the projector may become temporarily heated if the projector is turned off with the POWER button or if the AC power
supply is disconnected during normal projector operation.
Use caution when picking up the projector.