Ricoh PJ WU6181N 6200-Lumen WUXGA LCD Projector (No Lens) User Manual
Page 194

179
7. Maintenance
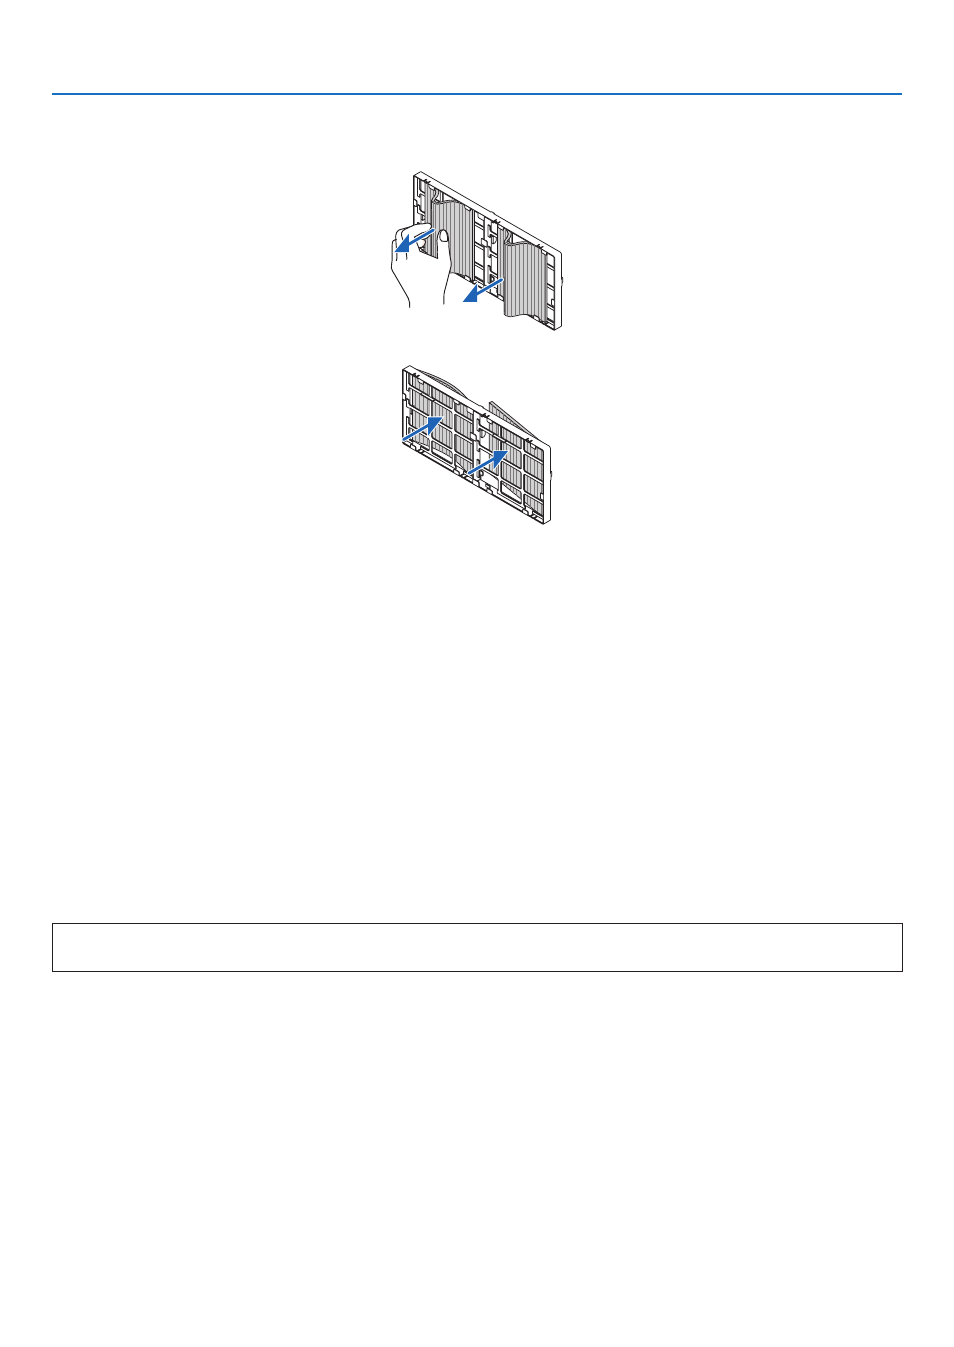
3. Remove the four filters.
Hold onto the filters fitted to both sides of the filter unit to remove the filter unit.
4. Remove dust from the filter unit and the filter cover.
Clean both outside and inside.
5. Attach 4 new filters to both sides of the filter unit.
The installation locations of the filters are differentiated by whether there are any slits (notches). Install the filter under the
flange around the filter unit as follows.
(1) Attach the 2 filters with transparent frames fitted to the grips to the side of the filter unit where the knob is located.
• Turn over the side of the filter with the transparent box and then install it.
(2) Attach the 2 filters with the black lines to the side of the filter unit where there is no knob.
• Turn over the side of the filter with the black line, and then insert the slits into the protrusions on the filter unit to install
it.
6. Mount the filter unit back onto the projector cabinet.
Insert the filter unit onto the projector with the sides on which the left and right hooks are located on the outside.
7. Close the filter cover.
After closing, push the filter cover near the buttons until a “click” sound is heard. The filter cover will be secured in position.
This completes the filter replacement.
Go on to the clearing lamp and filter hour meters.
To clear the lamp usage hours and the filter usage hours:
1. Place the projector where you use it.
2. Plug the power cord into the wall outlet, and then turn on the projector.
3. Clear the lamp usage hours and the filter usage hours.
1. From the menu, select [RESET]
→
[CLEAR LAMP HOURS] and reset the lamp usage hours.
2. Select [CLEAR FILTER HOURS] and reset the filter usage hours. (
→
page
)
