2 ctrl (control) button and menus – Magnum Energy ME-RTR Router User Manual
Page 22
©
2014 Magnum Energy, Inc.
Page 14
Setup
3.3.2
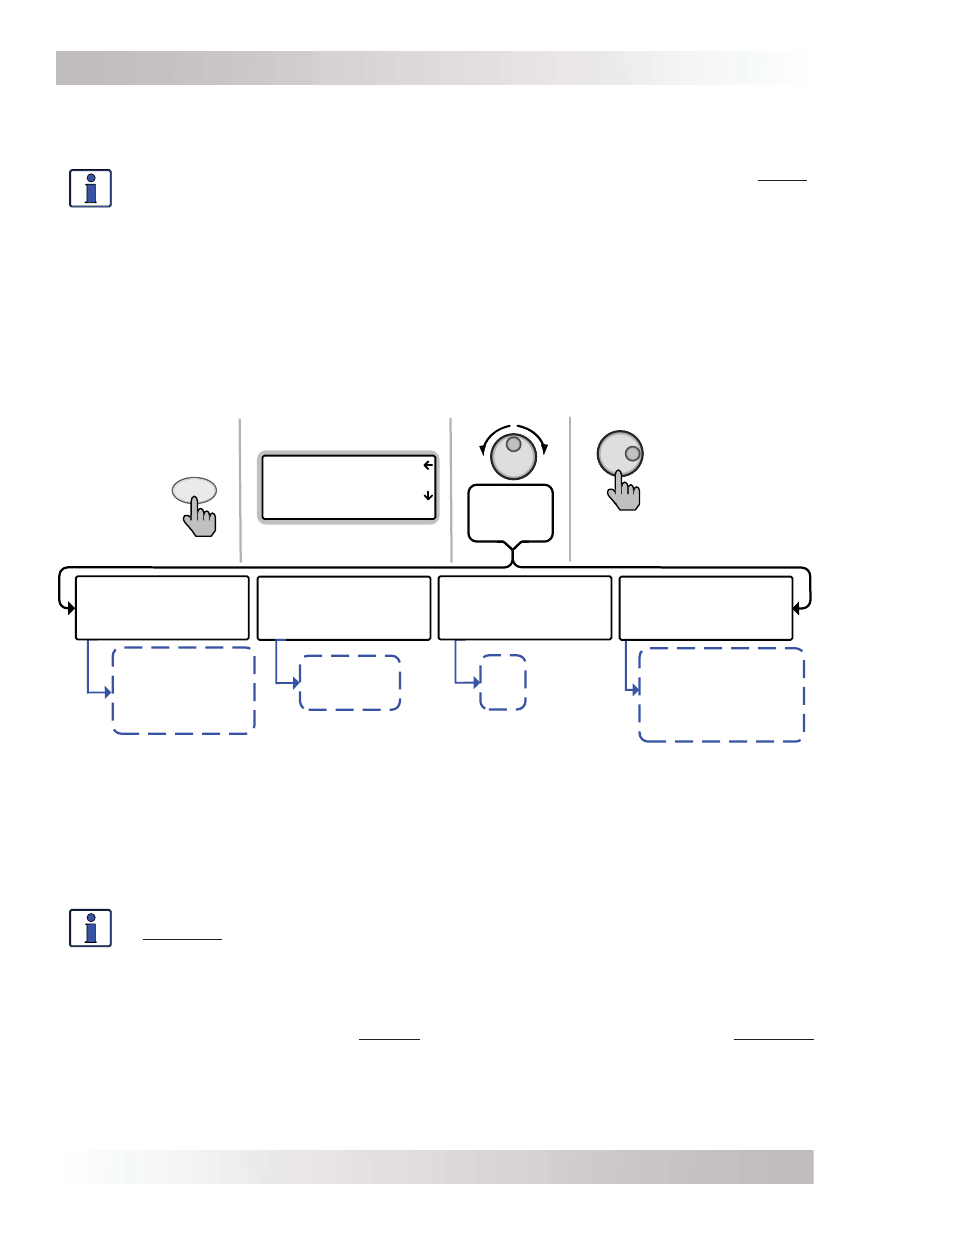
CTRL (Control) Button and Menus
The CTRL button accesses the 01 AC In Control, 02 Charger Control, 03 Gen Control, and 04 RTR
Aux Relay menus.
Info: An AGS must be connected in order for the Gen Control menu to display unless
the TECH: 07 Show all Menus menu has been set to “YES”.
Refer to
Section 3.3.5 for
more info on the TECH 07 menu. Otherwise, “No AGS Present” appears on the 03 Gen
Control screen.
The CTRL button gives you quick control of the main functions of the inverter/charger without having
to access the SETUP button’s menus in order to change the operation of the inverter/charger or
the generator. Once the settings have been programmed in the SETUP menus, the features can
then be enabled using the CTRL button.
Example: The SETUP menu’s 02C AC In – Time setting is used to set what time of day (e.g., 12AM
to 8AM) you want the inverter to connect to the incoming AC. Once this time is set, use the CTRL
button to access the Set AC In Control menu item and select Time Connect. When Time Connect
is selected, the inverter/charger will only connect to AC when the time is between 12AM and 8AM.
Force Open
Force Closed
Auto VDC
Auto VDC (BTS Comp)
Auto Fault
Auto SOC
Press to
edit setting
Press
CTRL
Rotate &
press to
select:
Top lines show menus
Bottom line shows view
Auto Connect
VDC Connect
Time Connect
SOC Connect
AC In - Disabled
01 AC In Control
02 Charger Control
03 Gen Control
ALL Select CTRL
OFF
ON
AUTO
04 RTR Aux Relay
Force Open
ALL View SYS CTRL
01 AC In Control
Auto Connect
ALL View ACI CTRL
02 Charger Control
Multi-Stage
ALL View CHG CTRL
03 Gen Control
OFF
P3 View AGS CTRL
Multi-Stage
Start Float
Start Bulk
Figure 3-4, CTRL (Control) Button and Menus
CTRL: 01 AC In Control
The 01 AC In Control menu has four different conditions in which the inverter/charger connects
to an incoming AC power source. Only one may be selected at any time—multiple conditions can
be set up and enabled, but only one can be active at any time.
Info: The top status line of the LCD display alternates the inverter/charger status with
a secondary AC IN status when AC is present, but is not connecting as a result of a
setting made in the SETUP menu.
Example: AC is present, but Time Connect has been selected from the 01 AC In Control menu and
the current time of day is 6PM. The SETUP menu’s 02C AC In – Time current setting is 2AM-8AM.
The current time of 6PM is outside the connect time, so the inverter/charger will not connect to
the incoming AC until after 2AM. The primary status will display “Inverting” and the secondary
status will display “ Time Connect” to let you know the reason that incoming AC has not connected.
•
Auto Connect: Automatically connects to incoming AC power when the incoming AC is qualifi ed
by the inverter/charger (voltage is below the high AC input requirements, above the SETUP
button’s 03B Low VAC Dropout setting, and between 50 Hz to 70 Hz for domestic models;
40-60 Hz for export models).