Bouncing, 7 – timeline mode – Teac HS-4000 User Manual
Page 67
TASCAM HS-4000
67
7 – Timeline mode
Bouncing
You can output part of a region or an interval that crosses
multiple regions as a single take.
Designating the bounce starting point
1. Touch the HOME key to open the Home Screen.
2. Use the m and , keys, for example, to locate the
bounce start point (time).
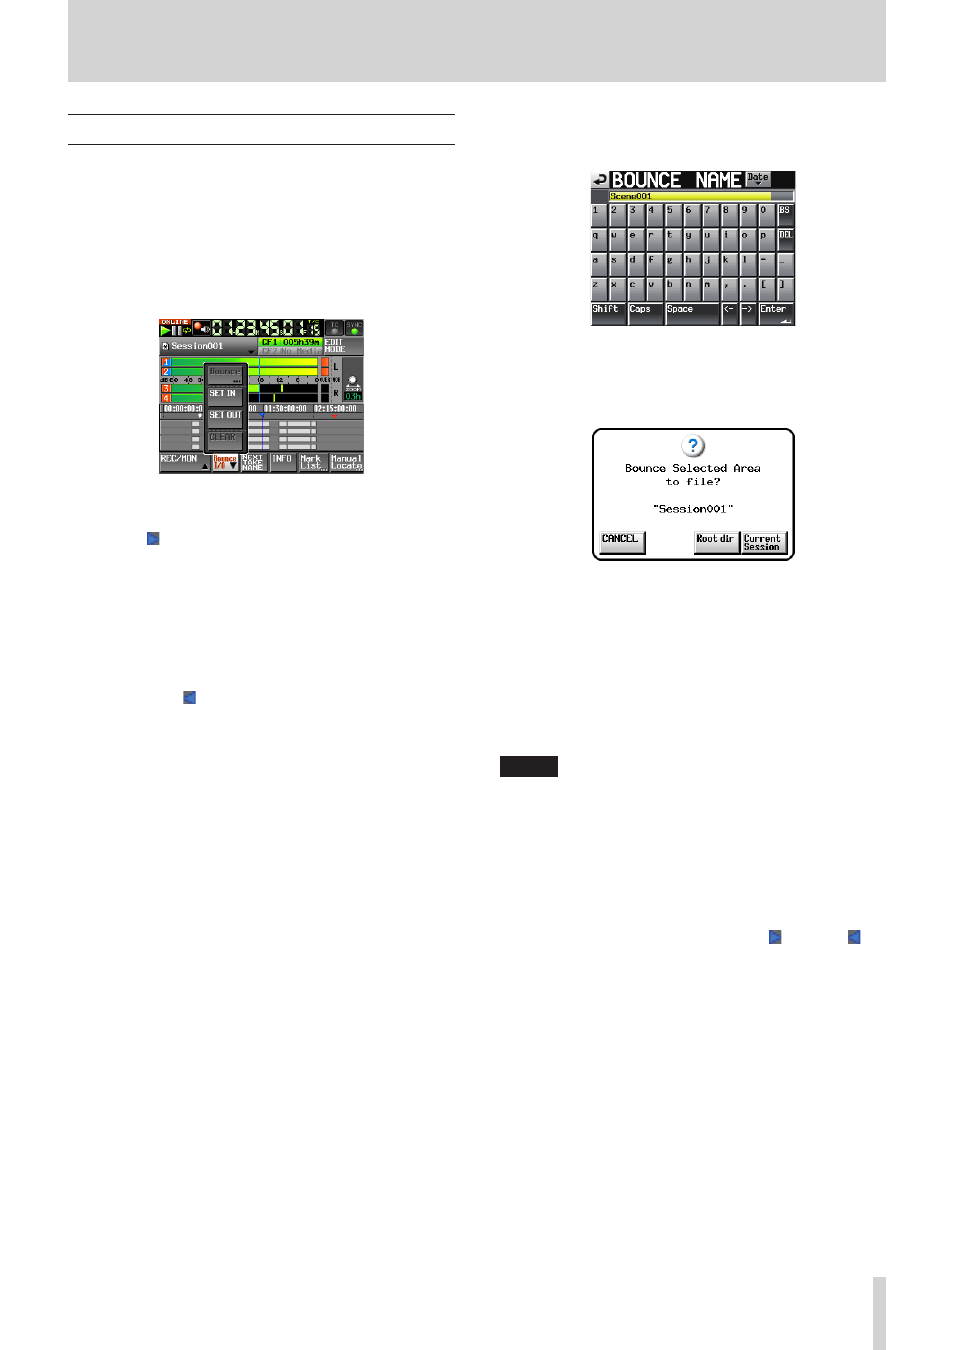
3. Touch the Bounce I/O button to open a pull-up menu with
buttons related to bouncing.
4. Touch the SET IN button on the pull-up menu to set the
bounce starting point (IN point).
The IN mark ( ) appears at the current position in the mark
display area.
Designating the bounce ending point
5. Use the m and , keys, for example, to locate the
bounce ending position (time).
6. Touch the BOUNCE I/O button to open a pull-up menu.
7. Touch the SET OUT button on the pull-up menu to set the
bounce ending point (OUT point).
The OUT mark ( ) appears at the current position in the
mark display area.
Selecting tracks
8. If "TIMELINE Rec Tracks" is set to "2trx2", touch the tracks that
you want to bounce to select them.
Bouncing the interval
9. Touch the BOUNCE I/O button to open a pull-up menu.
10. Touch the BOUNCE button on the pull-up menu to open the
BOUNCE NAME screen where you can input the bounce file
name.
Input the file name. Use the same input method as in
“Editing the project name” on page 40.
11. Press the Enter button. The following confirmation pop-up
message will appear.
• Touch the Root dir button to save the bounce to the root
folder of the current CF card.
• Touch the Current Session button to save the bounce to
the current session.
• Touch the Cancel button to return to the BOUNCE NAME
screen without bouncing.
While the file is being created, a progress status pop-up
appears.
When file creation completes, the pop-up disappears.
NOTE
You can cancel a bounce by pressing the CANCEL button
while the progress pop-up window is open.
Clearing the bounce starting and ending points
12. Touch the Bounce I/O button to open a pull-up menu with
buttons related to bouncing.
13. Touch the CLEAR button on the pull-up menu to discard the
currently set IN and OUT points.
When a confirmation message pop-up appears, touch the
OK button or press the DATA dial. The IN ( ) and OUT ( )
marks in the mark display area will disappear.