Level meters settings (meter setup), System settings (system setup), Een. (see – Teac HS-4000 User Manual
Page 112: 11 – internal settings, Preferences page
112
TASCAM HS-4000
11 – Internal settings
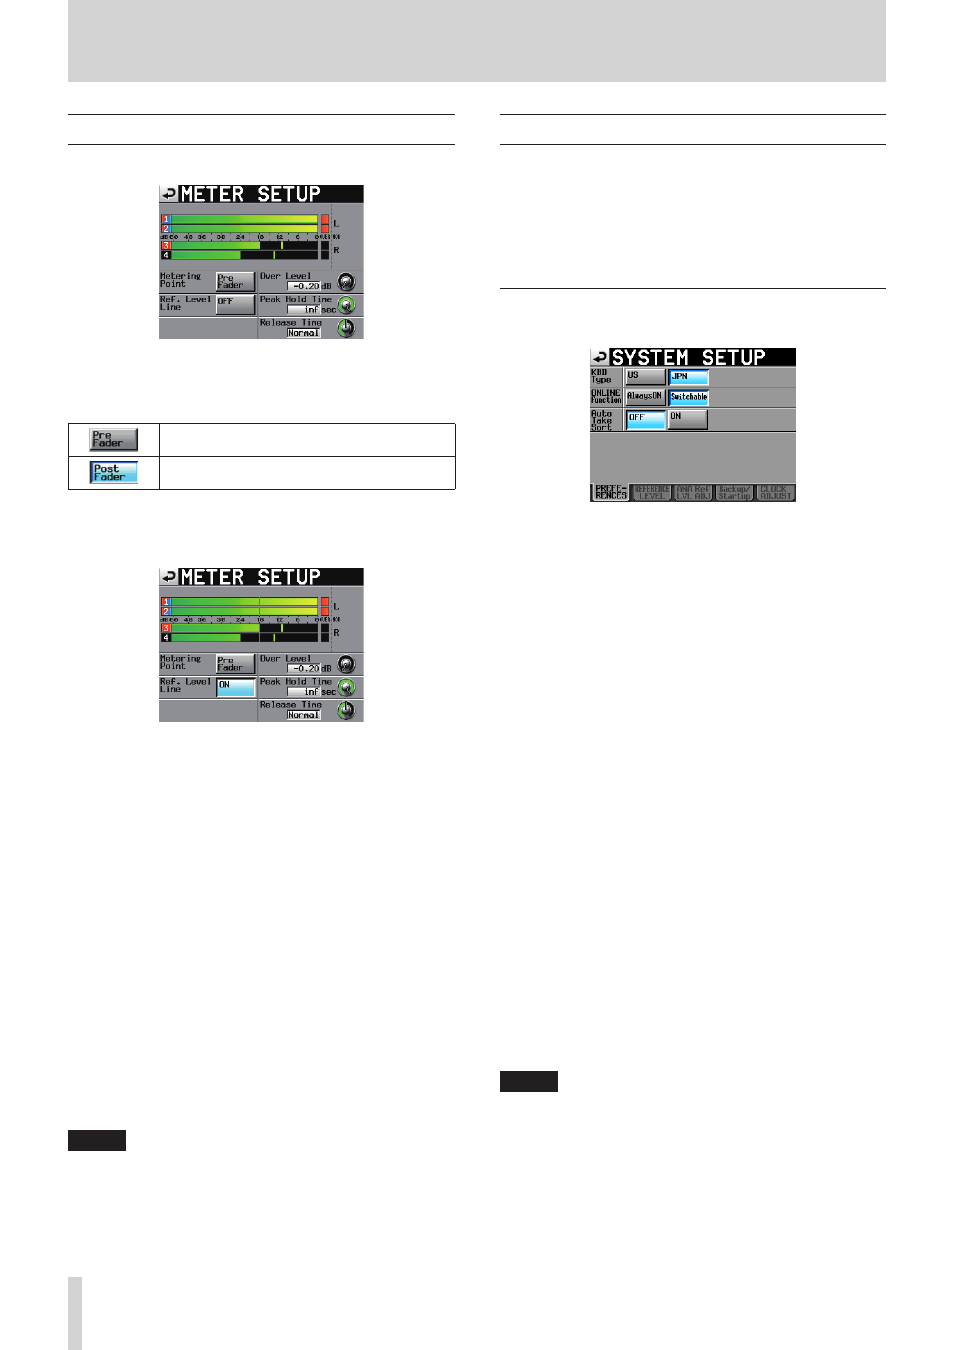
Level meters settings (METER SETUP)
Make level meter settings.
Metering Point
Set whether the meters show the signal before or after the
online faders.
Meters show the levels before the faders
(default).
Meters show the levels after the faders. In this
case, the button appears light blue.
Ref. Level Line
Touch to turn the reference level line that appears on the
level meter ON (default) or OFF.
Reference level line display ON
Over Level
Use this to set the level at which the overload indicator
lights.
The peak indication level is this amount below the
maximum level (full scale).
Touch this knob and use the DATA dial to adjust the level.
Setting options: −0.20 dB (default), −0.17 dB, −0.13 dB, −0.10
dB, −0.06 dB, −0.03 dB
This setting is reflected in the Audio Over setting of the Auto
Marker item on the OPTIONS page of the REC SETUP screen.
Peak Hold Time
Use this to set the peak hold time.
Touch this knob and use the DATA dial to adjust the time.
Setting options: 0 sec, 1 sec, 2 sec (default), inf (infinite hold)
Release Time
Use this to set the release time.
Touch this knob and use the DATA dial to adjust the time.
Setting options: Slow, Normal (default), Fast
NOTE
If you press the EXIT/CANCEL (PEAK CLEAR) key when the
Home Screen is open, the peak hold display resets.
System settings (SYSTEM SETUP)
Make system settings on this screen.
The SYSTEM SETUP screen has 5 pages: PREFERENCES,
REFERENCE LEVEL, ANA Ref LVL ADJ, Backup/Startup and CLOCK
ADJUST.
Touch the tabs at the bottom of the screen to open the corre-
sponding page.
PREFERENCES page
Set system preferences on this page.
KBD Type
Set the connected keyboard type to either US for English-
language keyboards or JPN for Japanese keyboards.
Setting buttons: US, JPN (default)
ONLINE Function
Set whether or not to enable the online function (default:
Switchable).
Set to “Switchable” to allow online playback mode to be
enabled from from the ONLINE key on the front panel, the
parallel connector, serial connector (RS-232C) or a TASCAM
RC-HS32PD remote controller (sold separately).
Set to AlwaysON to not allow online playback to be used
and always output the sound from all connectors. (See
“Using the numeric entry screen to edit the playback
beginning and ending positions” on page 90.)
Auto Take Sort
When this setting is ON, the playback order of takes in the
current session will automatically be reordered by take
name in character code order at the times indicated below.
Setting buttons
OFF: Auto Take Sort function disabled (default)
ON: Auto Take Sort function enabled
0
Auto Take Sort execution timing
o
When the unit is started with media in the current slot
o
When media is inserted in the current slot
o
When the current slot is changed
o
When a project is loaded
o
When a session is loaded
NOTE
Even if Auto Take Sort is set to ON, automatic take sorting
will not occur in the following circumstances. If you want
to reorder the playback order of takes by their names in
character code order after the following operations, use the
SORT button in the pull-up menu on the take list screen.
• After stopping recording
• After adding a file to the current session by FTP
• After adding a file to the current session using the copy
function